
Swapping out an outdated exhausting disk drive for an SSD is without doubt one of the finest upgrades you can also make on your pc in 2024. It is true that SSDs are costlier than your common exhausting drives, however there are many choices on the market, and also you’re sure to seek out one thing that matches your price range. It could be simpler to purchase an SSD proper now, however remember that its storage capability remains to be comparatively small, making it very simple to expire of area. So how do you stop that from taking place? Properly, there are some things you are able to do to scrub your SSD and liberate area for all of your video games, photos, movies, or no matter you need in your PC.
Clear the momentary recordsdata
Fast and straightforward cleanup tip
It is no secret that momentary recordsdata accumulate in your system, and so they can take up a number of area for those who do not concentrate. Most cleansing utilities and even the built-in instruments like Disk Cleanup goal these recordsdata first, so why not deal with them your self sometimes to make sure they do not grow to be a offender in your cluttered SSD case? To seek out the momentary recordsdata:
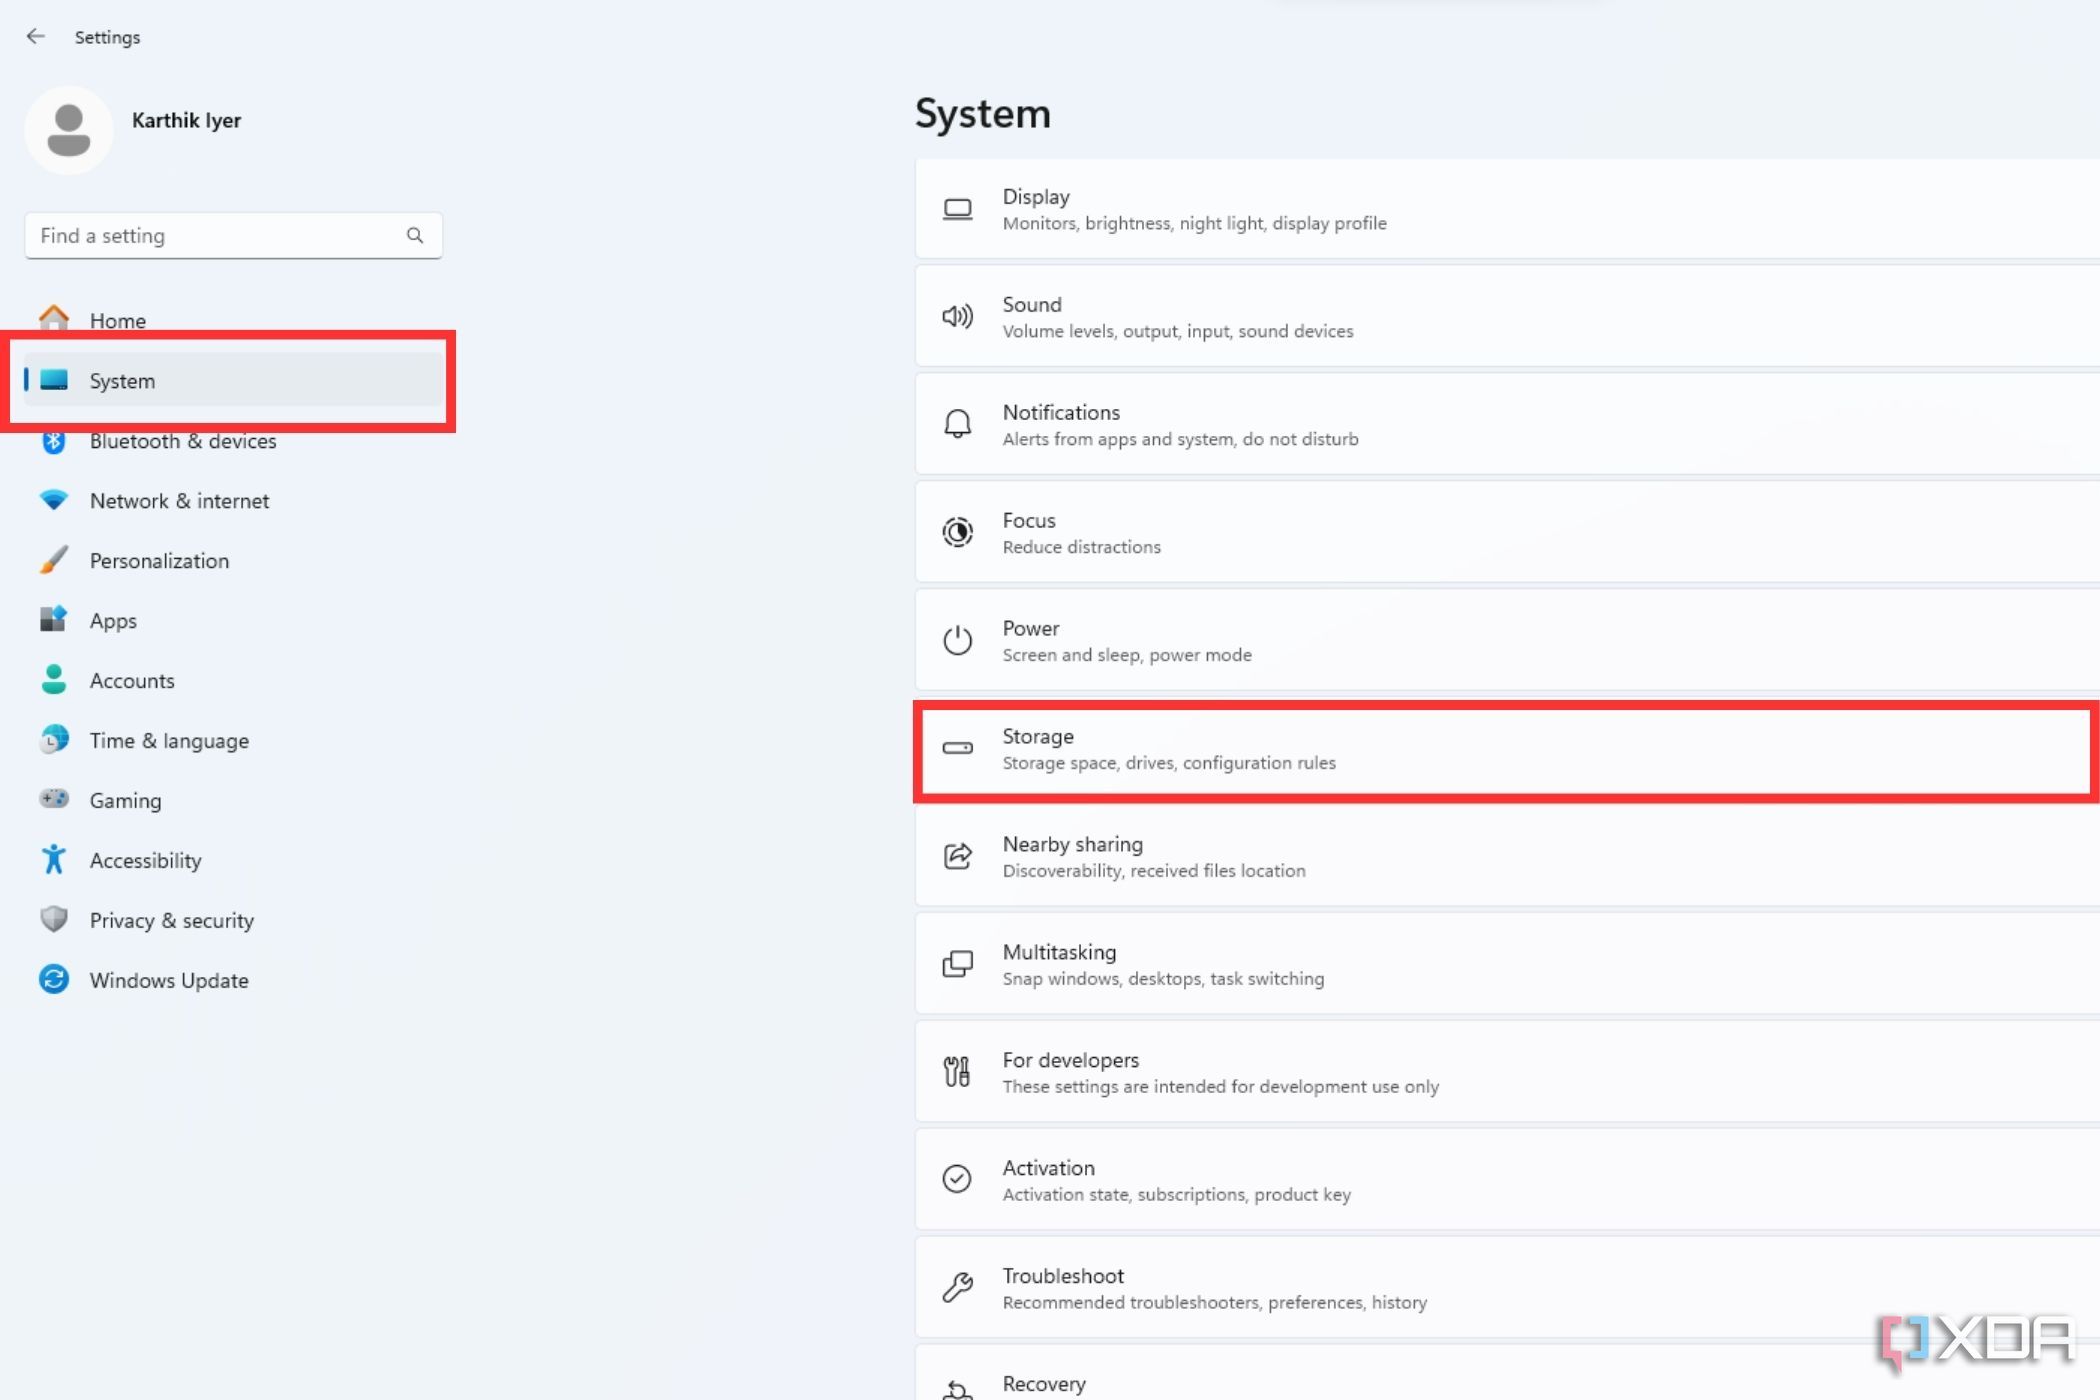
- Press Home windows + I on the keyboard to entry the Home windows Settings web page.
- Find and click on on the System settings on the left aspect.
- Click on Storageafter which choose Short-term recordsdata.
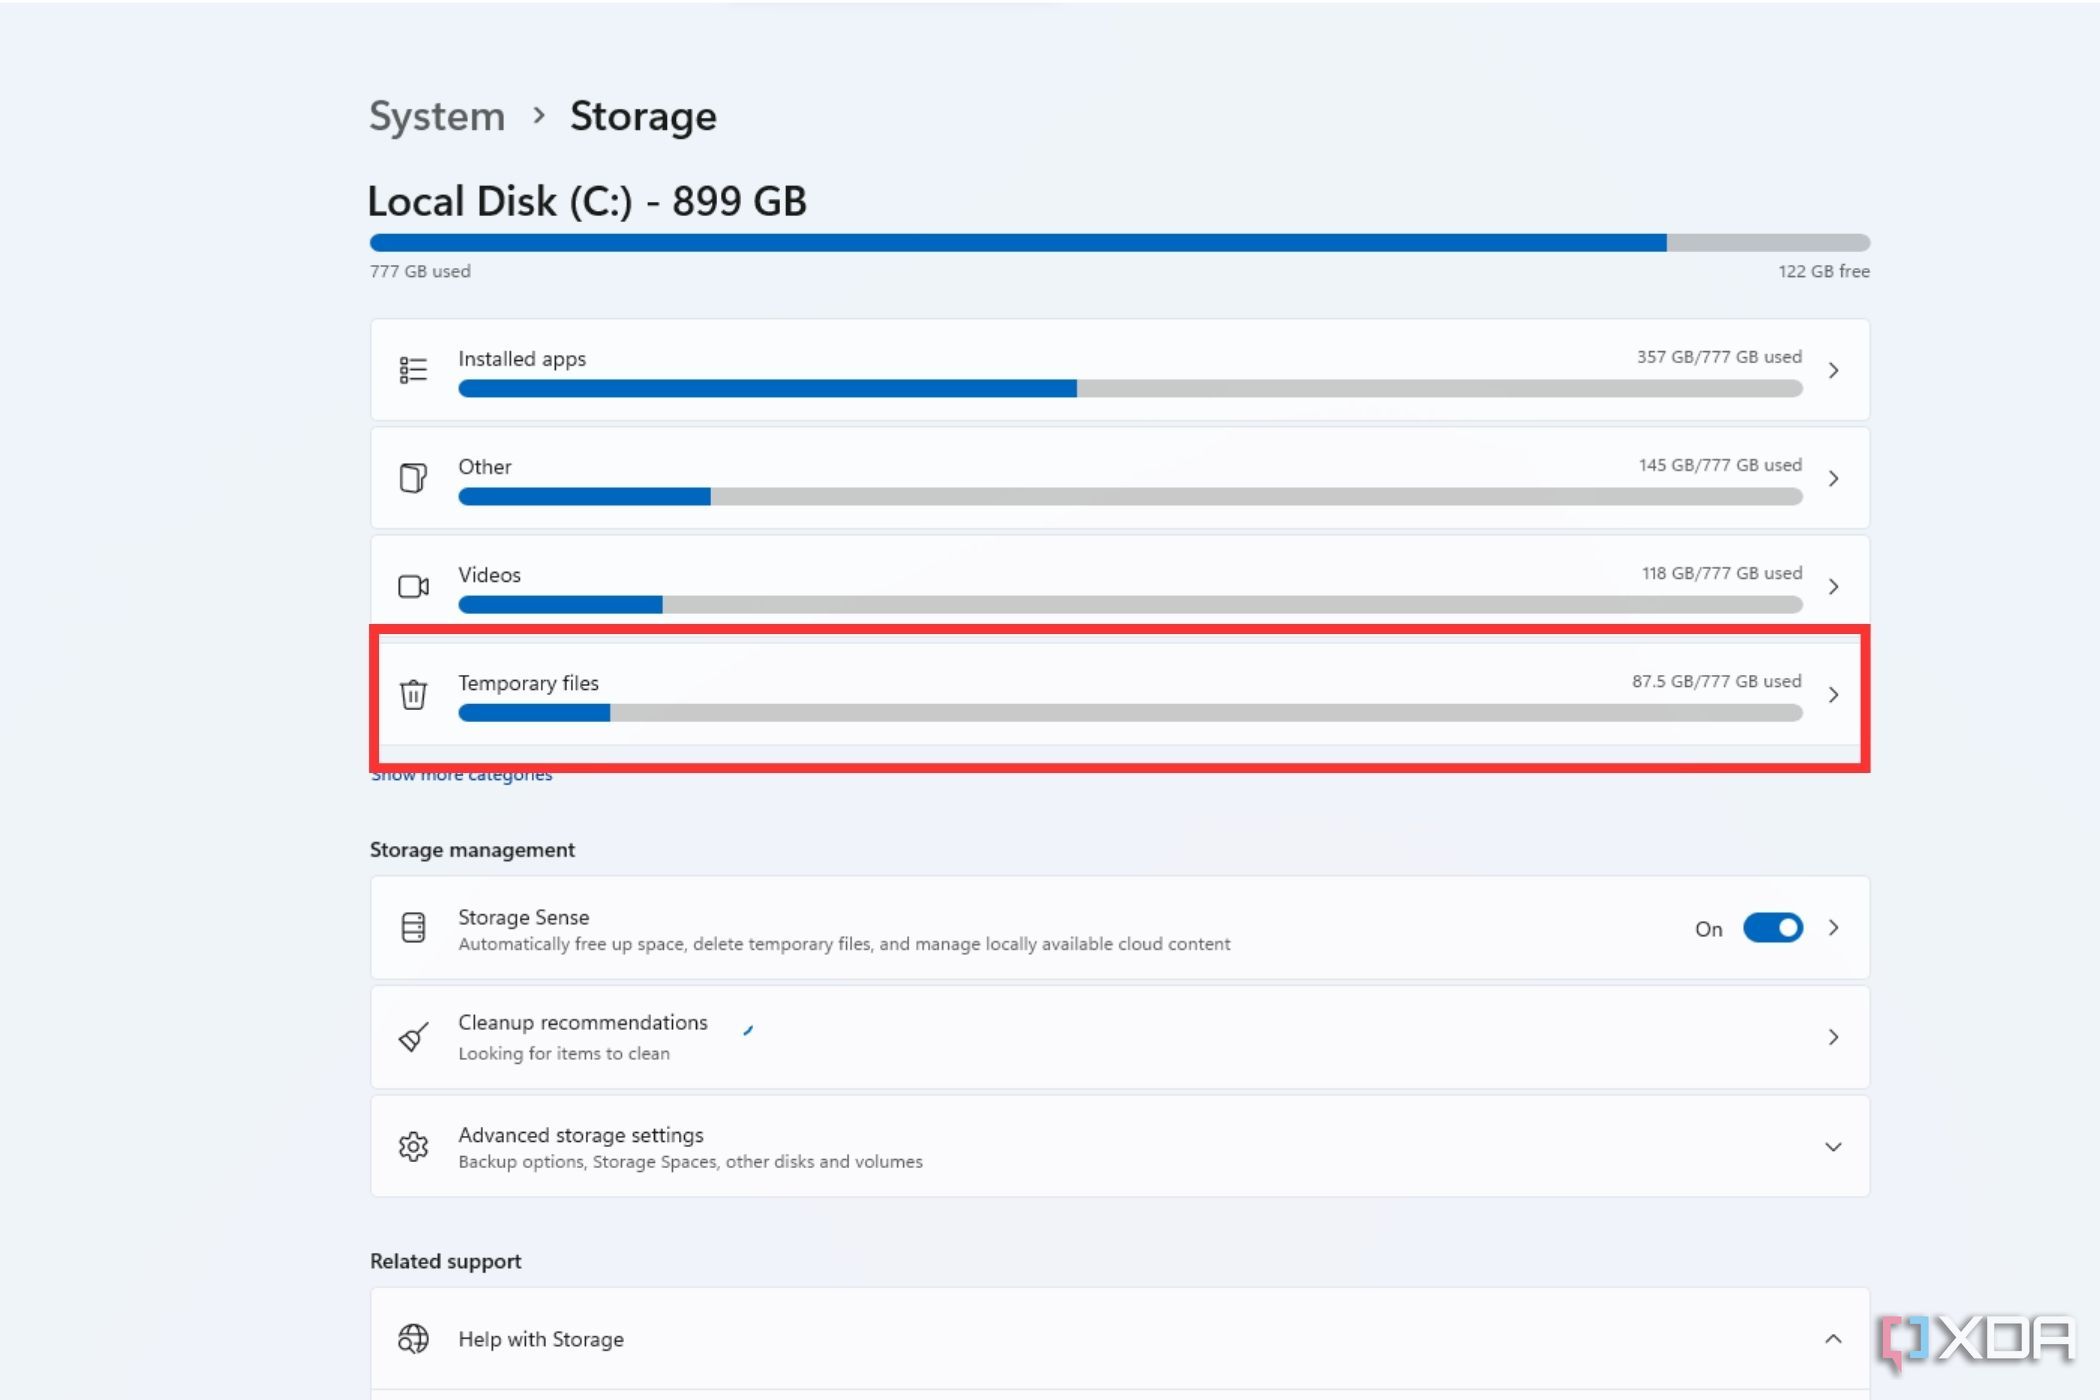
- Click on the Refresh button after which click on the checkboxes to pick out/deselect objects.
- Hit the Take away recordsdata button as soon as you choose the recordsdata to scrub up.


Uninstall undesirable apps
Do away with the apps and video games you have not opened in ages
Eliminating undesirable apps and video games is one other apparent step in cleansing up the SSD. All of us have these apps that we put in ages in the past and fully forgot they exist, proper? Properly, it is time to say goodbye to them, and put the area they’re occupying to raised use. To uninstall them:
- Press Home windows + I to open Settings.
- Click on Apps on the left and choose Put in Apps.

- Click on the drop-down subsequent to the Type by choice and choose Dimension (Giant to small).

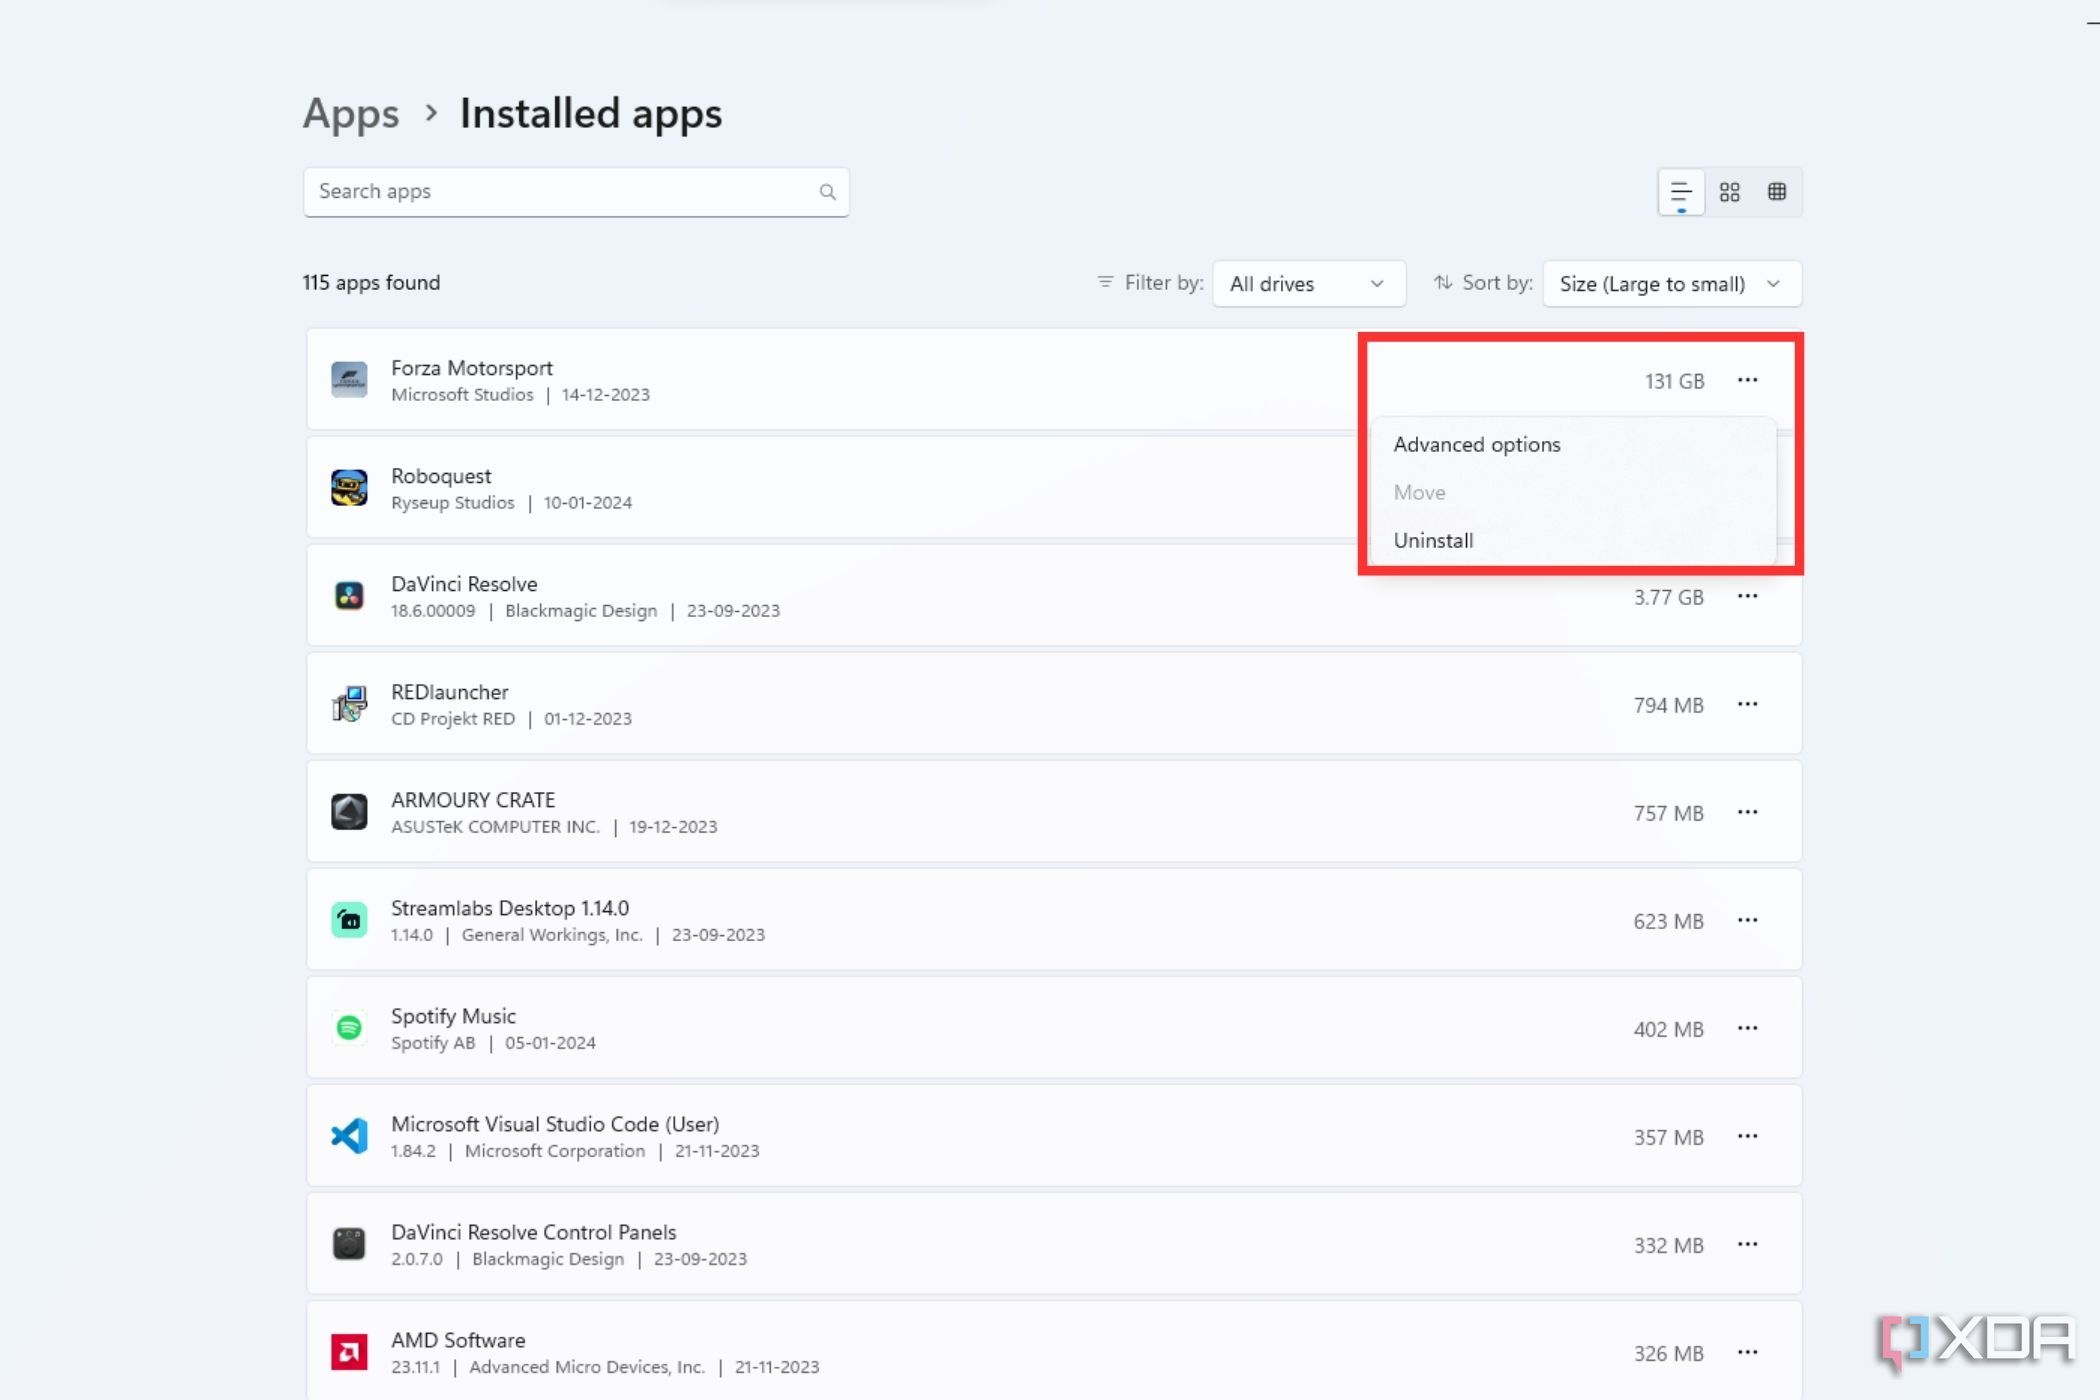
- Find the app you wish to uninstall and click on the three-dot icon subsequent to it.
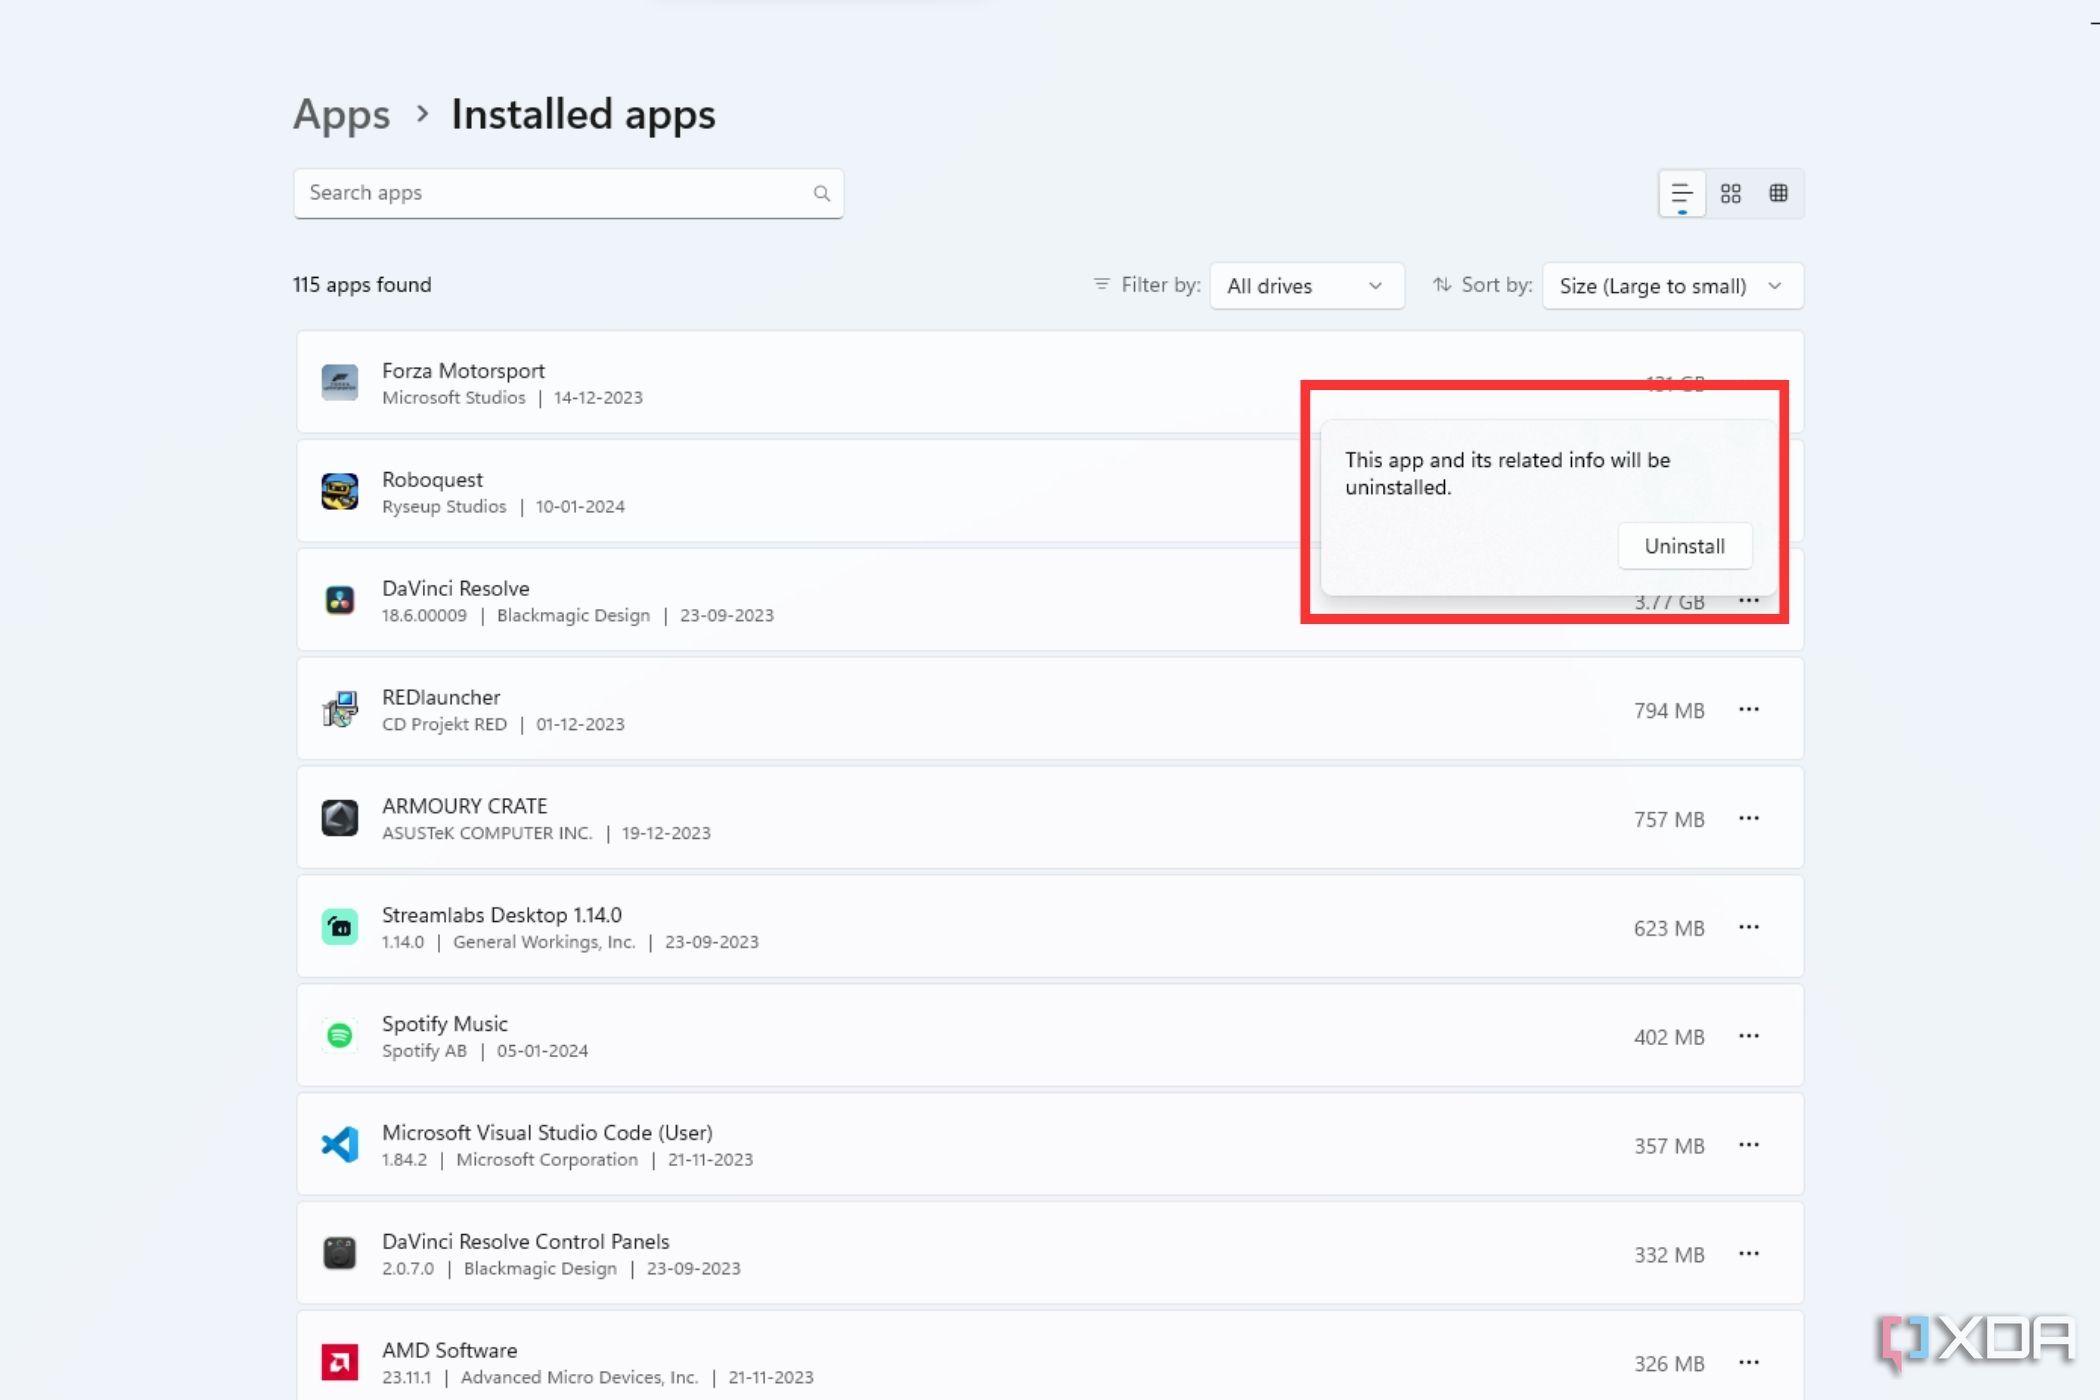
- Choose the Uninstall button twice to take away that exact app.


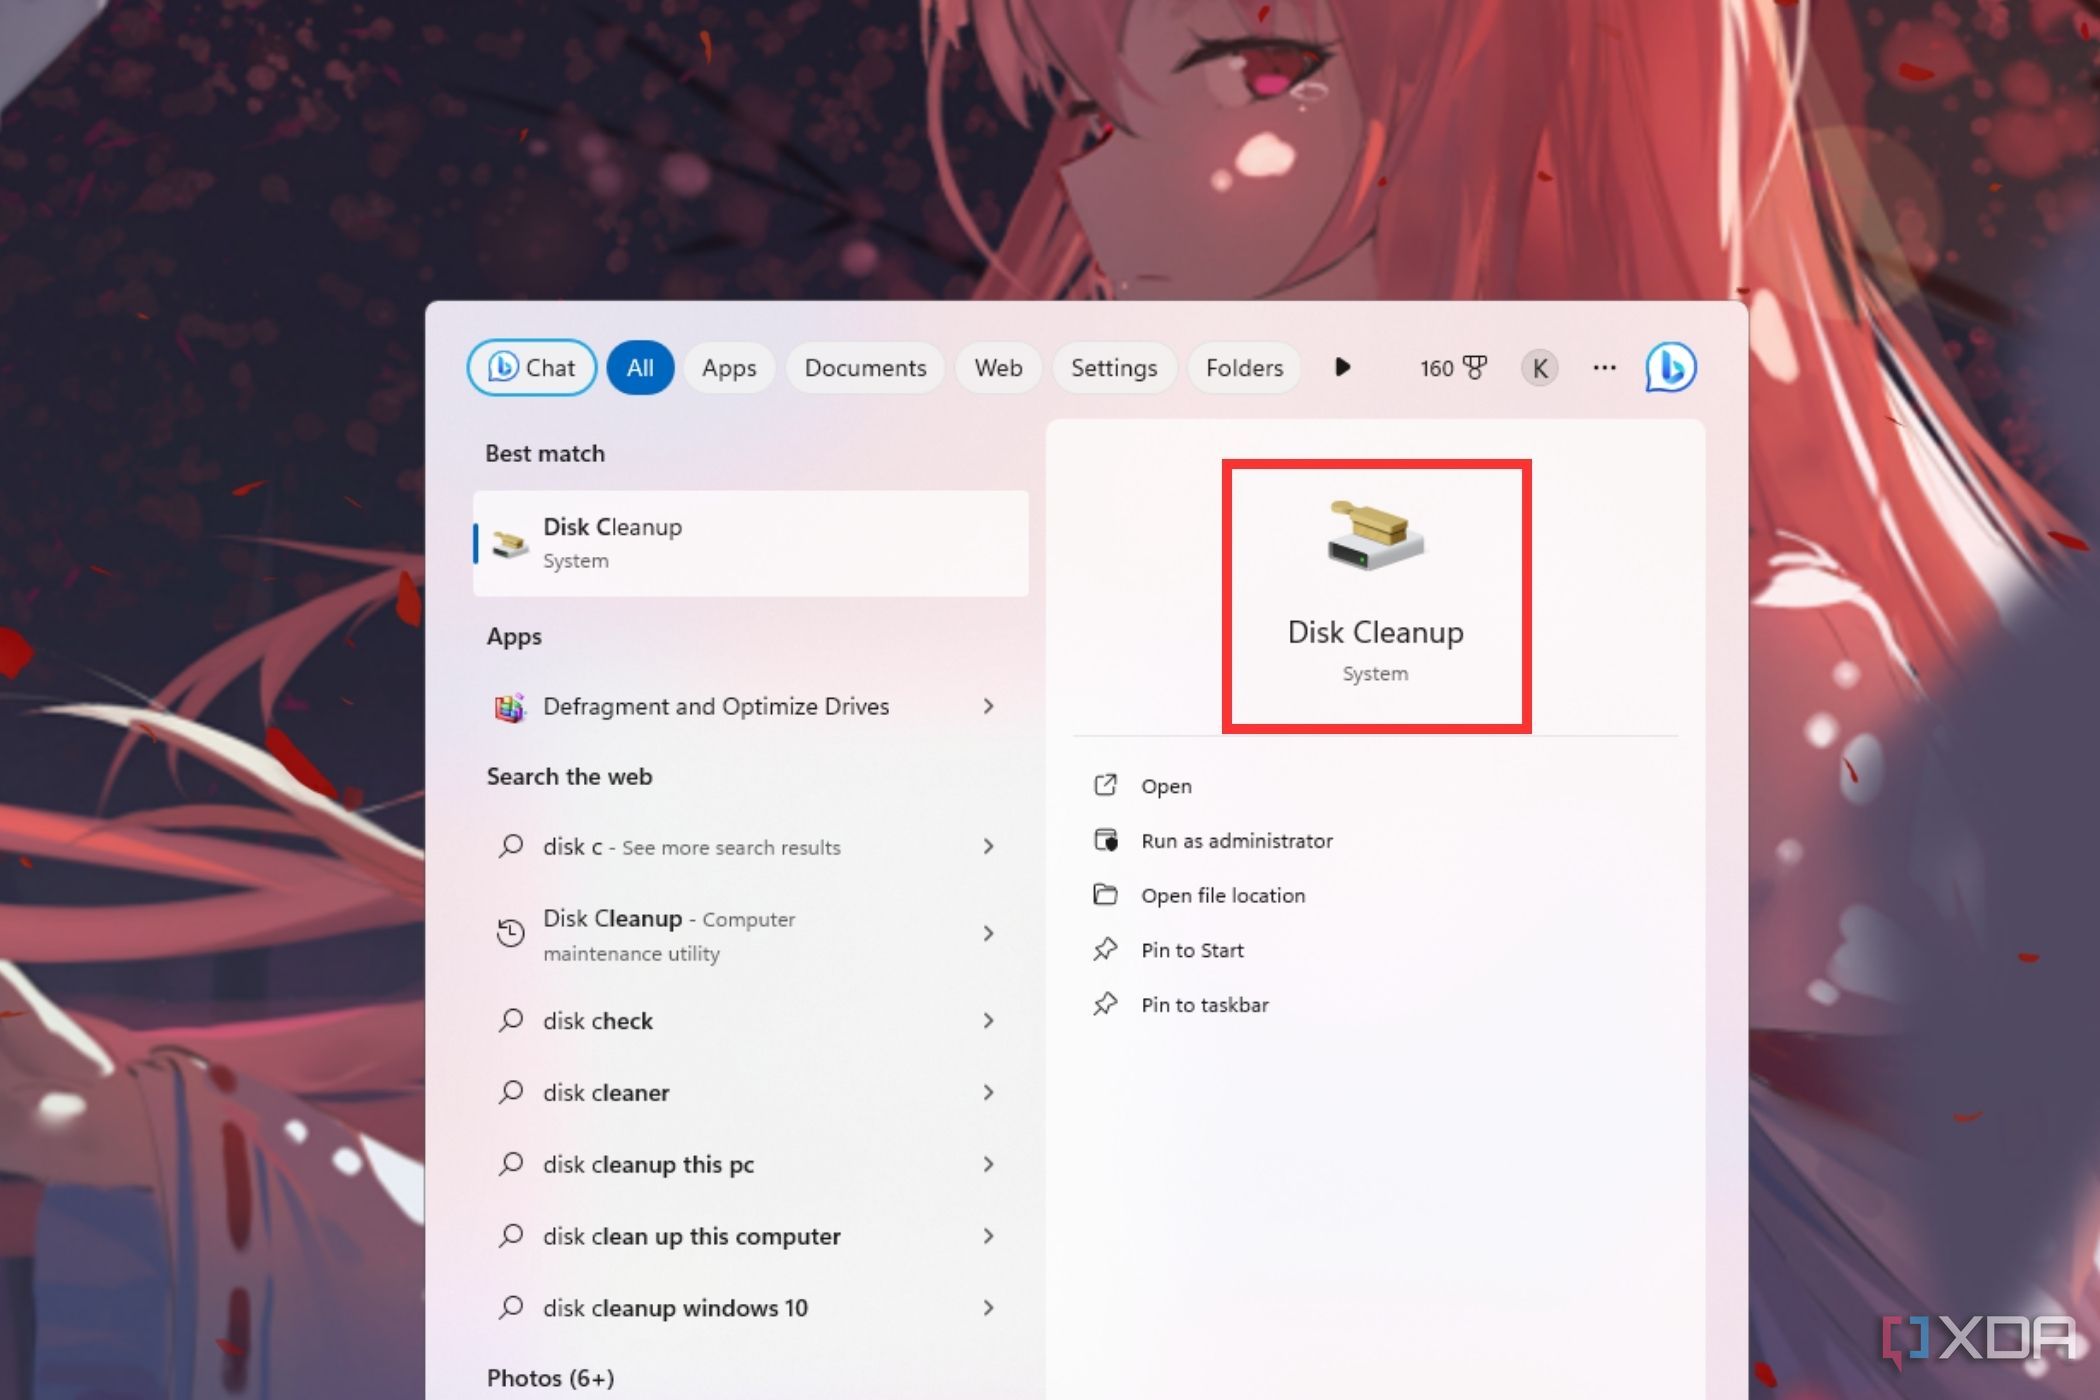
Run disk cleanup often
Among the many finest free utilities
Disk Cleanup is a free Home windows utility device to liberate area by cleansing pointless recordsdata. It is pretty easy to make use of, and it solely takes a couple of minutes to get the job achieved and liberate area in your SSD. To make use of it:
- Press the Begin button and kind Disk Cleanup.
- Choose the Disk Cleanup utility to open it.
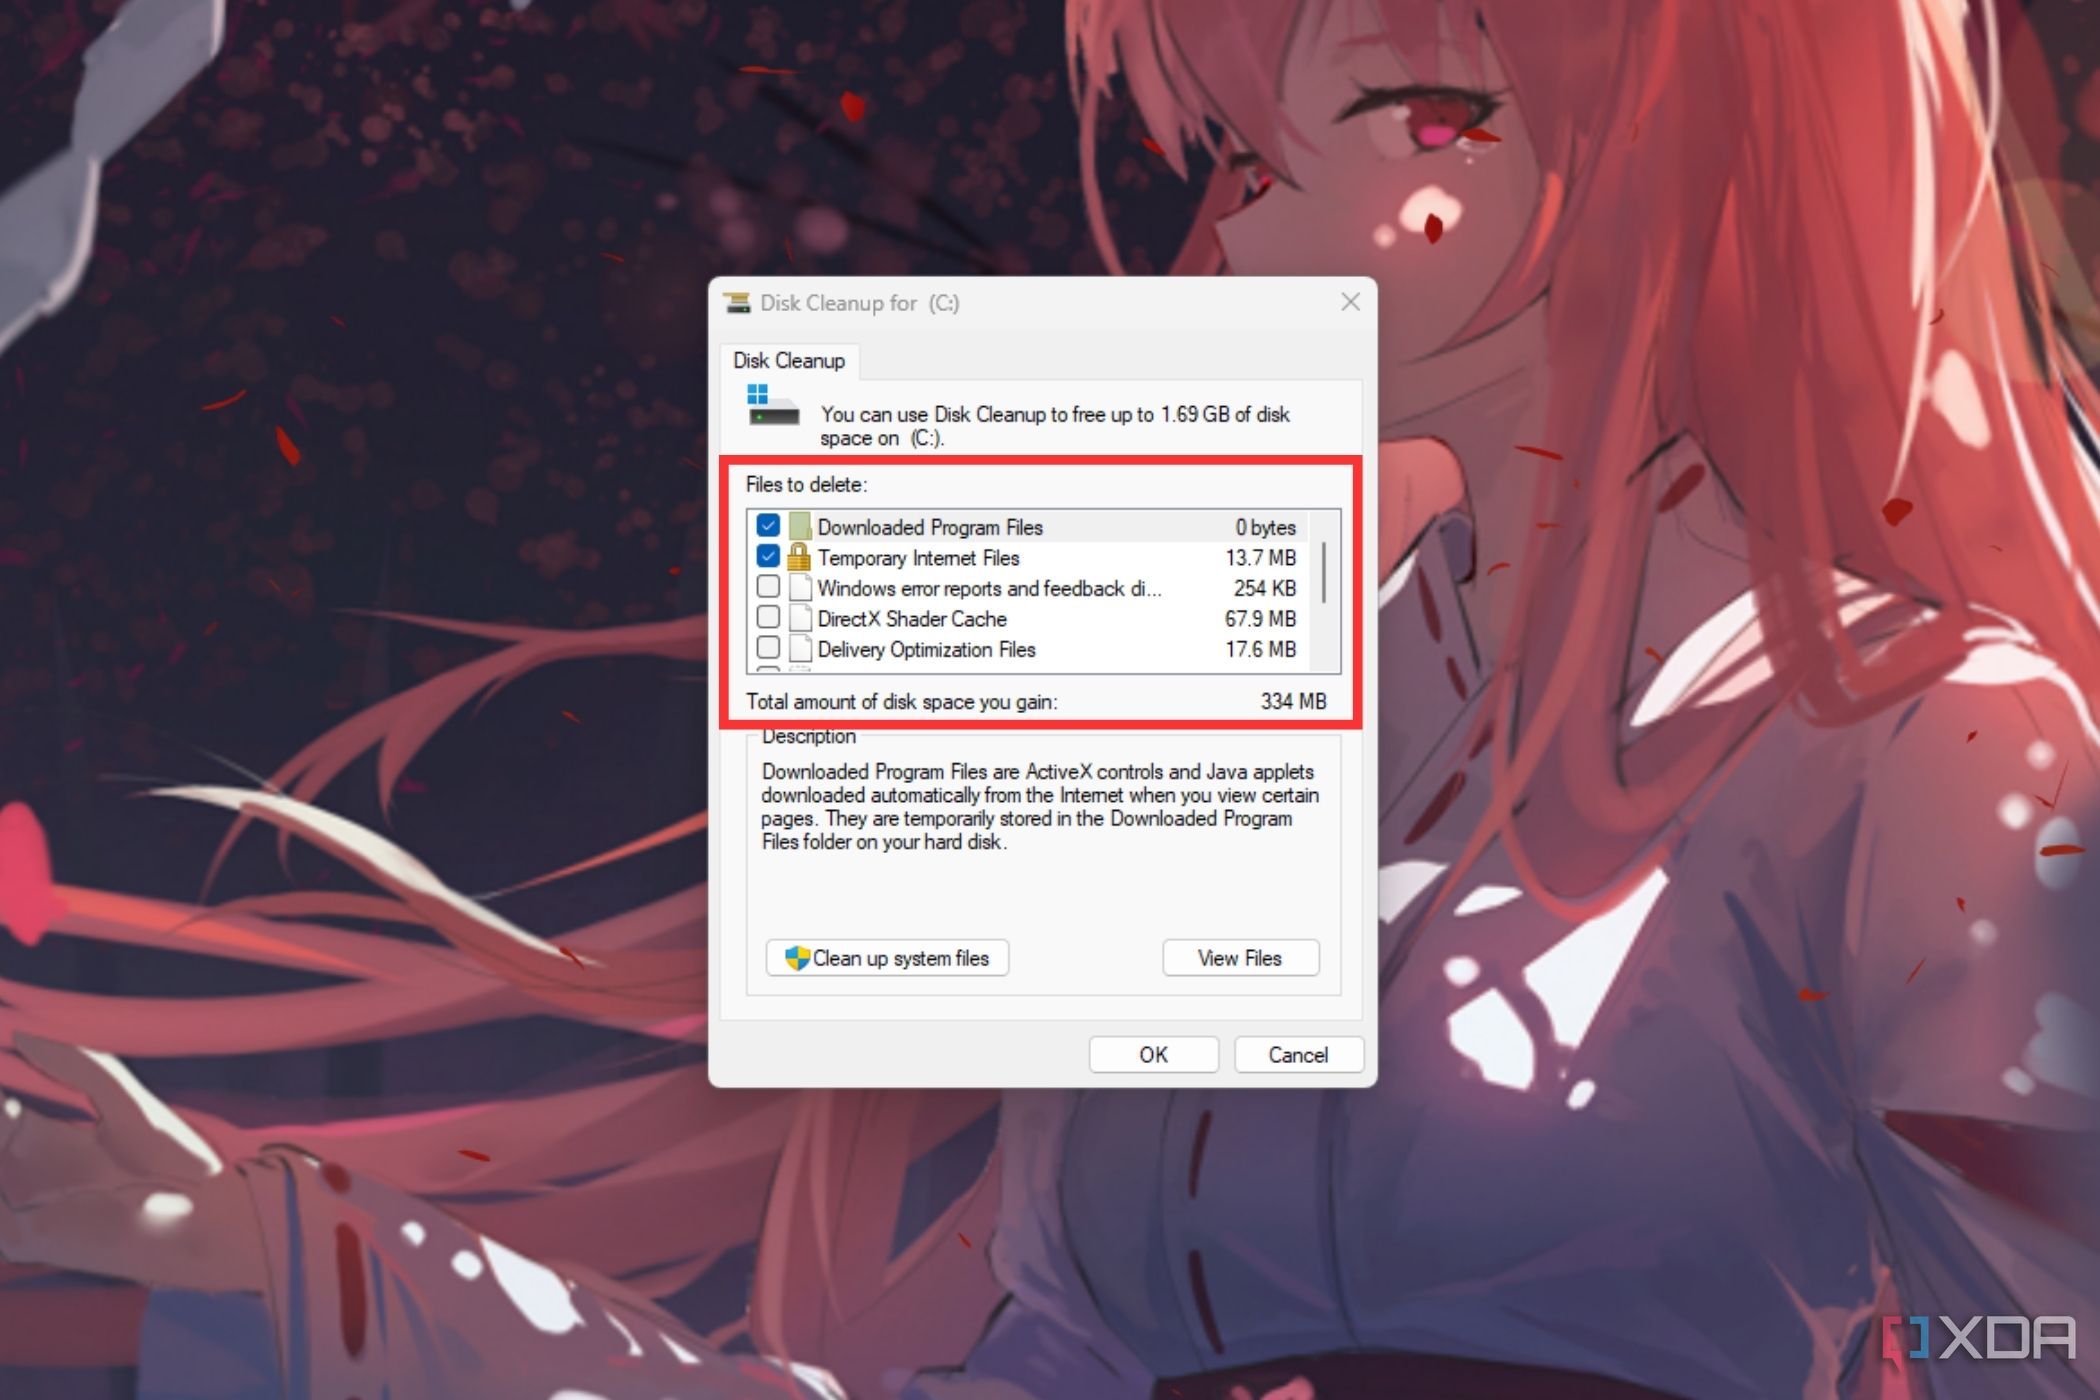
- Choose the drive you wish to clear in case you have multiple.
- The Disk Cleanup utility calculates how a lot area you’ll be able to liberate.
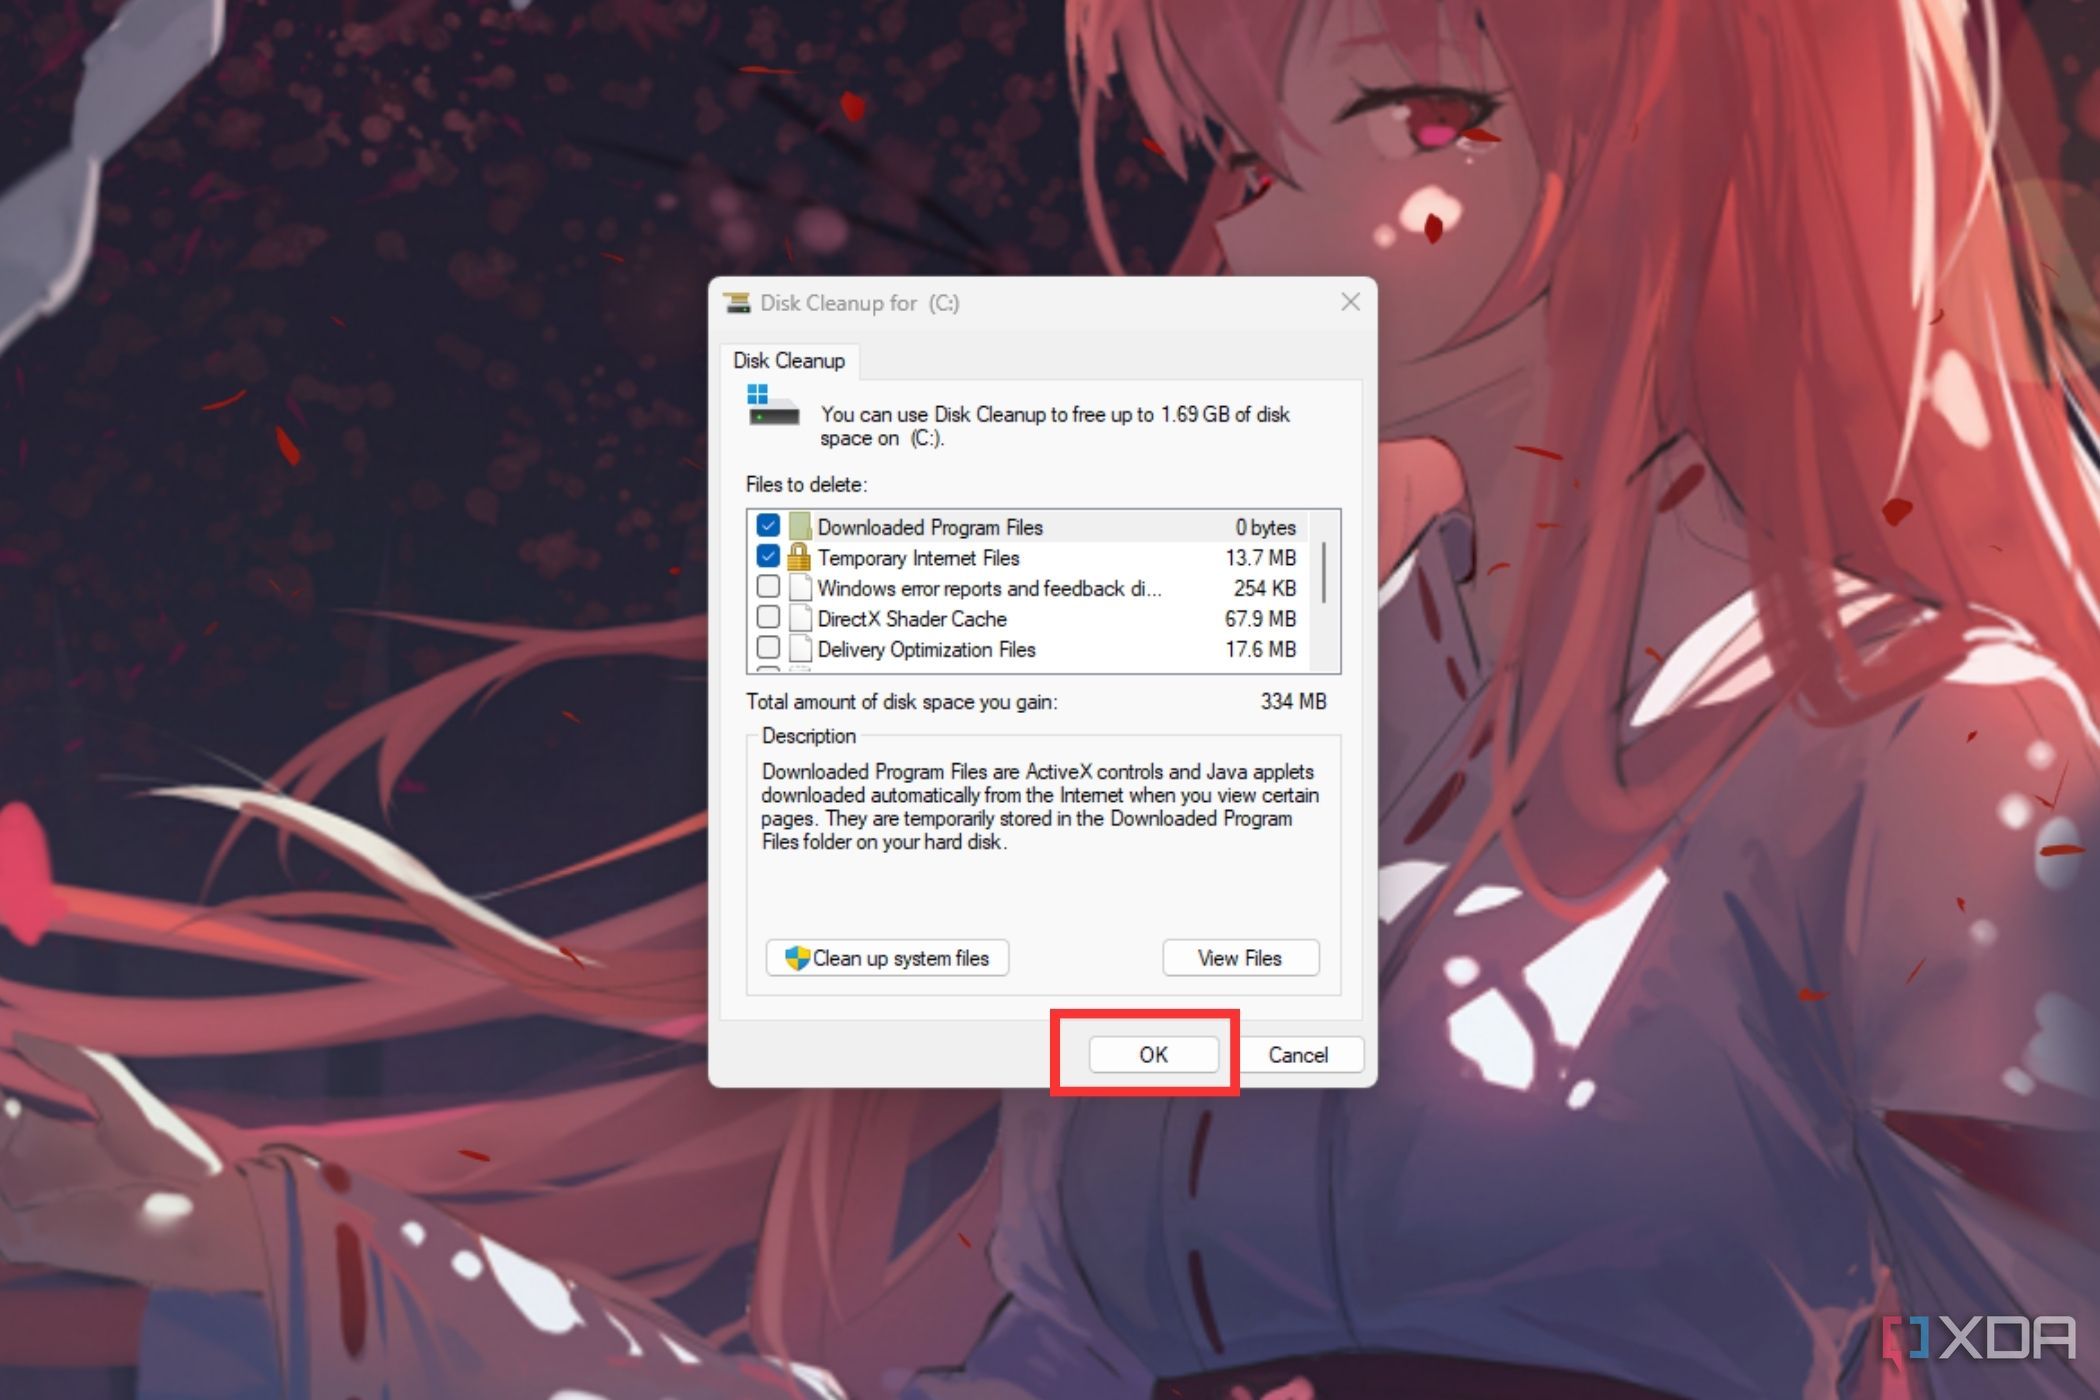
- Click on the checkboxes to pick out/deselect objects, and choose OK when achieved.
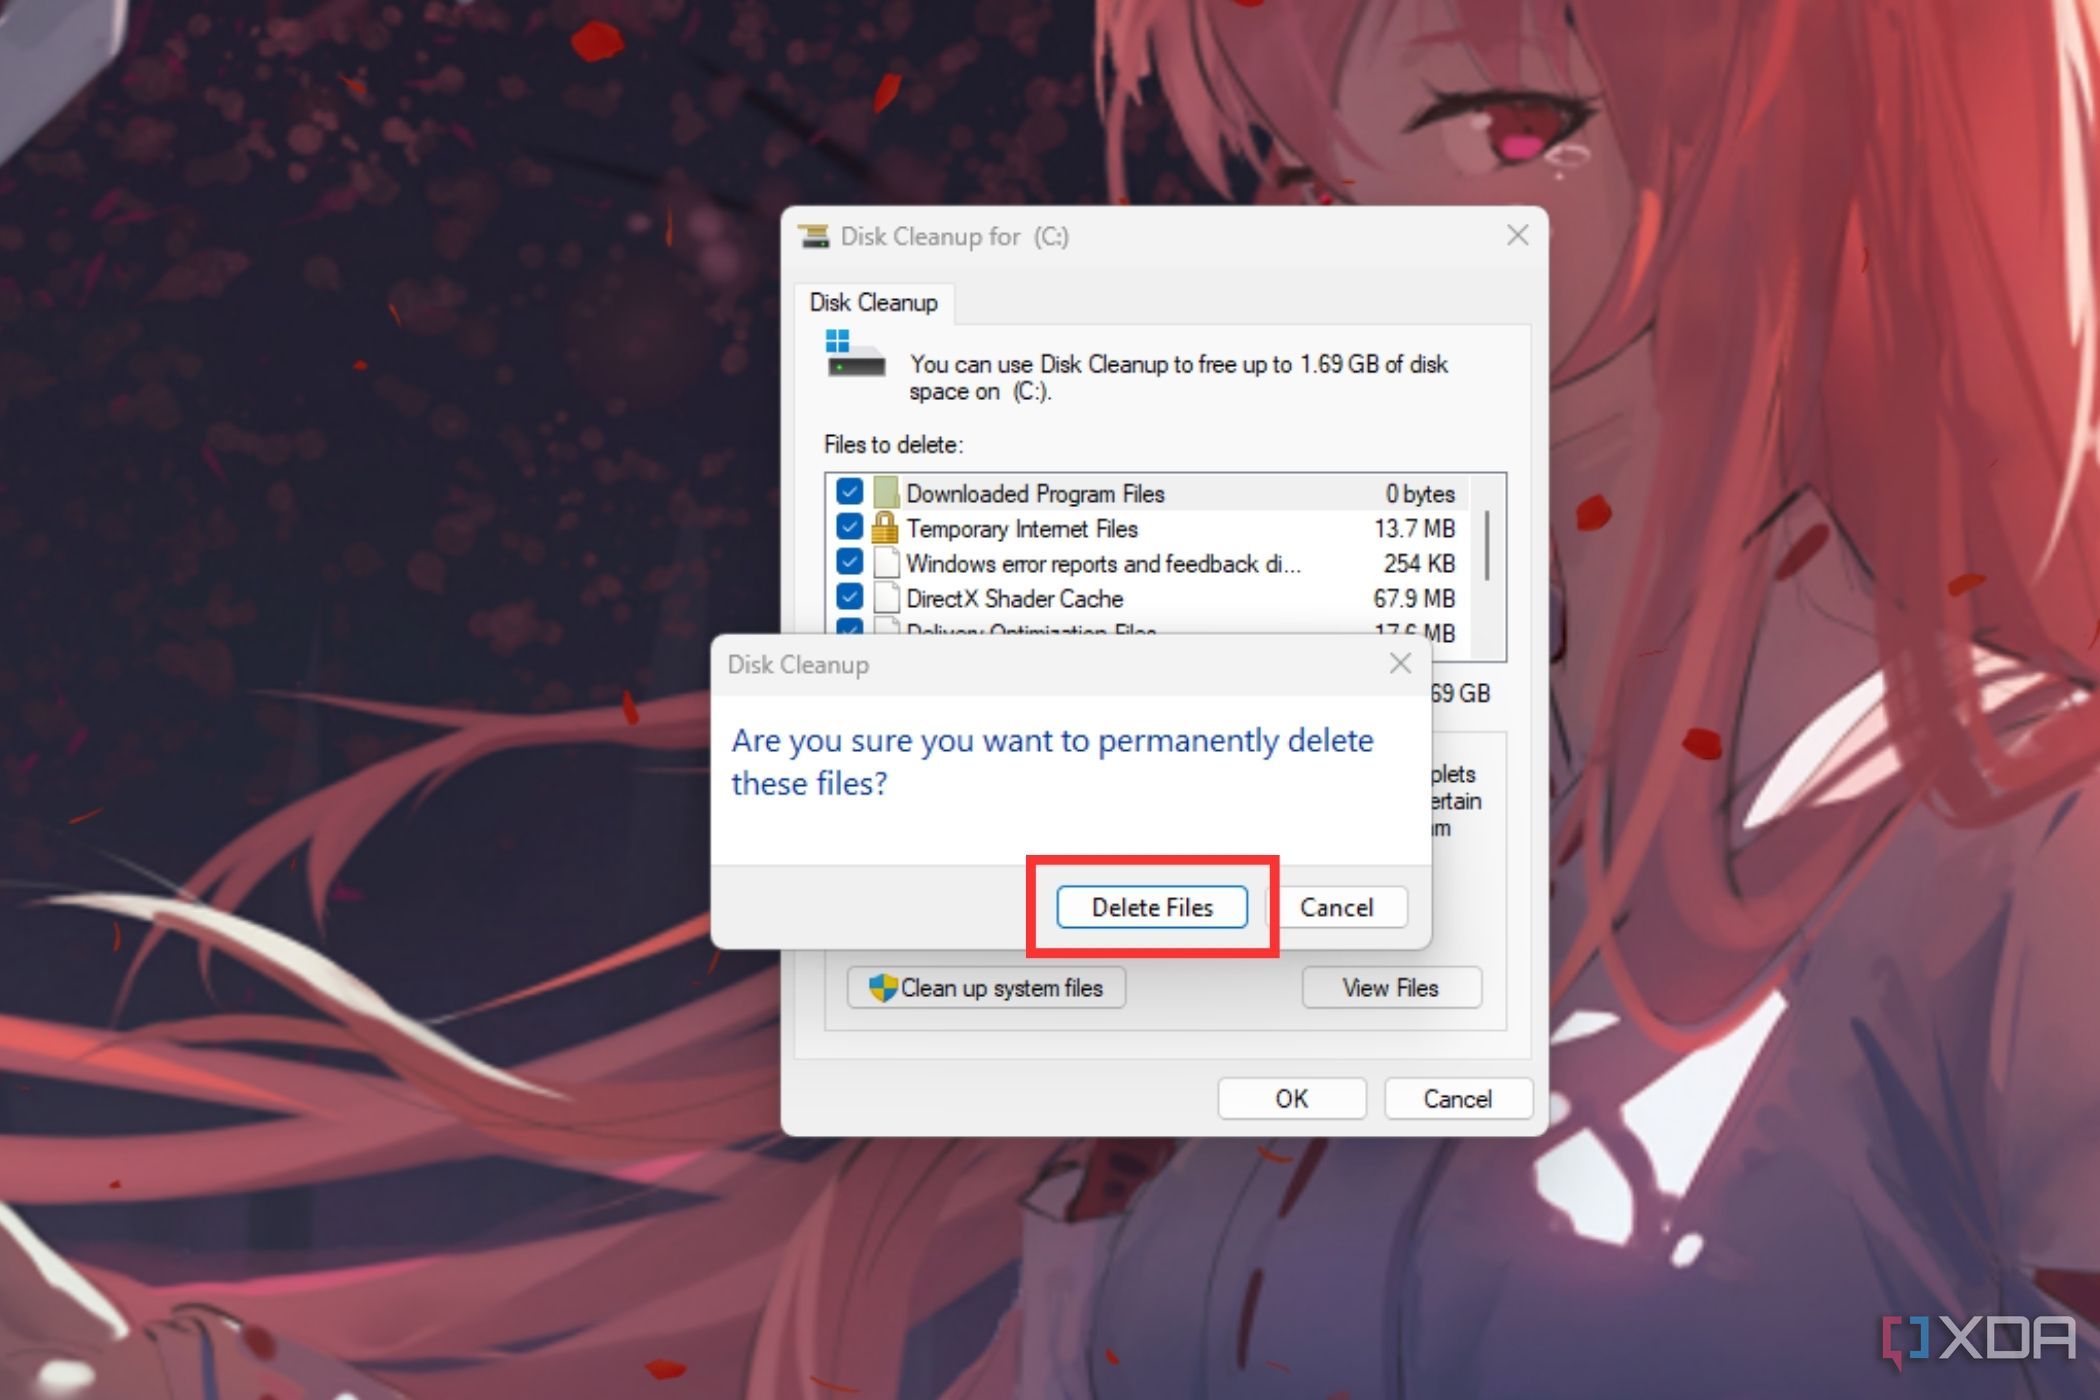
- Choose Delete Recordsdata when prompted to scrub up the pointless recordsdata in your machine.


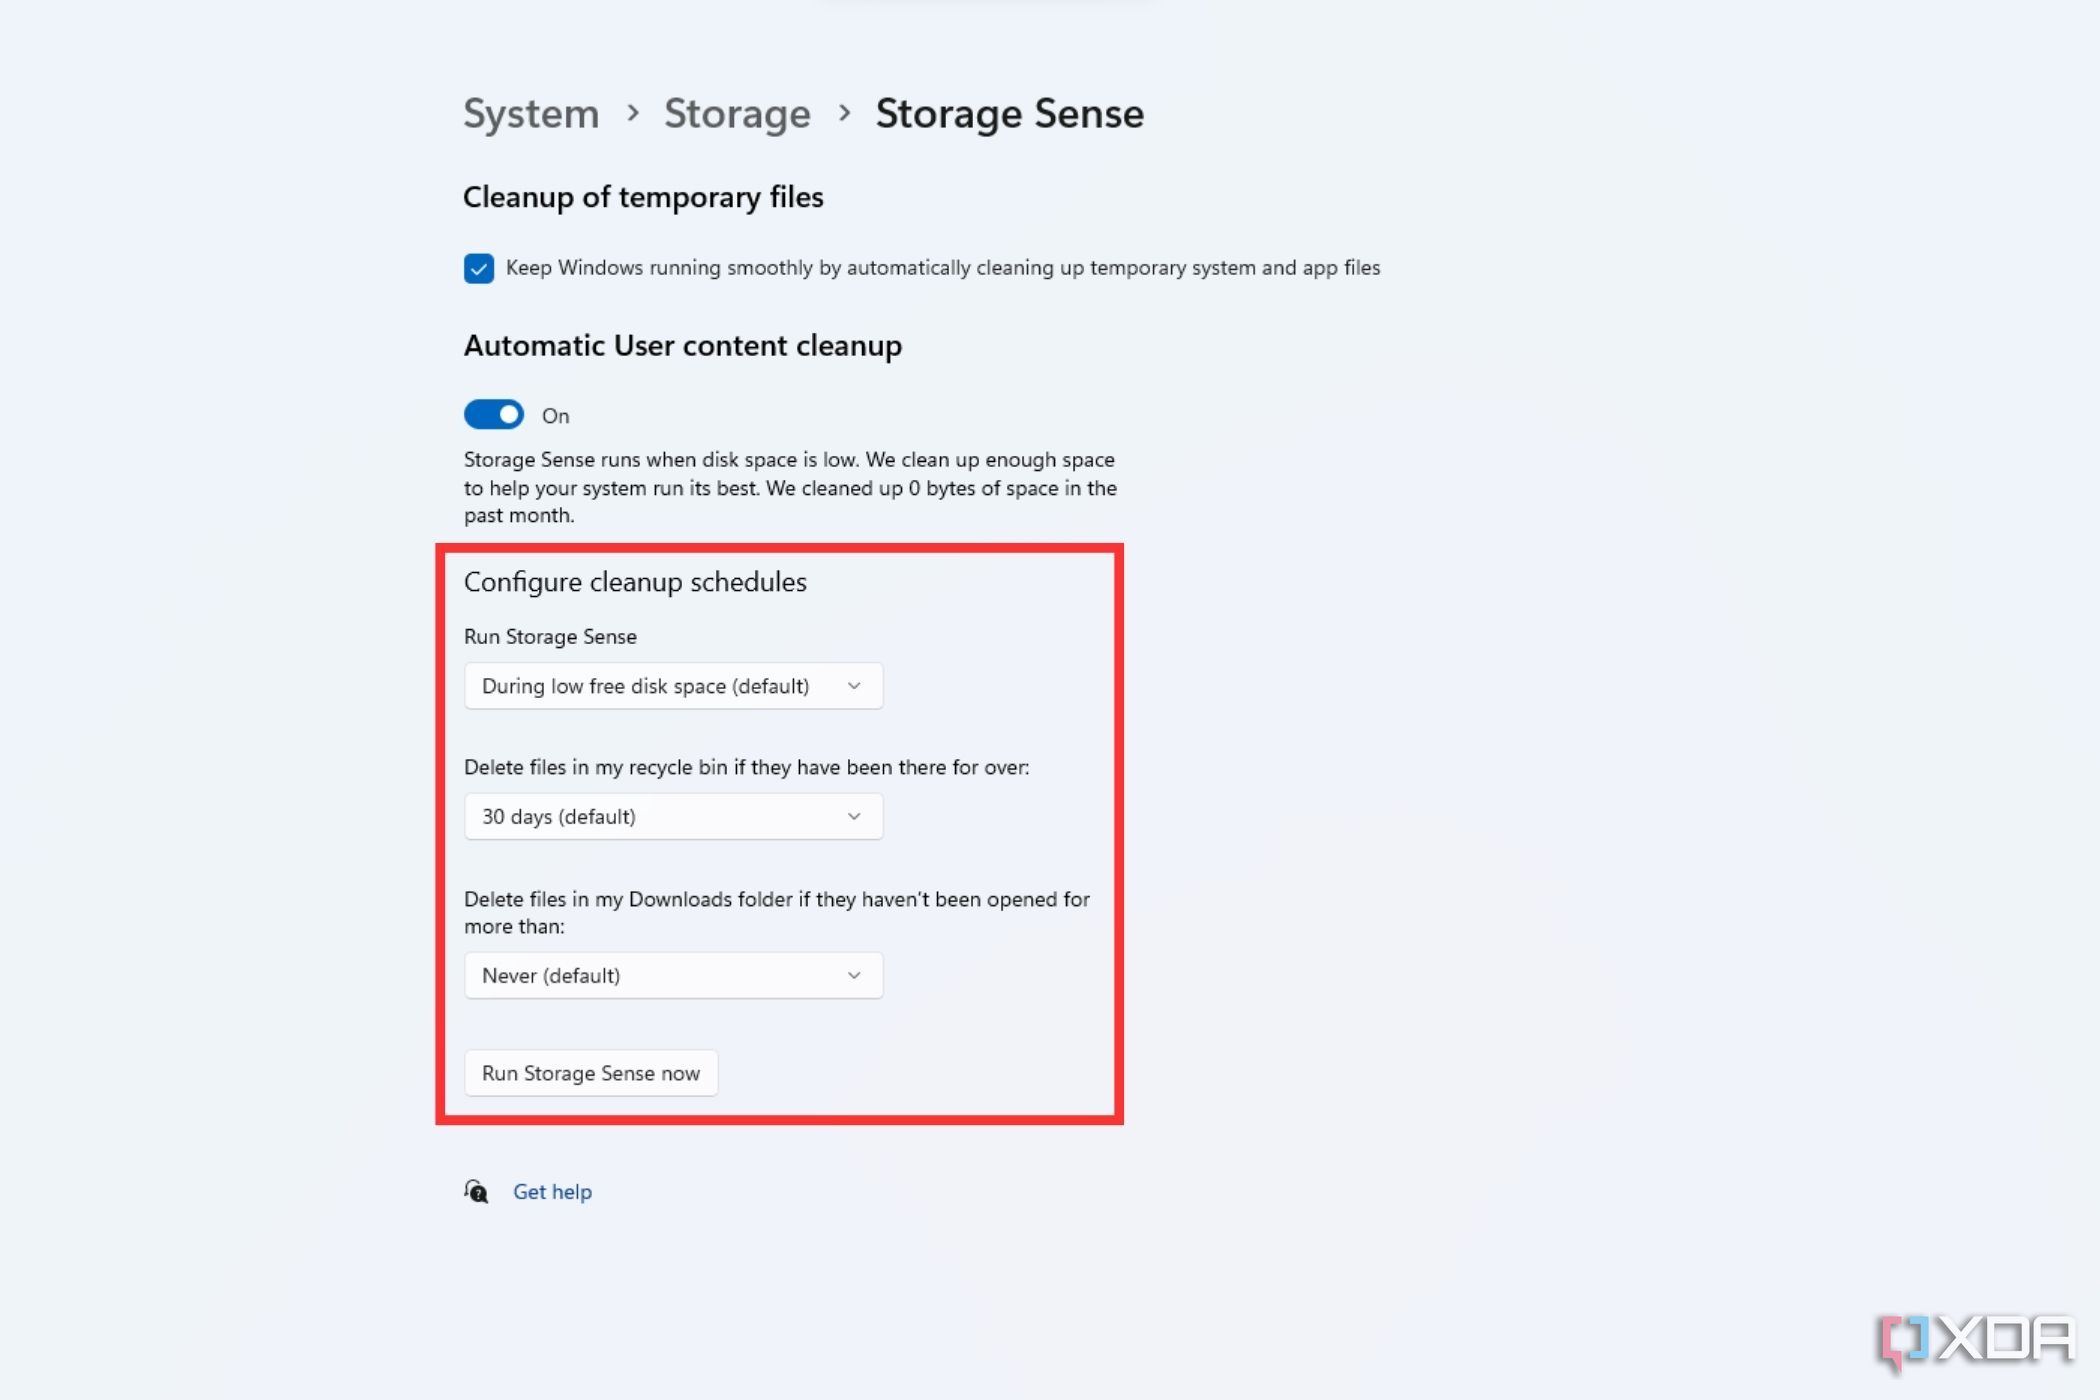
Use Storage Sense to mechanically liberate area
Let the OS take cost
Home windows Storage Sense is a straightforward utility device that helps you handle your cupboard space. You’ll be able to configure it to take away objects you do not want, like momentary recordsdata. Storage Sense will mechanically delete content material from the Recycle Bin by default after a while, but it surely’ll solely delete the objects in your Downloads folder and OneDrive for those who’ve set it up to take action. This specific characteristic is disabled by default. To allow it:
- Press Home windows + I to open Home windows Settings.
- Choose System and find the Storage choice.
- Search for Storage Sense on the Storage Administration tab and click on the toggle to allow it.
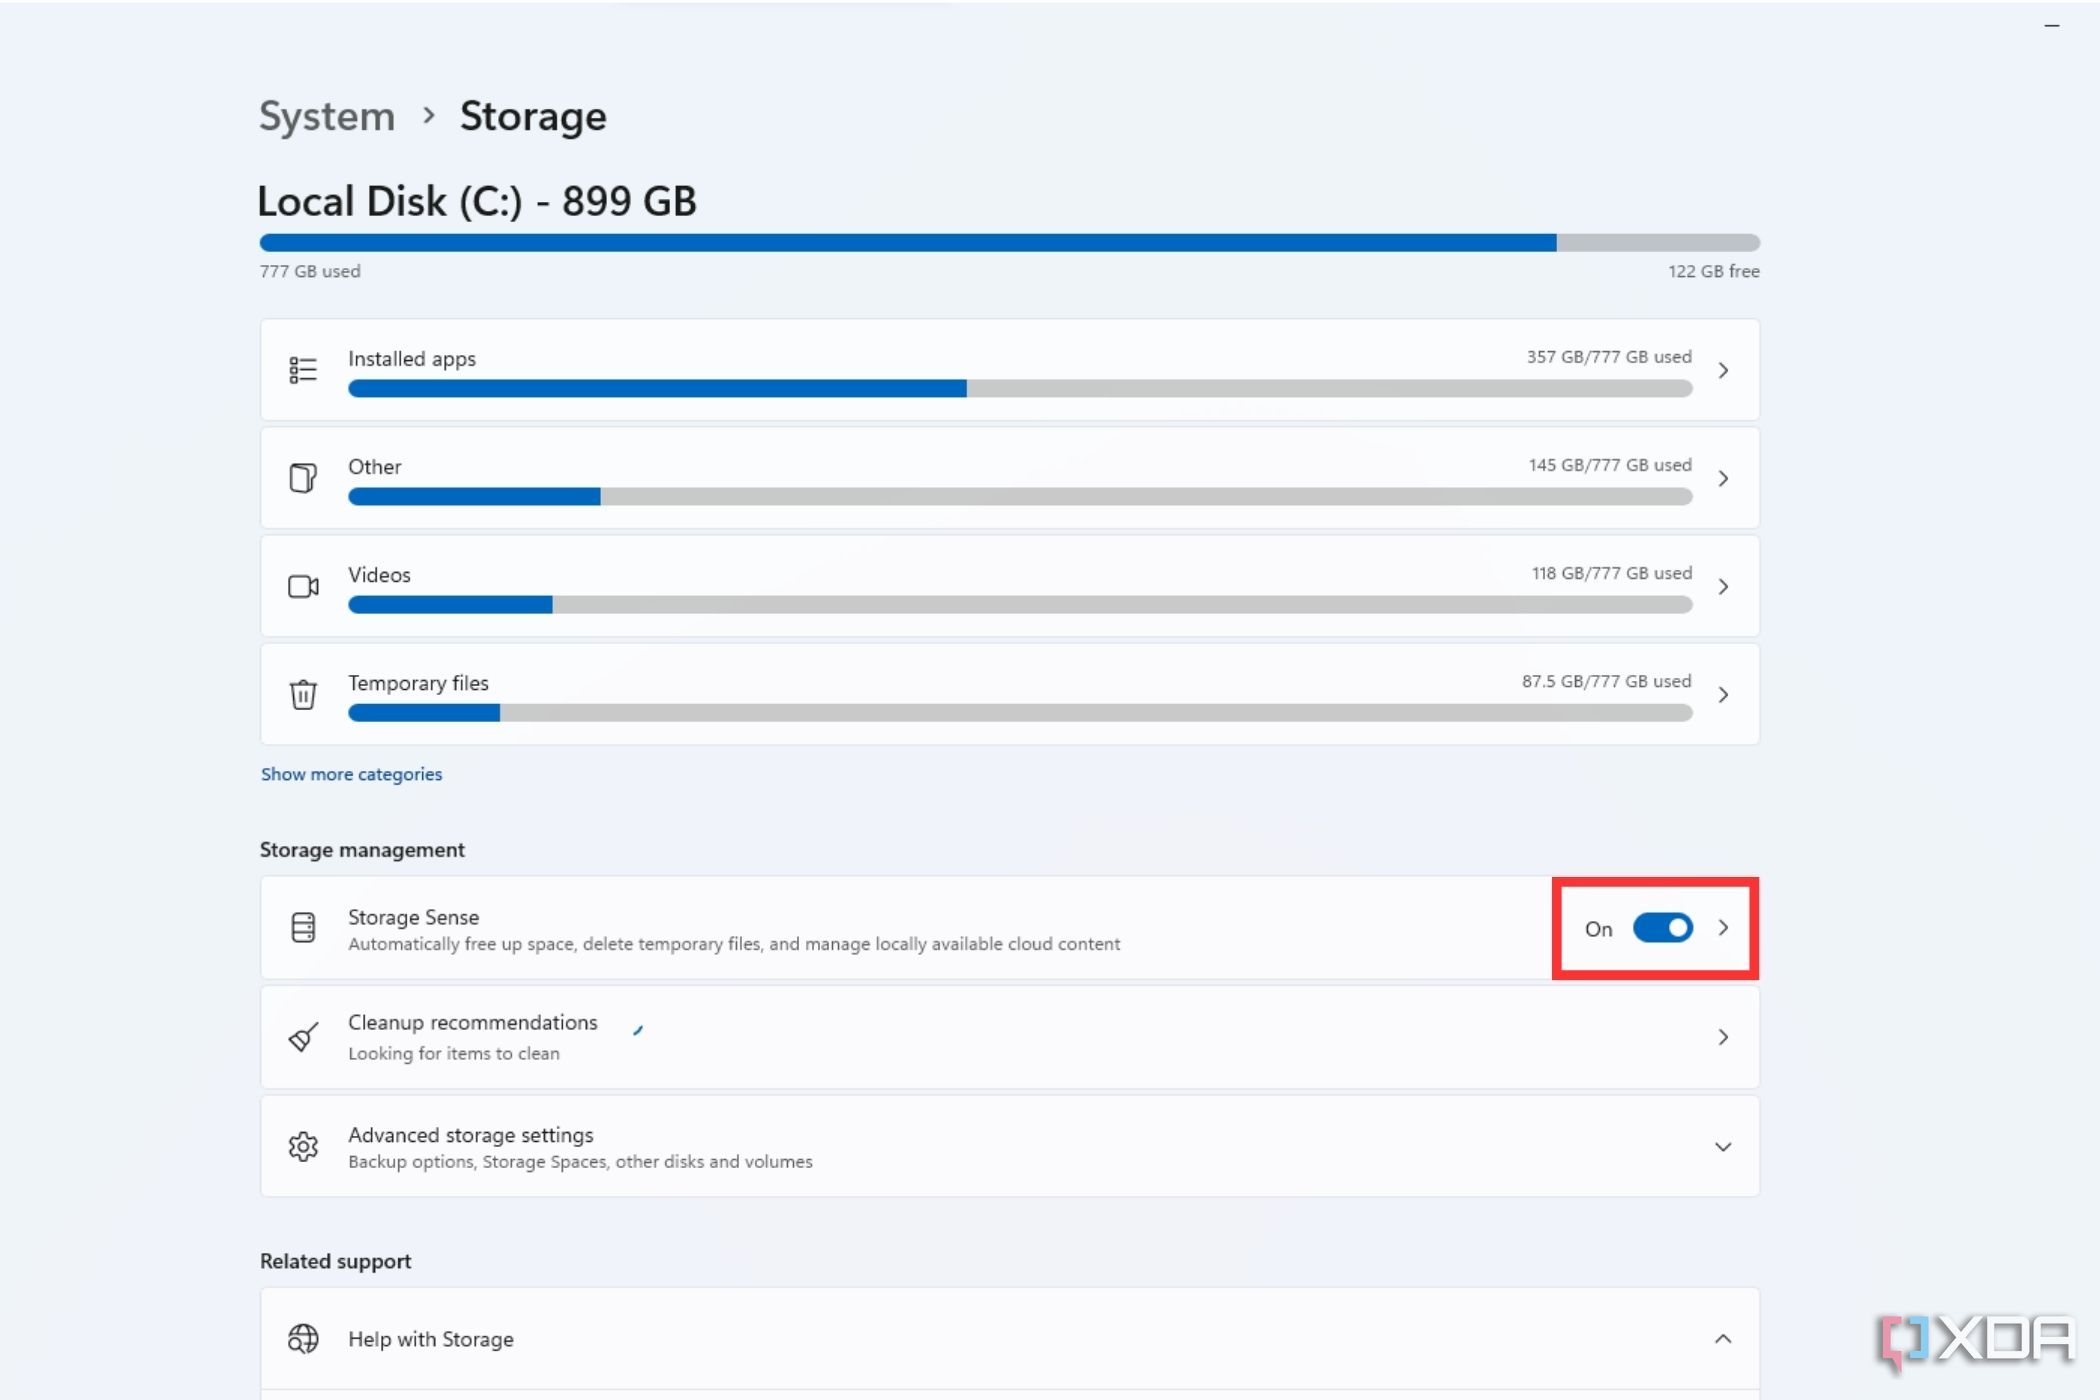
- Choose the Storage Sense choice to increase all of the settings.
- Alter the frequency of content material cleanup primarily based in your necessities.


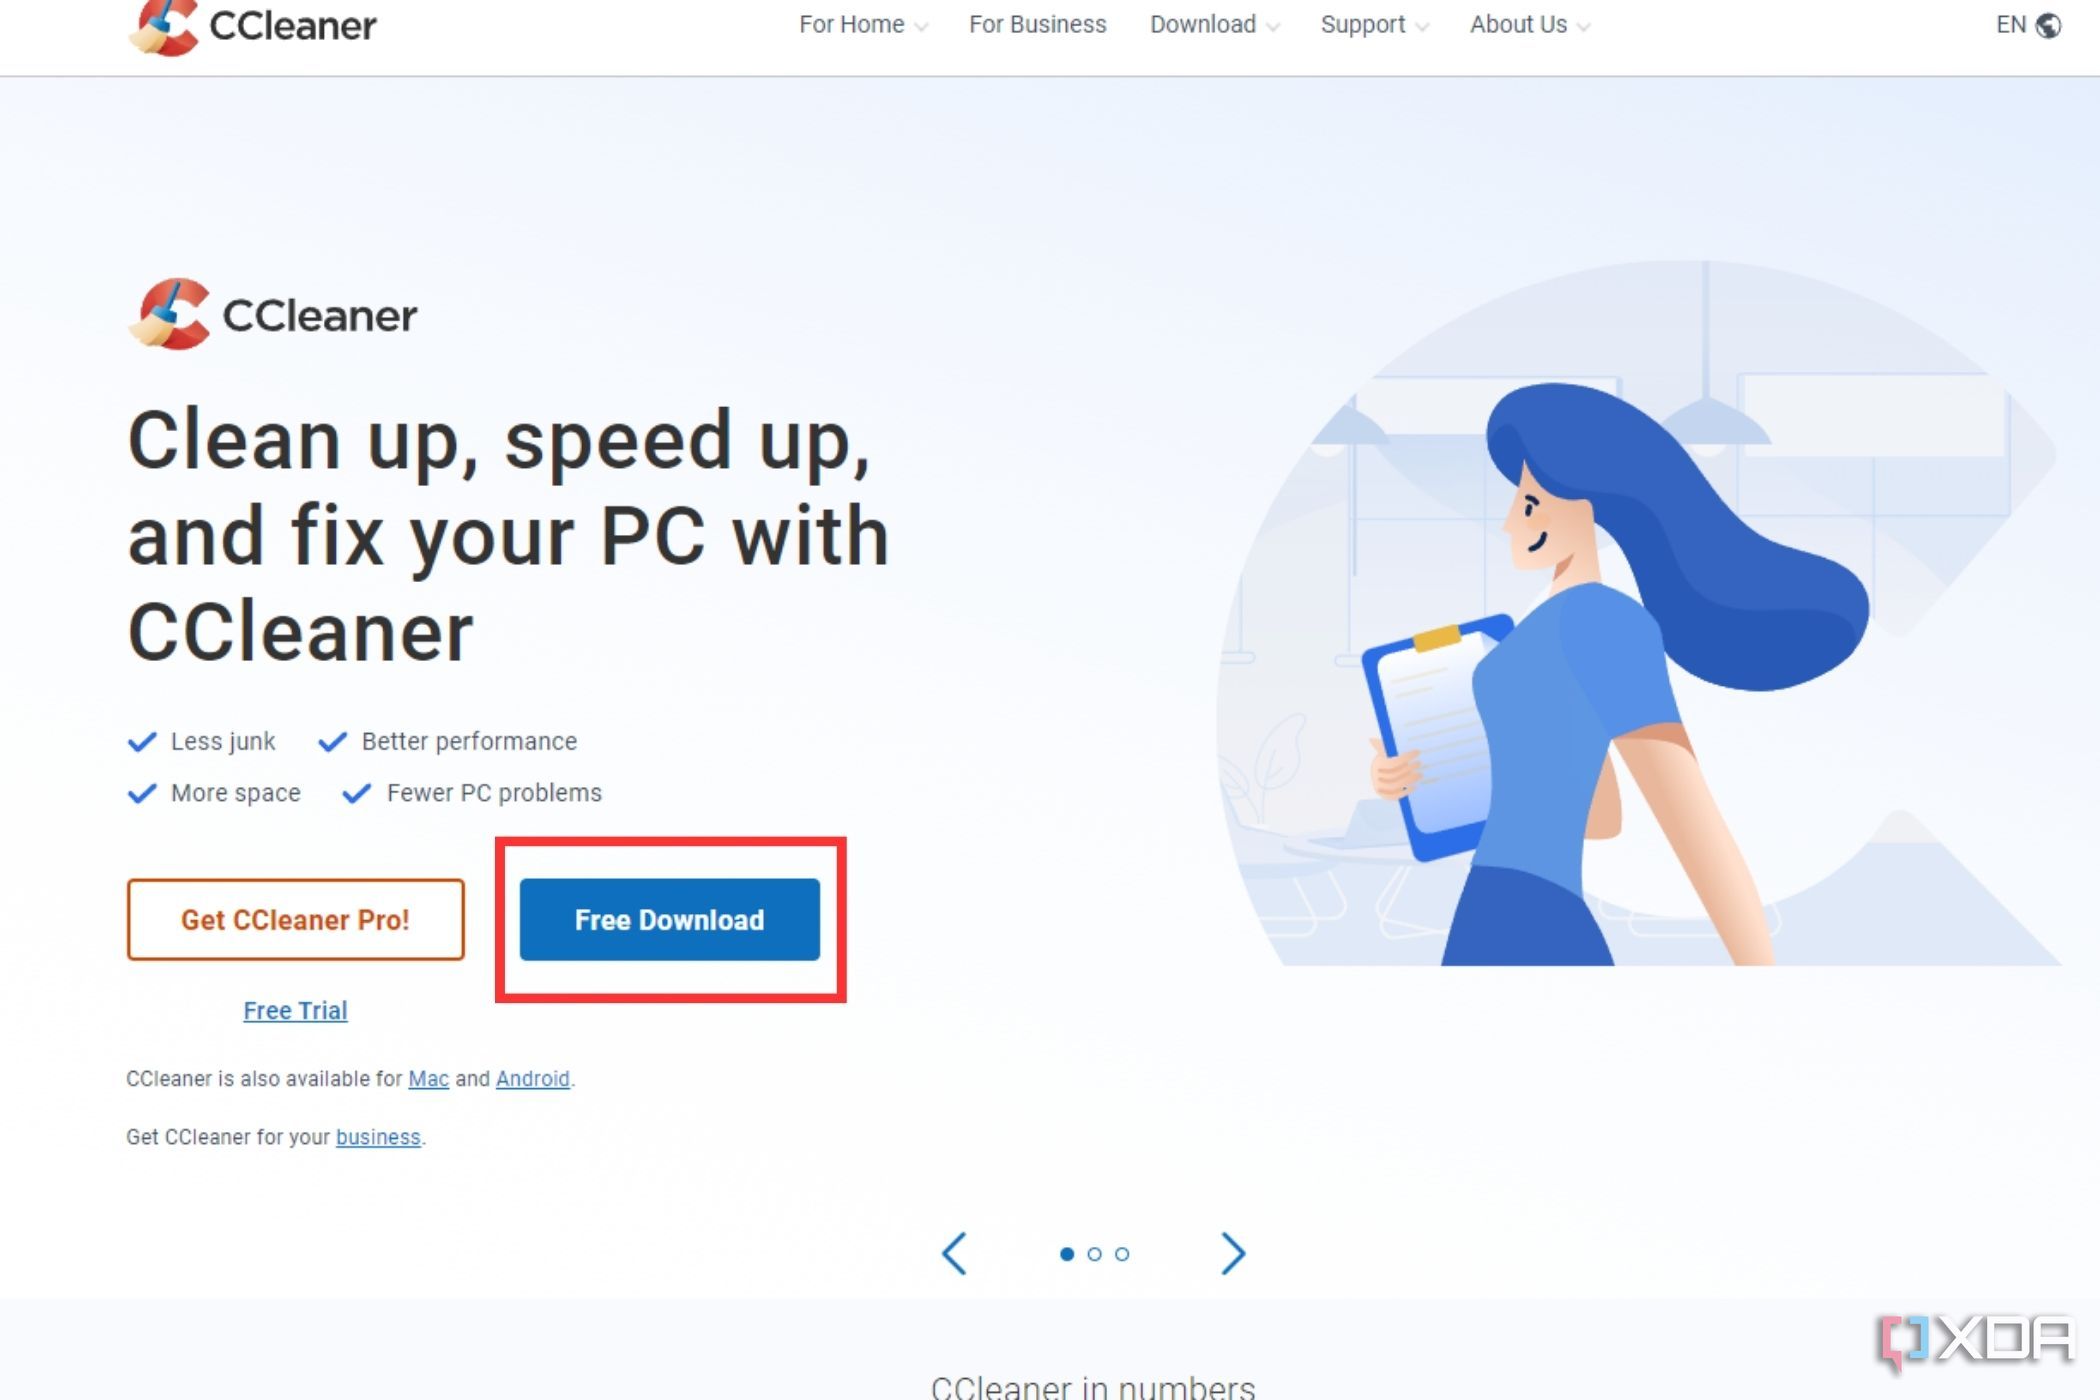
Loads of each free and paid utilities on the market
If you happen to’re not happy with the built-in instruments to scrub up your disk, you can even use third-party disk cleaners. CCleaner is among the many hottest disk cleansing packages obtainable, and it is the one we’re utilizing on this specific tutorial. CCleaner’s Customized Clear choice does a fairly good job of eradicating undesirable and momentary recordsdata to liberate area. To make use of CCleaner:
- Obtain the CCleaner setup file and set up it.
Be sure you do not set up the CCleaner browser throughout setup.
- Launch the appliance as soon as it’s put in.
- Choose the Customized Clear button on the left aspect.
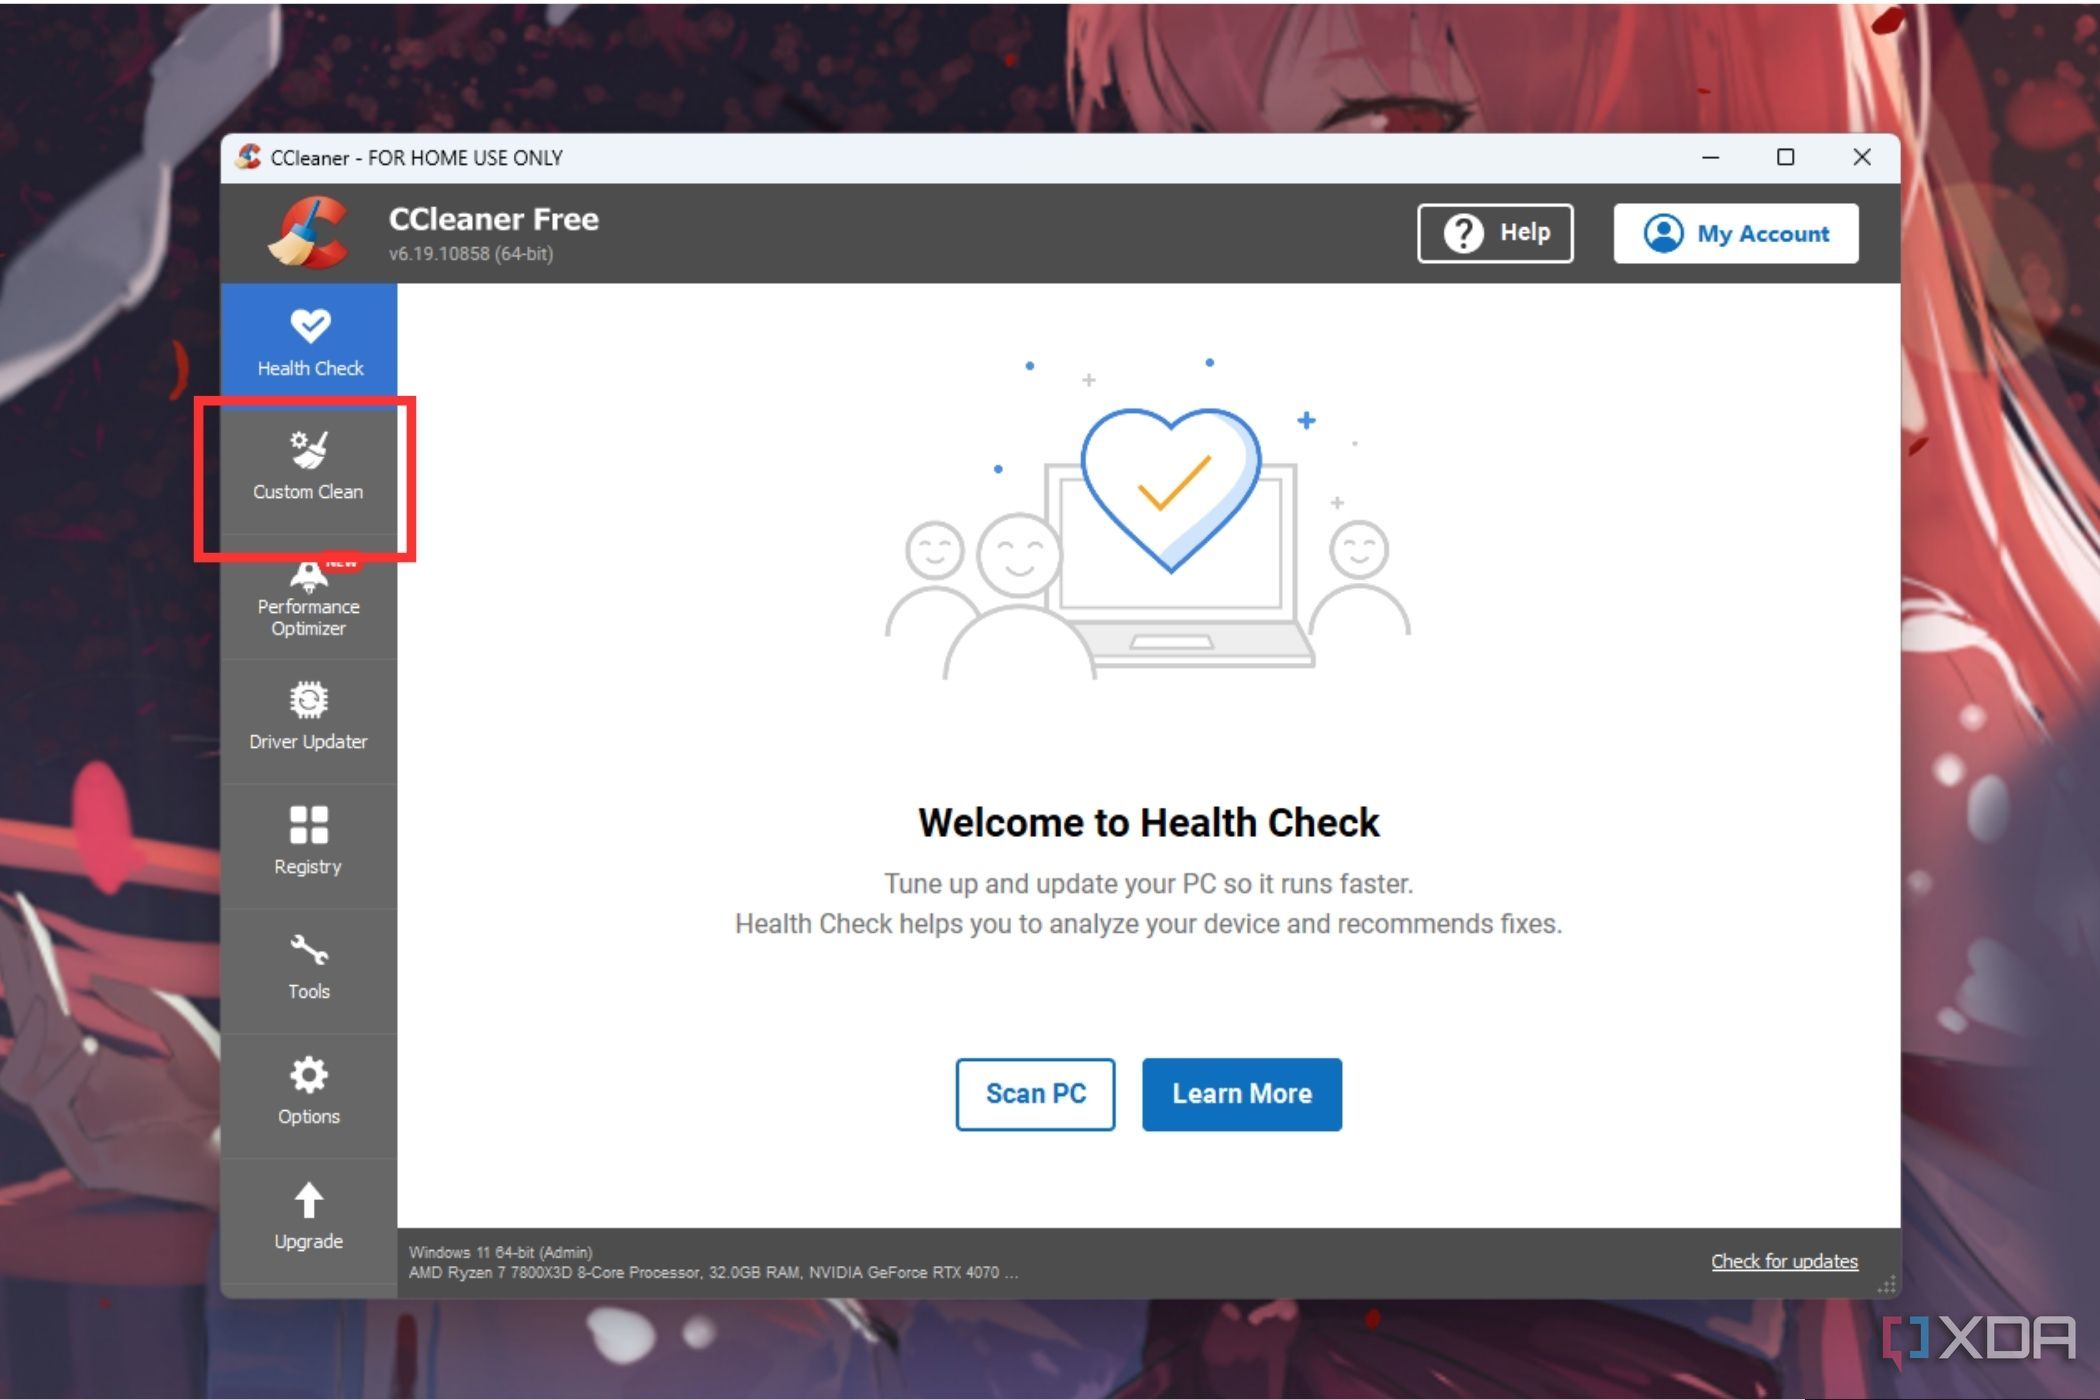
- Click on Analyze.

- Click on Run Cleaner button after reviewing the recordsdata to take away them.
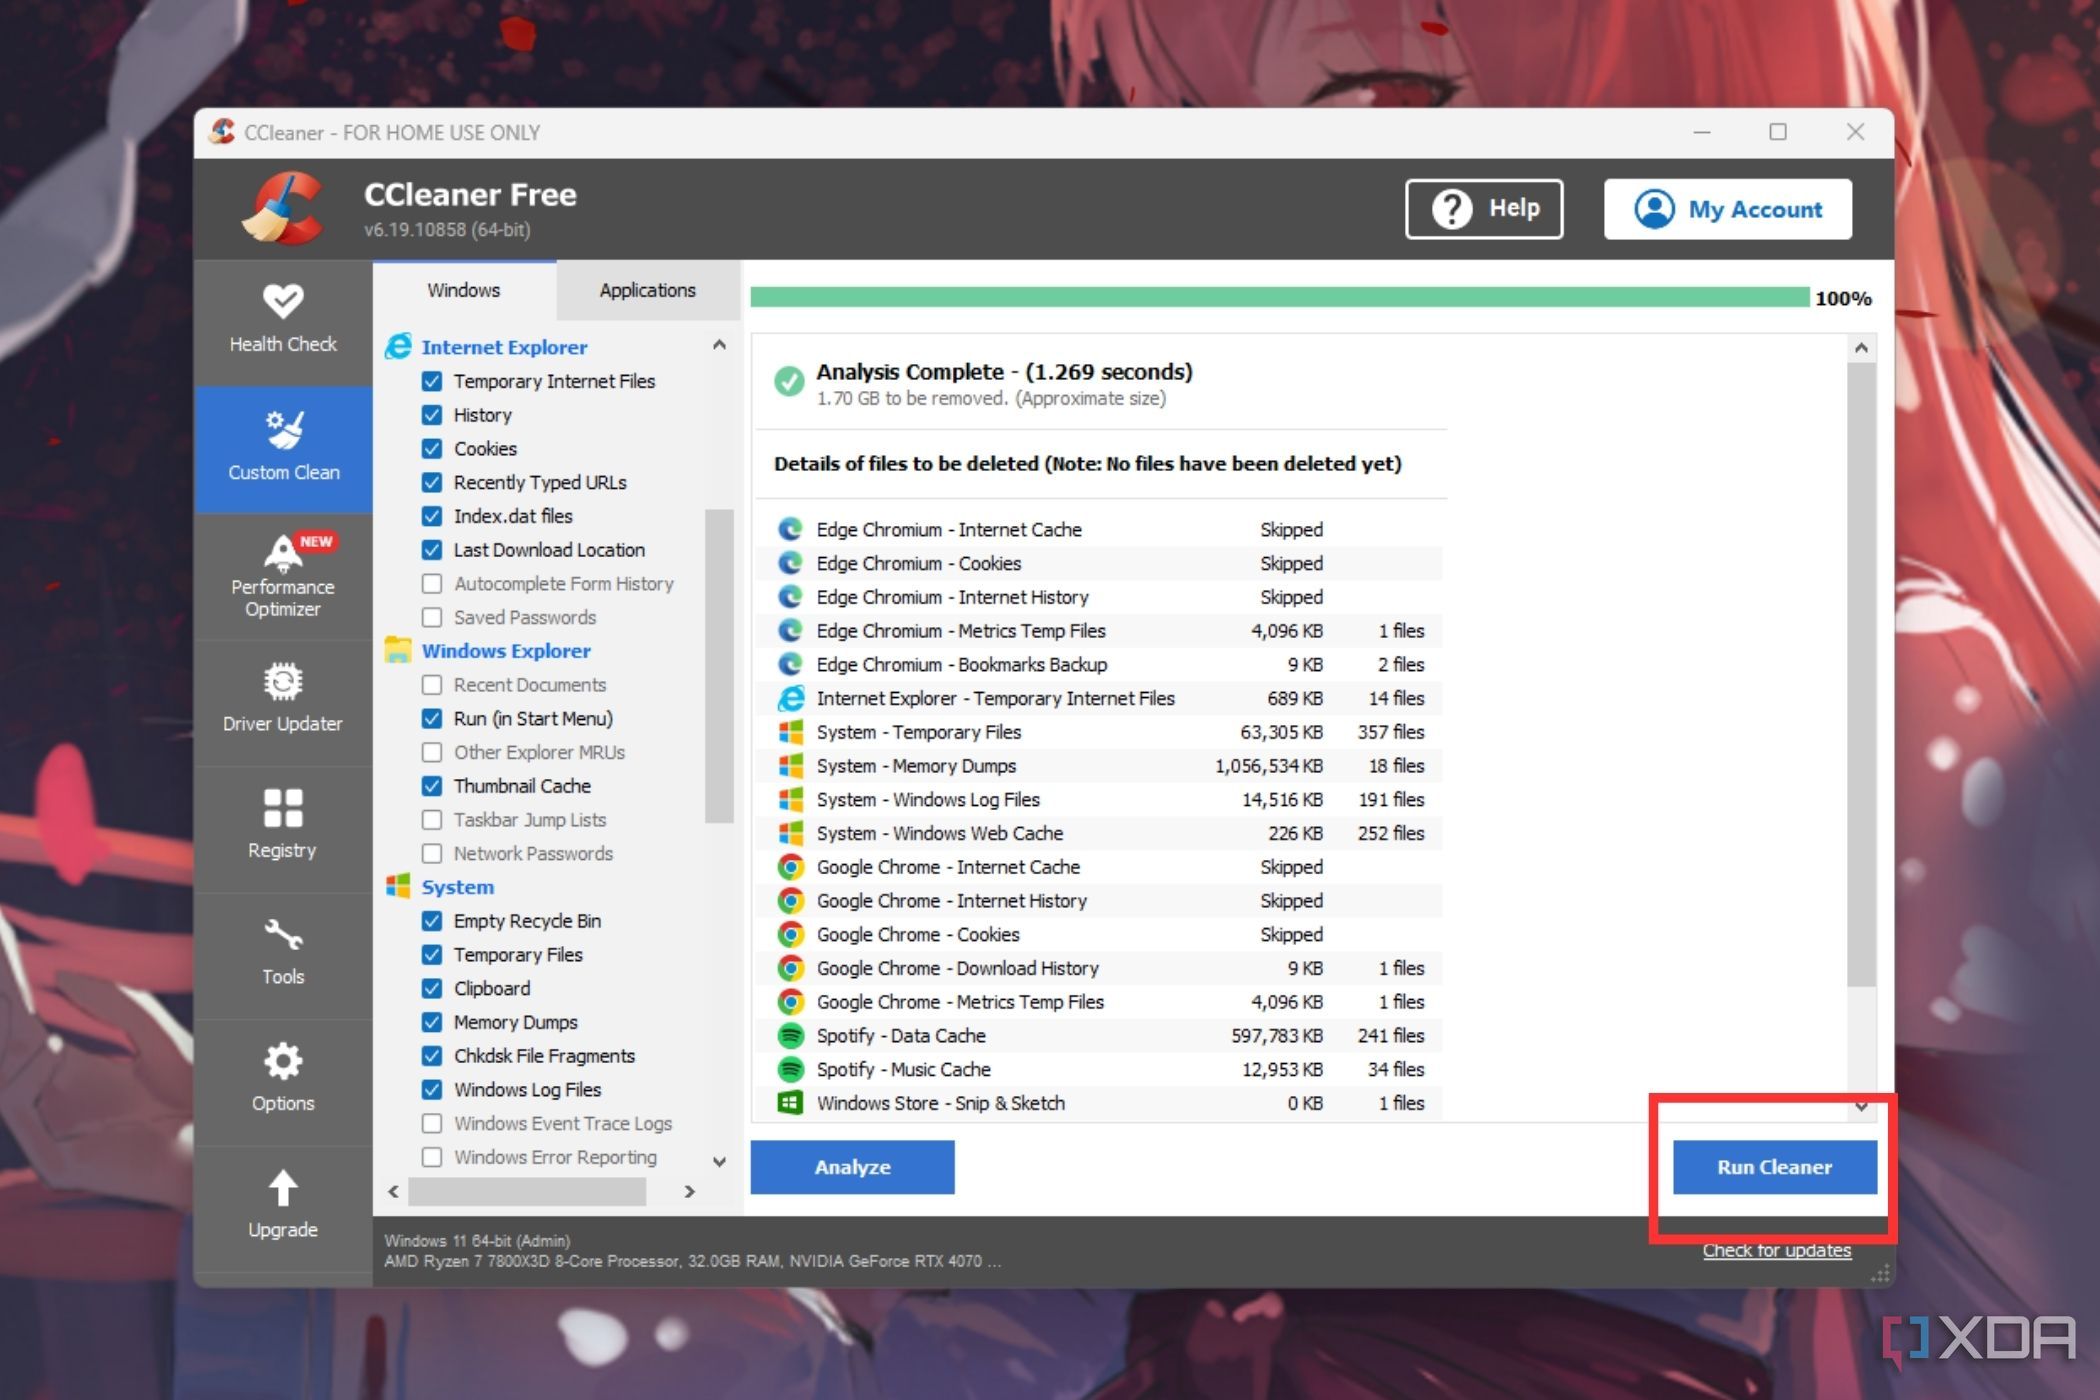
- Click on Proceed on the affirmation display.


Closing ideas
These are some tried-and-tested methods to scrub your SSD and liberate area for all of your new video games and media recordsdata. So long as you retain the momentary file folders in verify and often clear up your system for undesirable apps and recordsdata, it’s best to have completely no points with area. However do not forget that there’s solely a lot you or these utility instruments can do to liberate area in your SSD. If you happen to really feel such as you’re consistently working out of area in your pc, it could be time to choose up a brand new SSD with extra storage. It is by no means a nasty time to improve the storage of your pc, and there are many nice SSDs on the market proper now.