
Putting in a CPU on the motherboard is among the many first issues it’s a must to do whereas constructing a PC. It’s, nonetheless, incomplete till you put in a CPU cooler, which is important to keep up the thermal output of the CPU. You possibly can even set up it on the finish after you are executed assembling different elements, however failing to put in a CPU cooler correctly will end in extraordinarily excessive CPU temperatures and your system will shut down earlier than you even enter the working system. Putting in a CPU cooler can also be pretty easy, however there are some things that you will need to contemplate to make sure you’re doing it correctly.
There are two forms of CPU coolers: air coolers and liquid coolers. Putting in an air cooler is often simpler than establishing liquid cooling in your PC, however it’s straightforward to get each them each up and operating in just some minutes so long as you observe all of the steps which might be highlighted beneath fastidiously.
Conditions
What you might want to set up a CPU cooler
- Thermal paste: Loads of CPU coolers include pre-installed thermal paste lately, however it’s greatest to have your personal syringe of thermal answer. DO NOT set up the second layer of thermal paste on the CPU in case your cooler has a pre-installed layer of the paste.
- Instruments: You are going to want a Philips head screwdriver for this set up. Loads of air coolers could be put in with none instruments or include instruments of their very own, however it’s greatest to have one among your personal to put in higher-end air and liquid coolers, and to additionally open the PC case panels.
Learn how to set up an air cooler
A reasonably easy and customary course of for all air coolers
In terms of CPU air coolers, you are primarily a heatsink and a few followers relying on how massive the cooler is. The most effective fan coolers, together with the Noctua NH-D15, include an enormous heatsink and two followers to maneuver the air by means of the heatsink. The general course of, nonetheless, stays the identical whatever the measurement of the cooler and the variety of followers it has.
The very first thing you might want to do is fetch the precise bracket for putting in the cooler. The motherboard’s socket determines what coolers are suitable. Intel’s Alder Lake and Raptor Lake CPUs use the LGA 1700 socket, for instance, whereas the AMD Ryzen 7000 collection chips use the AM5 socket. Virtually all CPU cooler producers bundle the brackets for each CPU sockets with their models, or provide totally different variations of coolers that include totally different brackets.
You do not have to fret about CPU brackets or compatibilty for inventory coolers, as they’re designed to work with the bundled CPU.
To put in an air cooler:
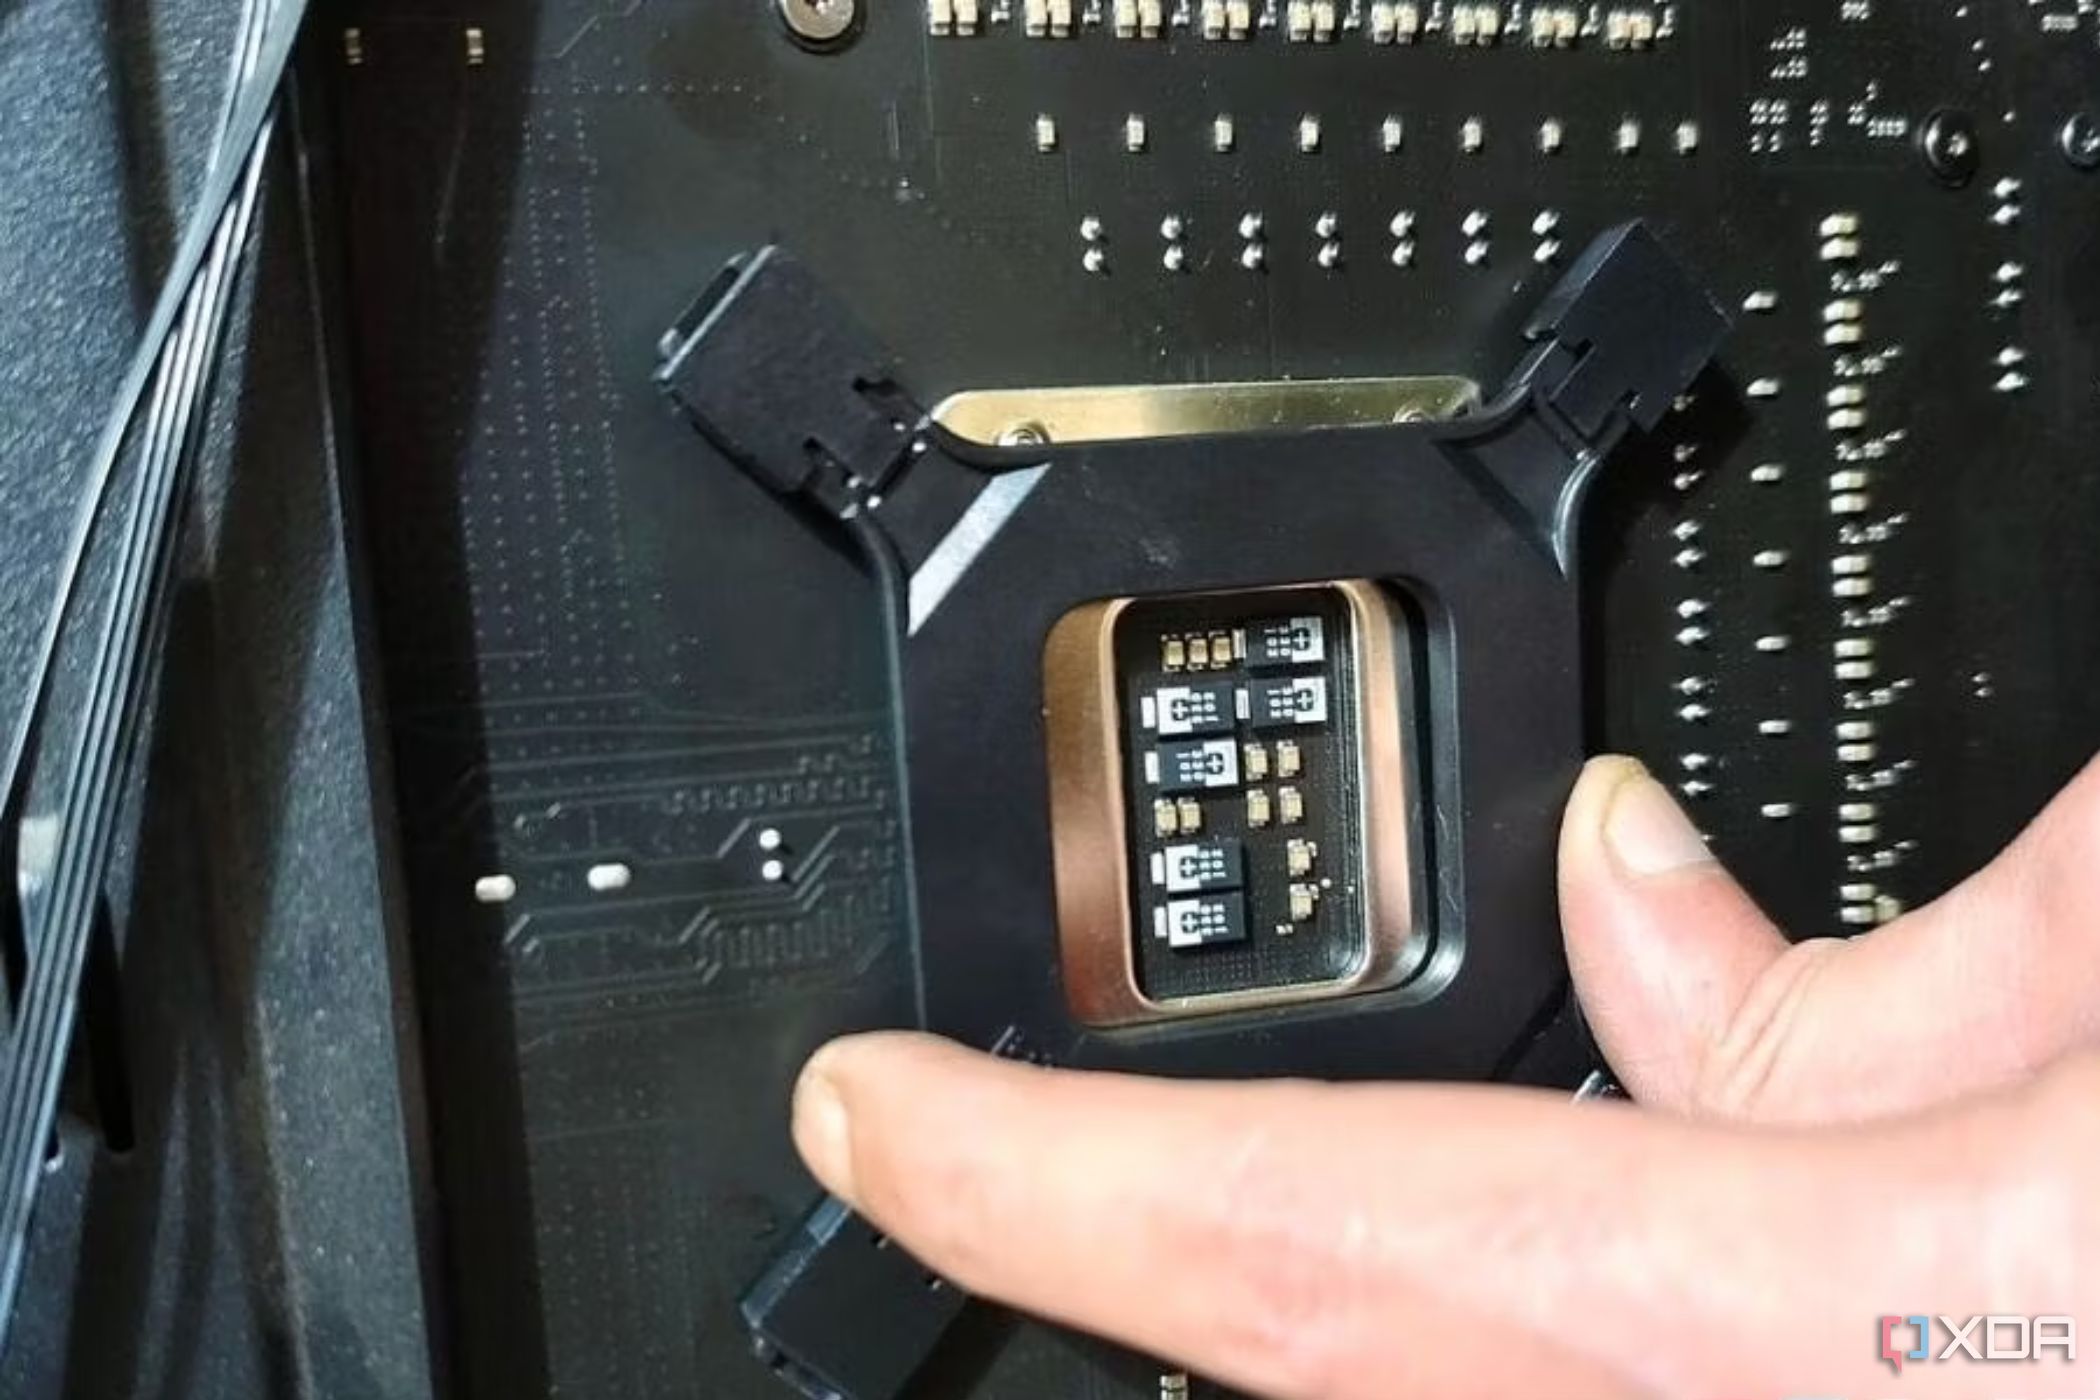
- Begin by putting in the backplate behind the motherboard, by holding it in place and securing it with the assistance of standoff on the entrance.
- Apply thermal paste if wanted.
- Line up your CPU cooler by holding it on prime of the CPU, fastidiously lining up the cooler with the holes on the board or the standoffs we put in earlier.
Take away the fan(s) from the heatsink in case you’re putting in an enormous cooler to get further clearance for aligning the screws and putting in it.
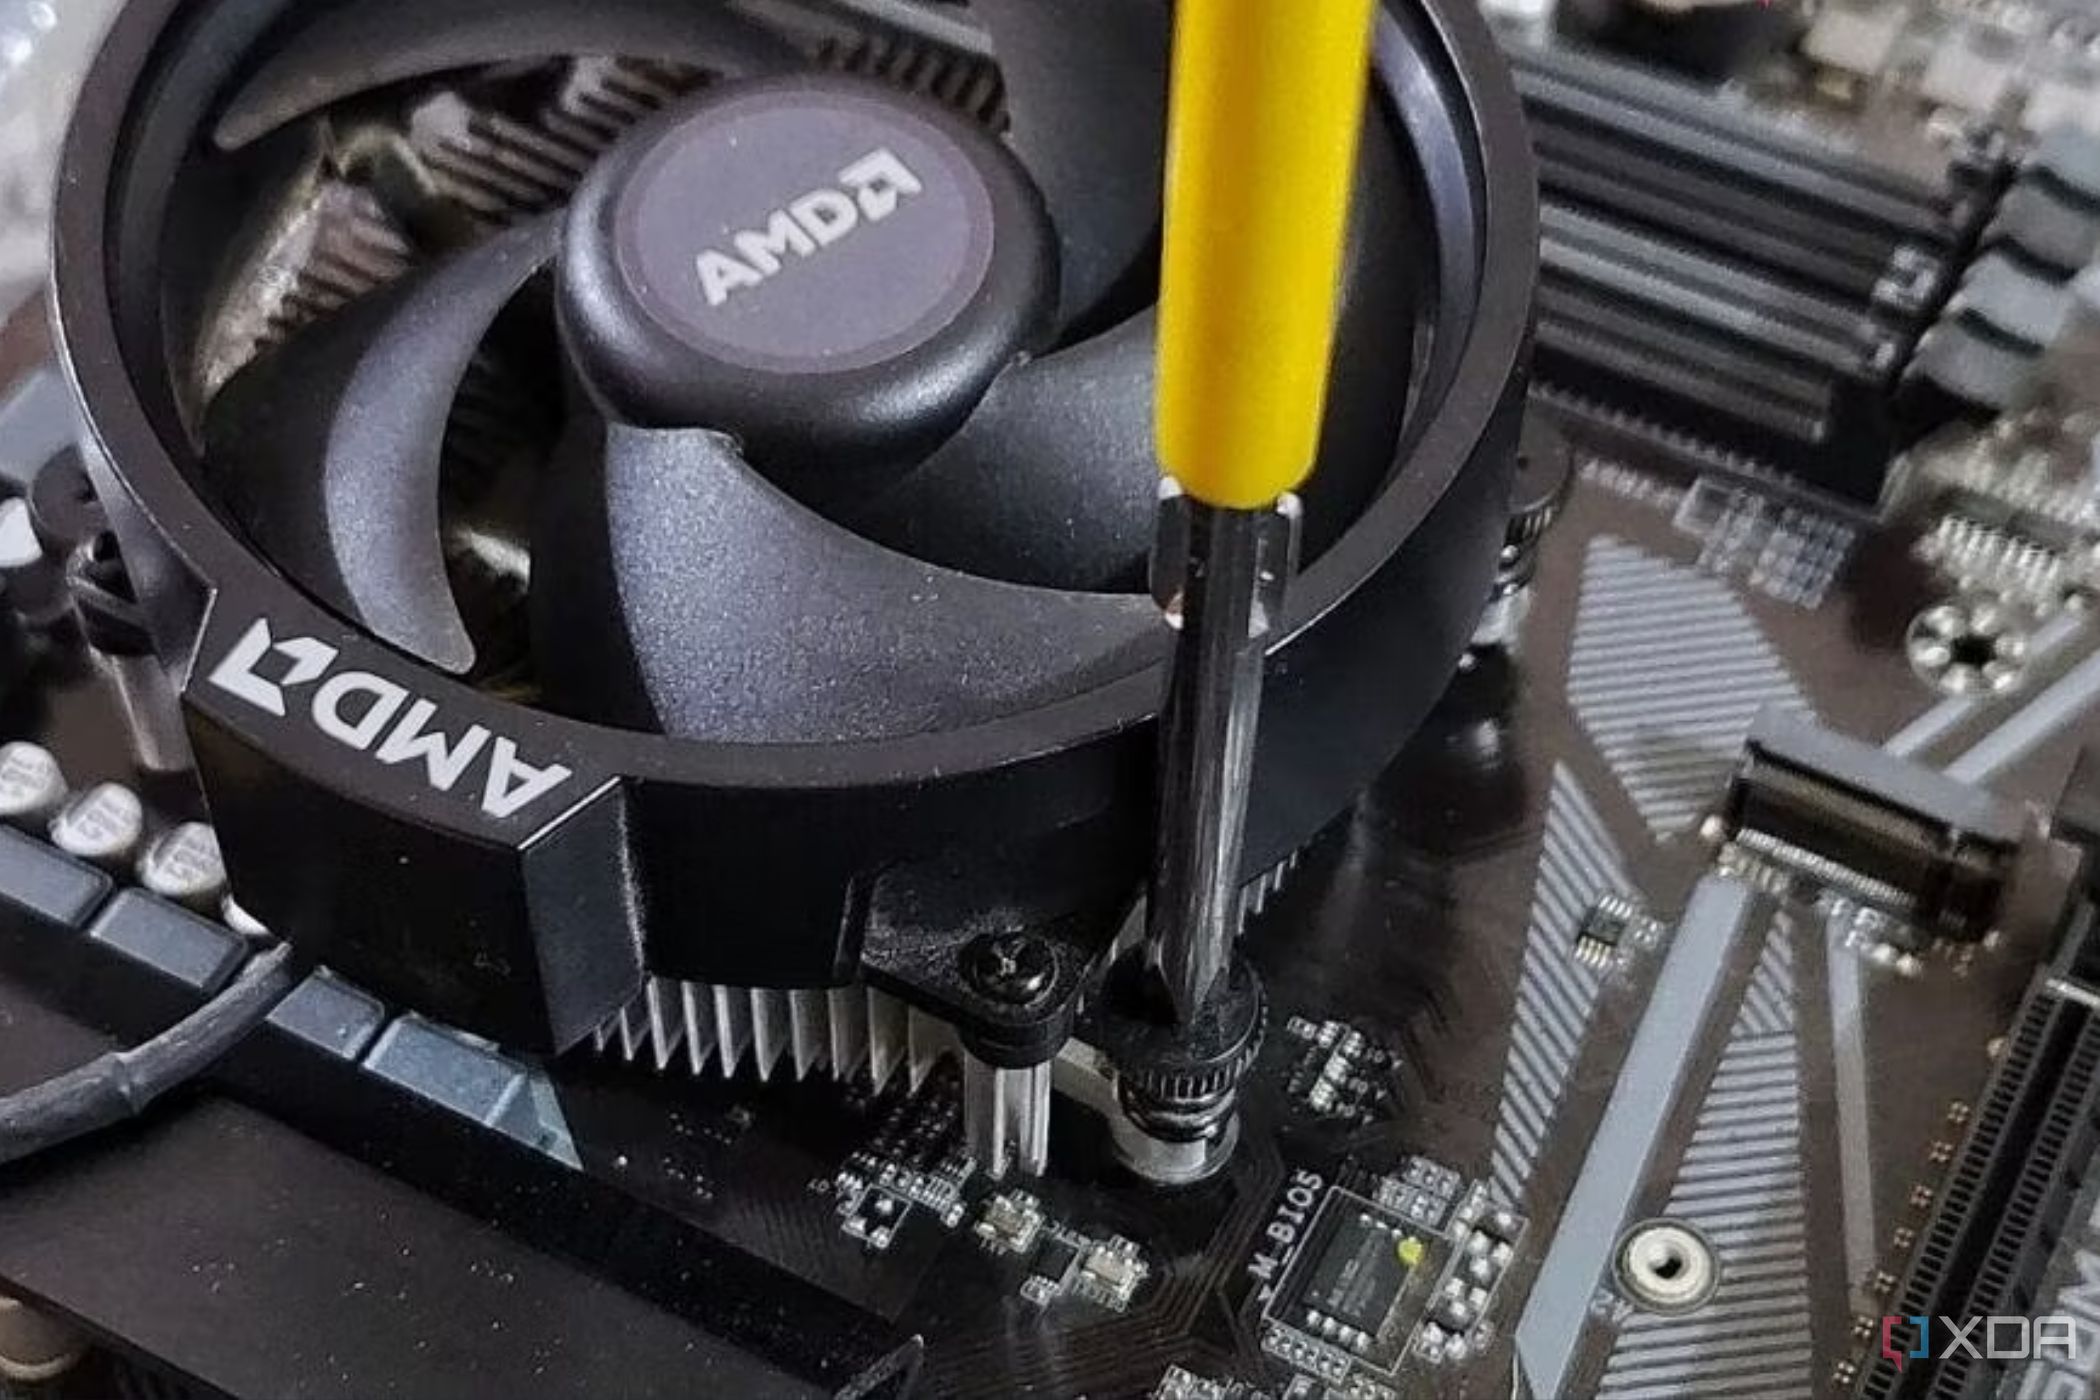
- Safe the CPU cooler by securing the diagonally reverse screws to create even stress on the CPU’s built-in warmth spreader (or IHS).
- Fastidiously mount the followers on the heatsink now in case you eliminated them earlier to finish the set up. Seek the advice of the handbook in case you do not keep in mind which strategy to connect the followers.


And that is it, it’s best to now join the air cooler’s cable to the fan header on the motherboard to get it up and operating.
Learn how to set up a liquid cooler
Wants a couple of further steps to mount the radiator

Putting in a CPU liquid cooler is a bit more difficult and entails a couple of further steps. We’ll be exhibiting you the best way to set up an all-in-one (AIO) liquid cooler on this information. The AIO liquid coolers are closed-loop liquid coolers that include a pre-assembled CPU water block, pipes, a radiator, and wherever from one to a few followers. The method of establishing a customized cooling loop is a little more advanced, however it’s past the scope of this newbie’s information.
We’re putting in a high-end AIO for this information with a 360mm radiator, however the course of stays the identical for all sizes, together with the smaller 120mm unit.
- Begin by putting in the backplate behind the motherboard, by holding it in place and securing it with the assistance of standoffs on the entrance.
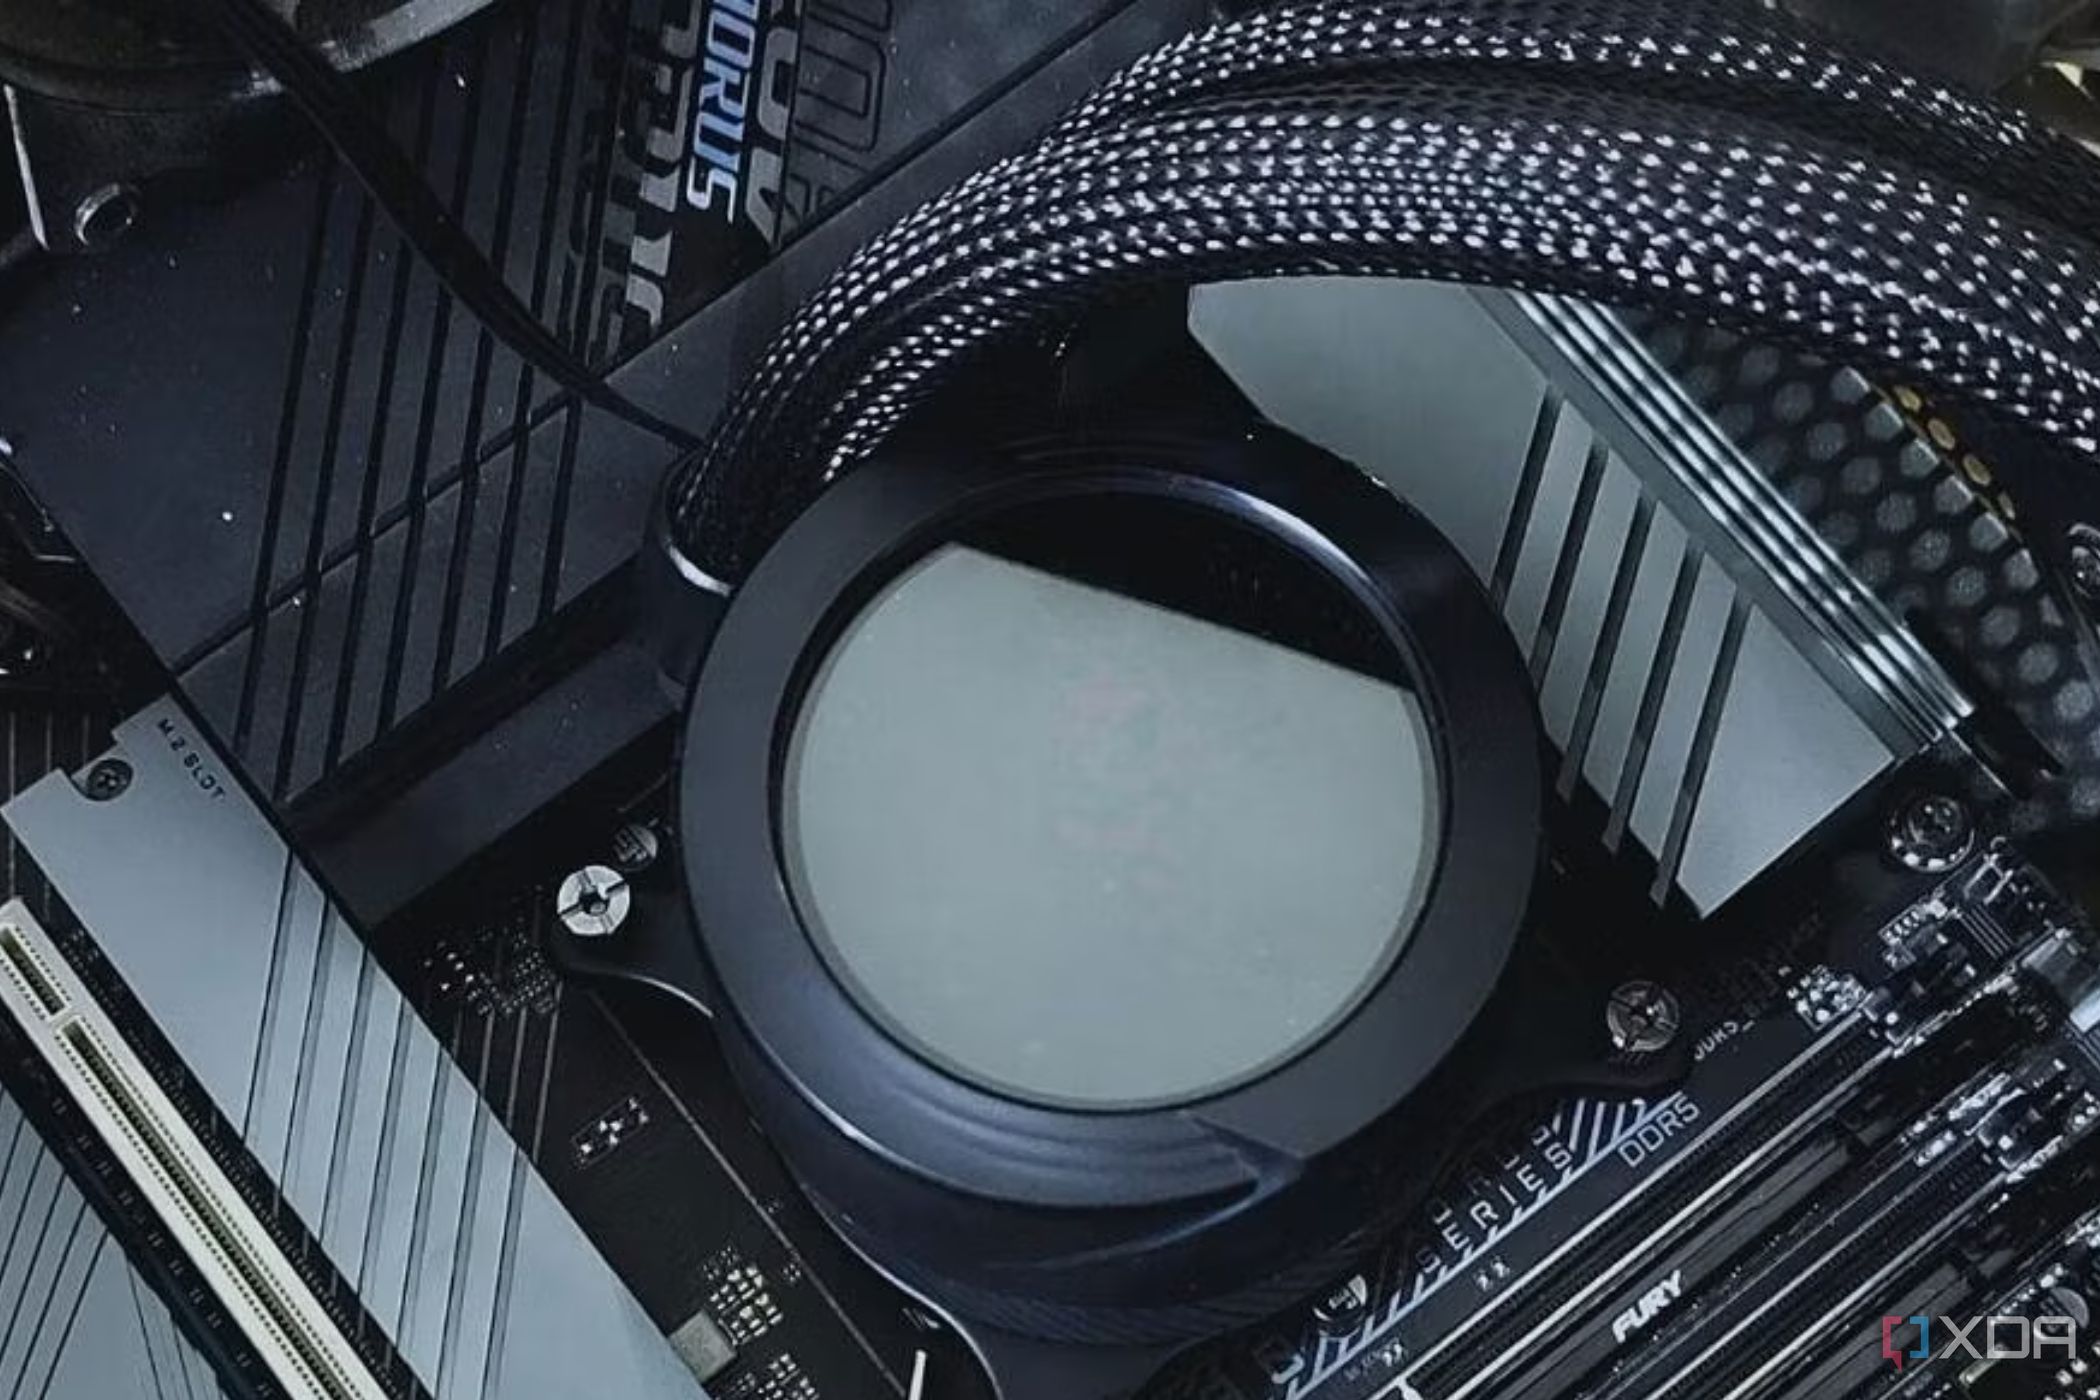
- Apply thermal paste if wanted, and mount the waterblock by holding it on prime of the CPU, fastidiously lining it up with the holes on the board or the standoffs.
- Set up the followers for the radiator. You possibly can both mount the followers on the radiator itself or set up them individually on the case relying on how a lot area you’ve gotten.
- Mount the radiator on the case relying on the clearance for it, and safe them with lengthy screws which might be bundled with the cooler. 240mm radiator and above are usually put in both on the entrance or the highest panel of the case.
- Make certain the coolant pipes transfer freely and are not in touch with different elements, particularly the case followers.


And that is it. Your liquid cooler is now able to be powered on and funky the CPU.
Plug every part in for energy
The ultimate step

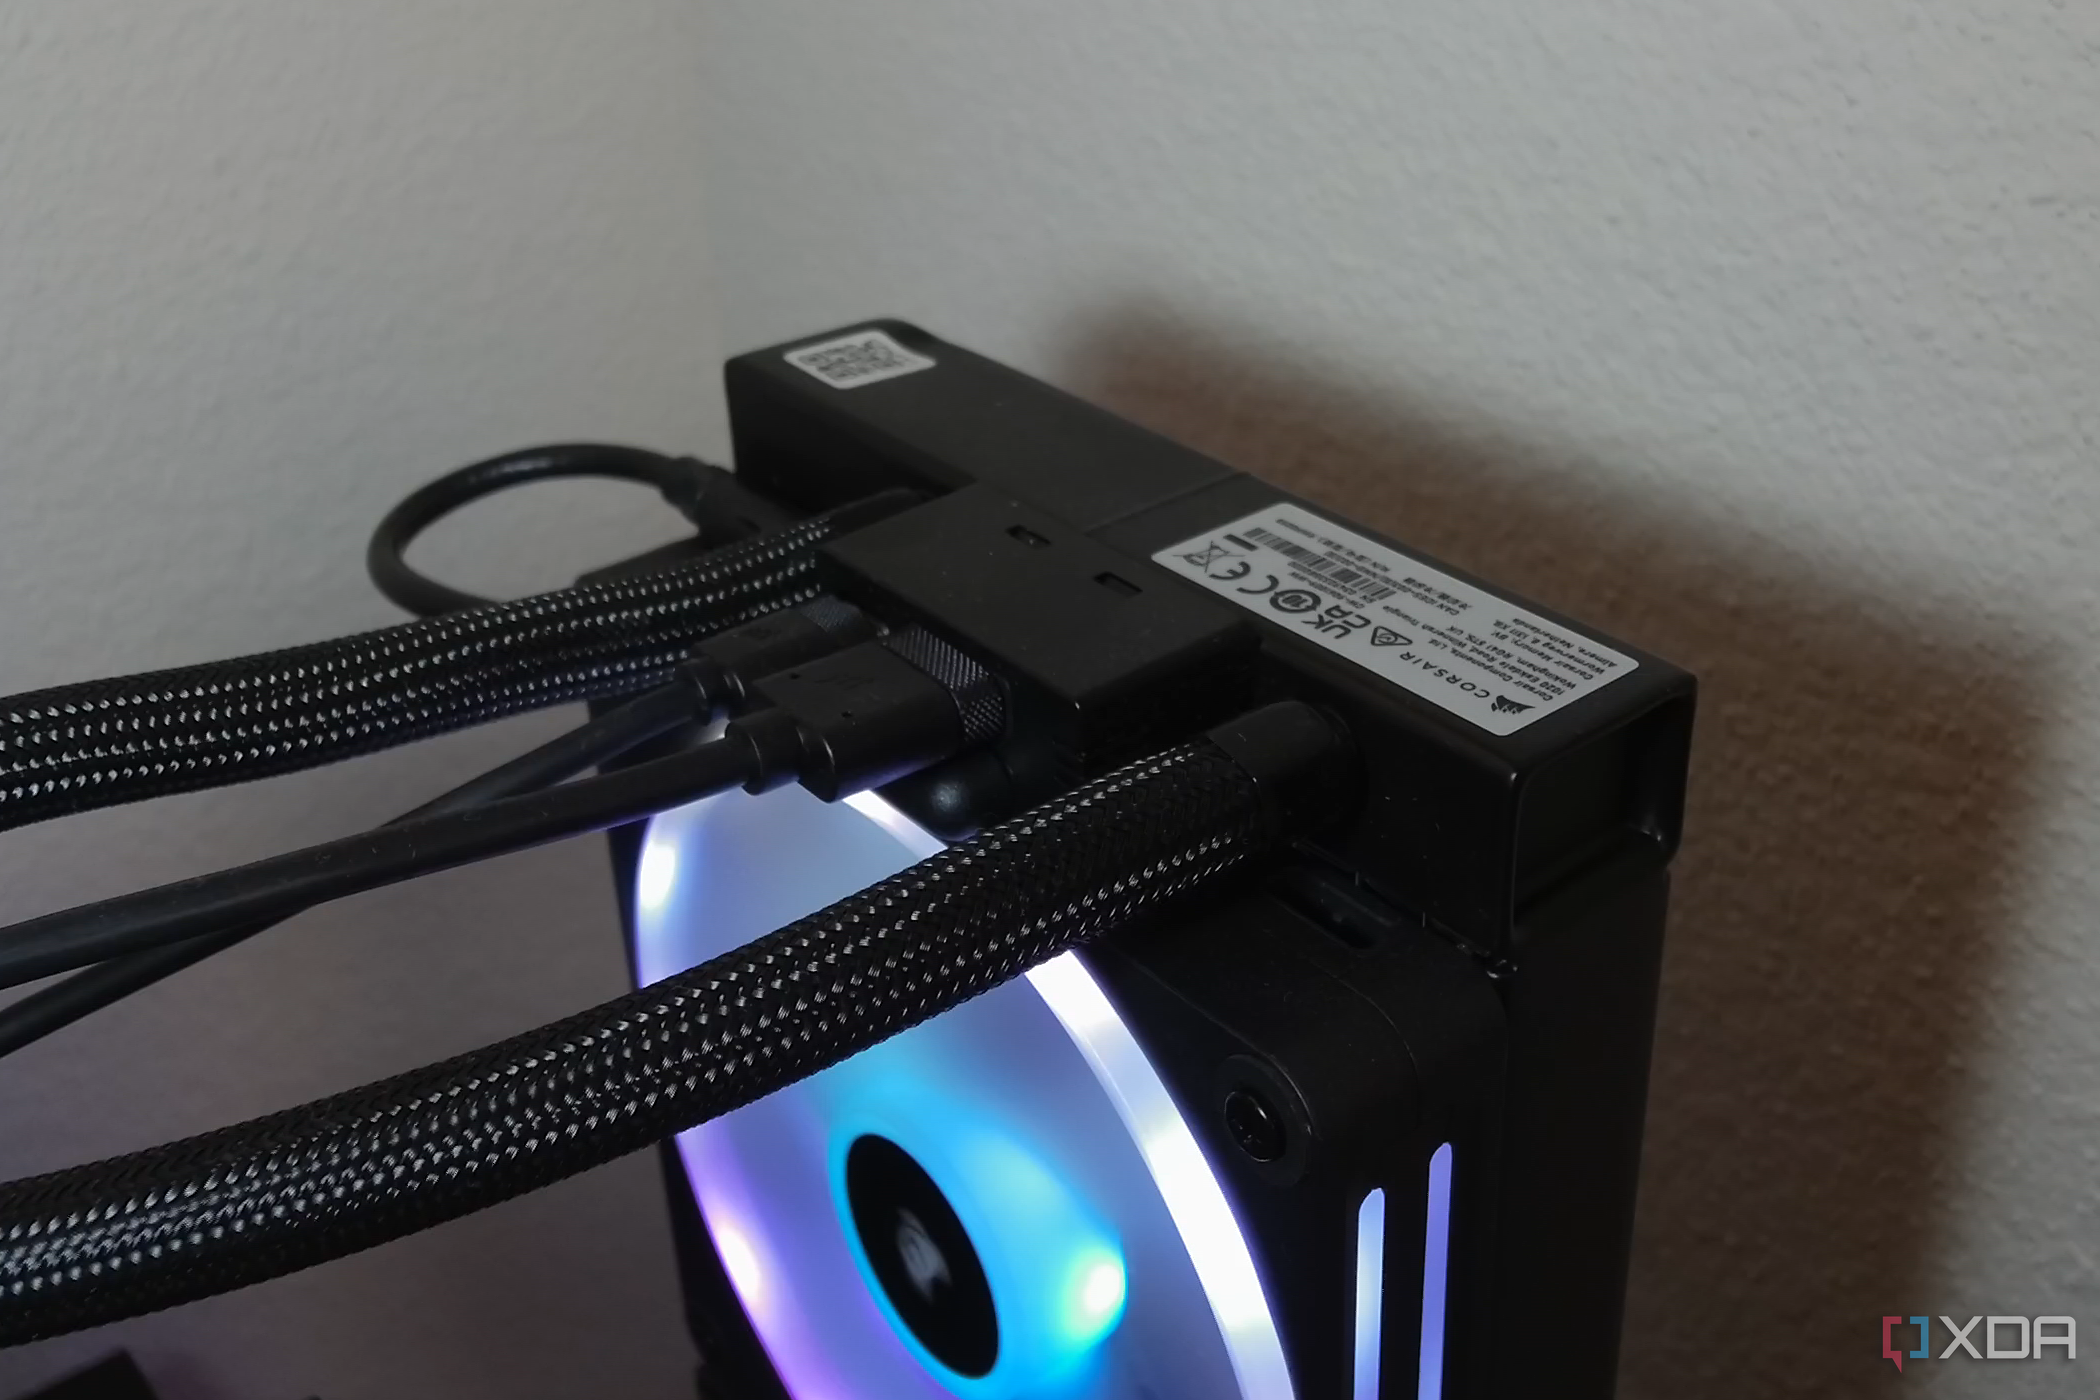
After you have every part hooked up, it is time to make sure you’ve related the ability and RGB cables to their respective headers on the motherboard. This can be a essential step with out which your CPU cooler will not work, and you will not have a working PC. For CPU air coolers, you simply want to ensure all of the followers are plugged in, however liquid coolers additionally want the pump related as nicely. Often, there is a particular fan header on the motherboard for pumps. Relying on the variety of followers, you could have to make use of a controller to make your connections simpler to handle. We advocate consulting each the CPU cooler and the motherboard handbook to seek out the right headers to attach them, because the steps change relying on the cooler.
Closing ideas
With that, you have efficiently put in the CPU cooler in your construct. Choosing the perfect CPU cooler in your construct is extraordinarily necessary. There are many CPU coolers to select from, so you’ll want to go along with the one which fits your construct. Inventory coolers bundled with the CPU are greater than sufficient to keep up the thermal output of the CPUs underneath inventory settings. That being mentioned, we advocate stepping as much as a greater third-party cooler in case you plan on overclocking the CPU. Good luck!