
Home windows requires a PIN when projecting your laptop onto one other display screen, comparable to a projector or a second monitor. Doing so prevents others from accessing your non-public info or projecting their content material onto your laptop.
Nonetheless, in case you’re the one particular person utilizing your laptop, it’s possible you’ll discover this additional safety measure pointless. Let’s discover the way to disable the “require PIN for pairing” setting when projecting to your PC in Home windows 11.
1. Utilizing Home windows Settings
Home windows has a built-in app that lets you change varied settings. You need to use this app to show off the “require PIN for pairing” setting when projecting to your PC. Right here’s the way to do it:
- Open the Settings menu.
- From the left sidebar, choose the System tab.
- Scroll all the way down to the Projecting to this PC part and click on on it.
On the subsequent web page, search for the Require a PIN for pairing setting. Click on on its drop-down menu, and also you’ll see three choices:
- By no means: By no means ask for a PIN for pairing when projecting to this PC.
- First Time: Require a PIN the primary time you’re projecting to this PC.
- All the time: All the time requiring a PIN for pairing when projecting to this PC.
Select the By no means choice and exit the Settings window. The settings will probably be saved mechanically, and also you received’t must enter a PIN when projecting your laptop onto one other show.
If you happen to don’t see Require a PIN for pairing within the Projecting to this PC part, the function is disabled in your laptop.
To allow this function, click on on the Elective options hyperlink. You can even navigate to Settings > Apps > Elective options to entry the identical web page. Doing so will open the elective options window.

Click on the Add an elective function button and seek for Wi-fi Show. It is best to see the Wi-fi Show function listed within the search outcomes. Verify the field subsequent to it and click on Subsequent > Set up.

As soon as the function is put in, return to the Projecting to this PC part in Settings. It is best to now see the “require a PIN for pairing” setting. Select the By no means choice and shut the window.
2. Utilizing the Group Coverage Editor
Another choice is to make use of the Group Coverage Editor. This methodology requires you to have a Professional or Enterprise Home windows model. Nonetheless, you’ll be able to activate the Group Coverage Editor in Home windows Residence Version.
When you’ve carried out that, observe these steps to show off the function:
- Press Win + R in your keyboard to open the Run dialog field.
- Kind gpedit.msc within the textual content subject and press Enter. It will open the Group Coverage Editor window.
- From the left sidebar, navigate to the next path:
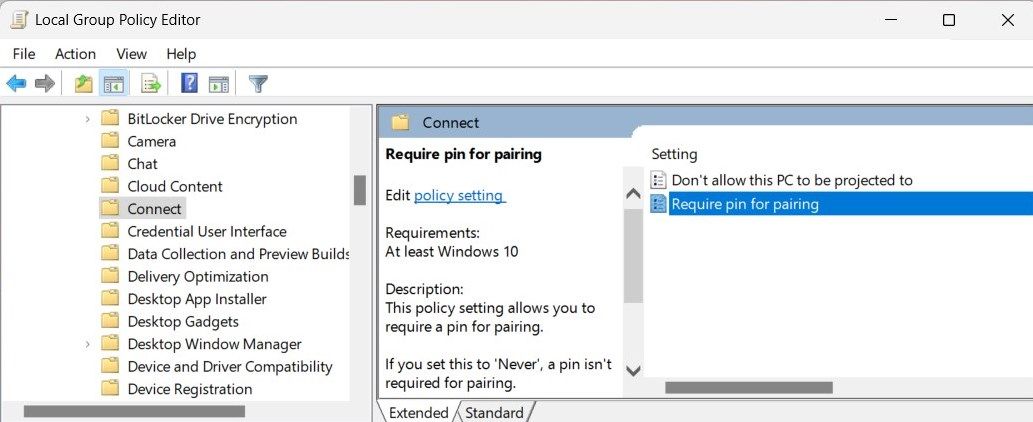
Laptop Configuration > Administrative Templates > Home windows Parts > Join - On the appropriate facet of the window, search for Require pin for pairing and double-click on it. Doing so will open the coverage settings web page.
- Choose the Enabled radio button and choose By no means from the drop-down menu.
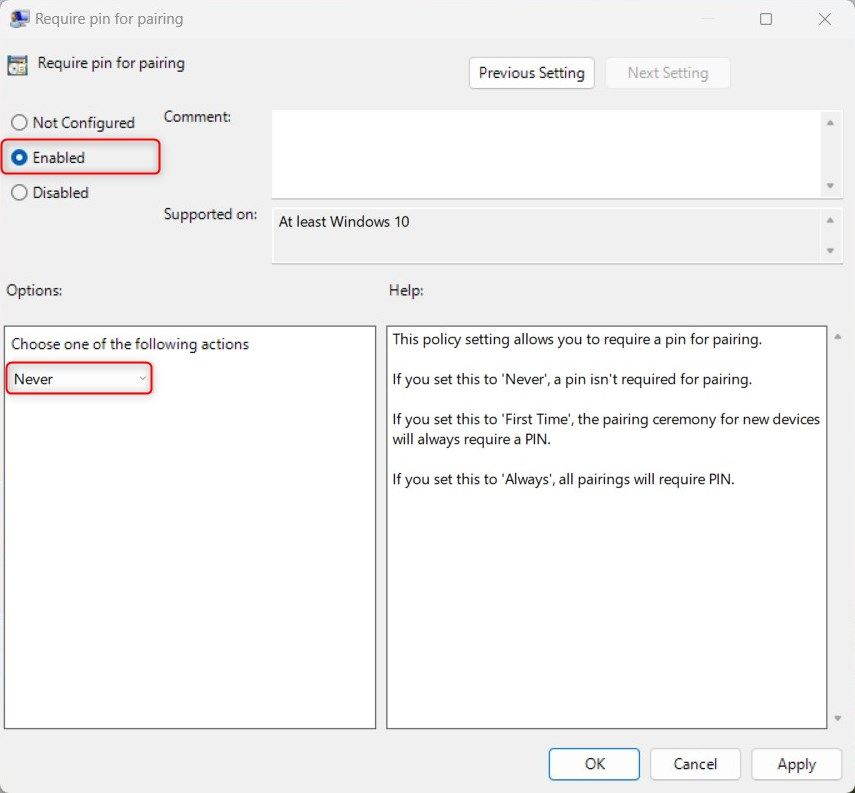
- Click on Apply > OK to save lots of the modifications.


After that, exit out of the window. When projecting your laptop onto one other display screen, you received’t want a PIN anymore.
3. Utilizing the Registry Editor
If you happen to can’t entry the Group Coverage Editor, you should utilize the Registry Editor to disable the “Require PIN for Pairing” setting. This methodology includes enhancing the Home windows registry, so making a system restore level and backing up the registry earlier than continuing is crucial. That manner, you’ll be able to simply restore your laptop if something goes flawed.
When you’ve carried out that, observe these steps to show off the function:
- Press the Home windows key to open the Begin menu.
- Kind regedit within the search bar and hit Enter to open the Registry Editor.
- If the Person Account Management window prompts, click on Sure to provide this system permission.
- Within the left sidebar, navigate to this path:
ComputerHKEY_LOCAL_MACHINESOFTWAREPoliciesMicrosoftWindowsConnect - If you happen to don’t see the Join key at this location, right-click on Home windows and choose New > Key. Identify it Join and press Enter.
- Now, right-click on Join and choose New > DWORD (32-bit) Worth.
- Identify the worth RequirePinForPairing and press Enter. Doing so will create a brand new DWORD within the registry.
- Double-click on this newly created worth to open its Properties window.
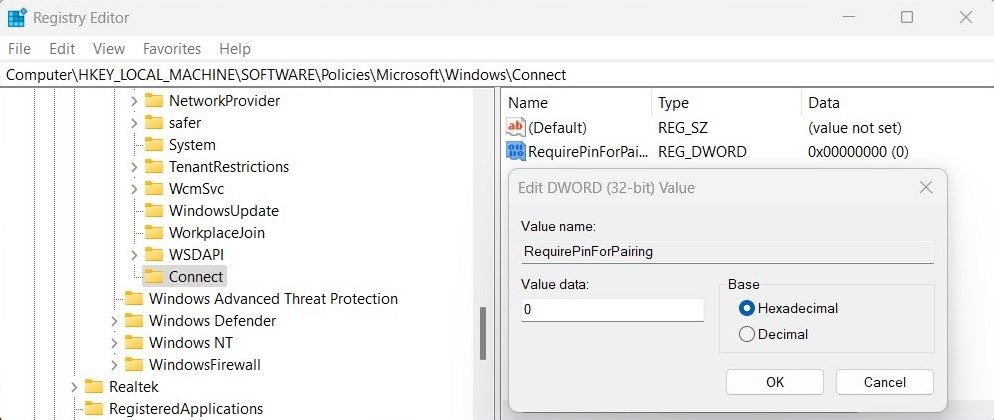
- Set the Worth information to 0 and click on OK to save lots of the modifications.

As soon as you have carried out that, exit the Registry Editor window and restart your laptop. After restart, you will not want a PIN when projecting your laptop onto one other display screen.
To show the function again on, observe the identical steps however set the Worth information to 1. It will allow the required PIN for pairing settings when projecting to a Home windows 11 PC.
4. Utilizing a REG File
The fourth and last choice is to make use of a REG file. This methodology is for many who have little or no expertise with the Registry Editor. The REG file comprises directions that edit the Home windows registry in your behalf. If you happen to’d fairly use this methodology, right here’s what you want to do:
- Proper-click on Begin and choose Run from the menu.
- Kind Notepad within the textual content subject and press Enter.
- Within the Notepad window, kind or copy-paste the next code traces:
 <code>Home windows Registry Editor Model 5.00[HKEY_LOCAL_MACHINESOFTWAREPoliciesMicrosoftWindowsConnect]
"RequirePinForPairing"=dword:00000001 - Click on File and choose Save as from the menu.
- Within the Save As window, click on the Save as kind drop-down menu and choose All recordsdata.
- Identify the file DisableRequirePin.reg and choose Desktop from the left sidebar.
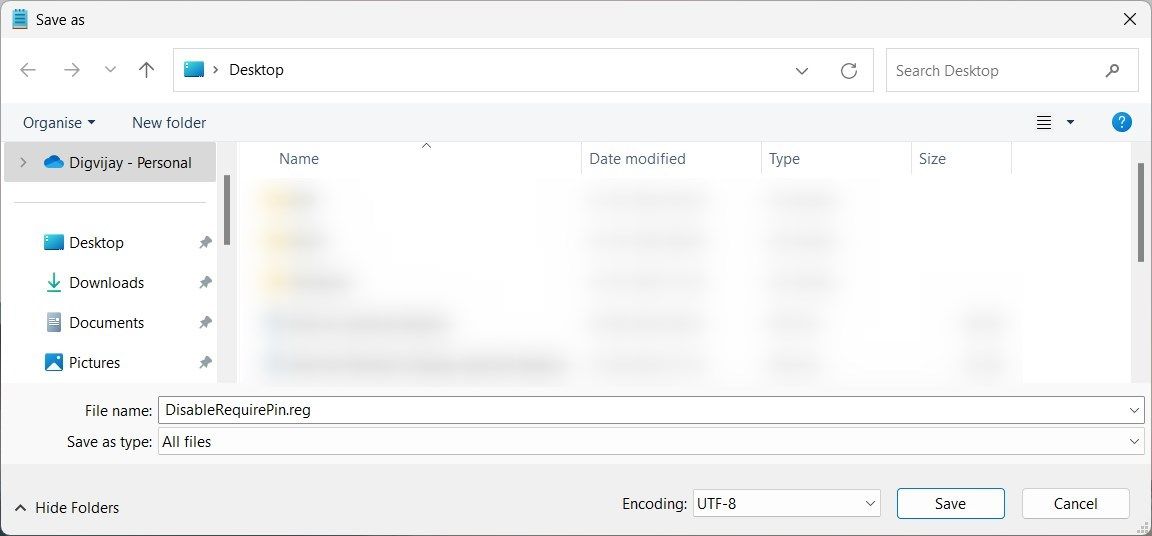
- Now click on Save and exit Notepad. You may discover the REG file in your desktop.
- Double-click on it and choose Sure when prompted. It will edit the registry in your behalf.

As soon as carried out, restart your laptop and the settings will probably be saved mechanically. You will not must enter a PIN when projecting your PC onto one other display screen.
If you happen to ever wish to re-enable this function, repeat the identical steps as above and use this code in Notepad:
 <code>Home windows Registry Editor Model 5.00[HKEY_LOCAL_MACHINESOFTWAREPoliciesMicrosoftWindowsConnect]
"RequirePinForPairing"=dword:00000003
Save the file with the EnableRequirePin.reg filename and double-click on it to edit the registry.
After that, restart your laptop and the setting will probably be enabled. You may now must enter a PIN every time you venture the PC onto one other display screen.
Venture to a Home windows 11 PC With out Requiring a PIN
Projecting your PC onto one other show is a helpful function that lets you mirror or prolong your laptop display screen. Now you understand how to take action without having to enter your PIN each time.