
Except for their blazing-fast speeds, SSDs are sometimes extra dependable than onerous drives. However that doesn’t imply they’re infallible. In actual fact, consistently subjecting your previous SSD to jot down operations will make it weak to unhealthy sectors, corruption, and different points.
Fortunately, you need to use sure Terminal instructions, DIY fixes, and third-party apps to revive an SSD, and this text covers every methodology that will help you salvage your malfunctioning drive.
How you can examine the SSD for errors in Home windows
Home windows 11 has an error-checking utility that’s ok for fundamental SSD troubleshooting. You possibly can comply with these steps to launch the instrument.
- Open File Explorer.
- Proper-click on the defective drive and select Properties.
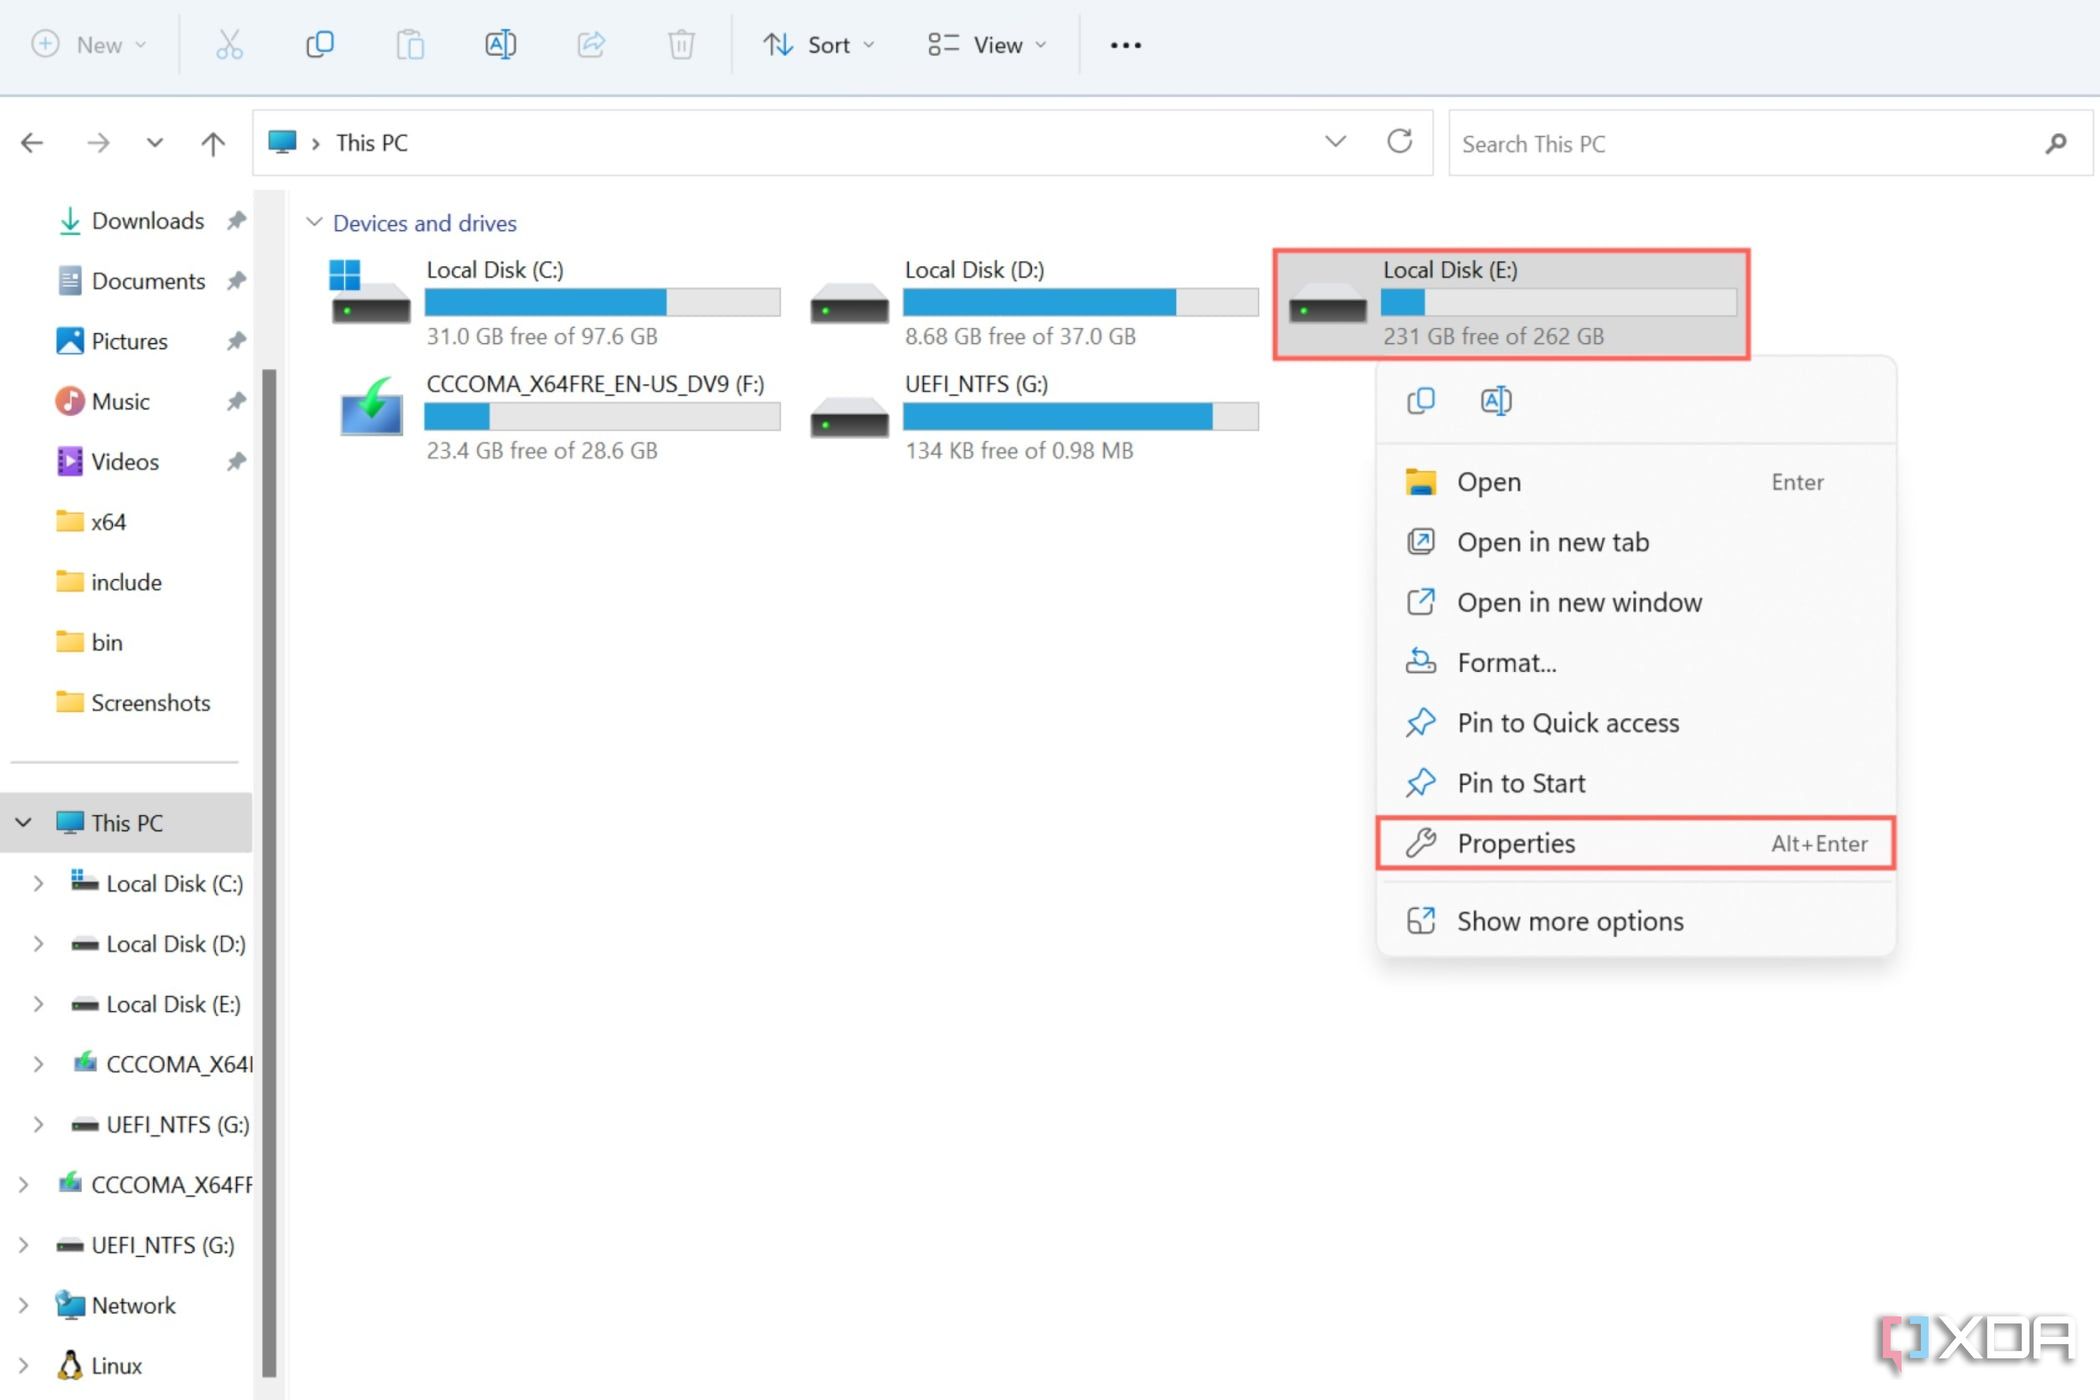
- Navigate to the Instruments header and choose Examine beneath the Error-checking part.
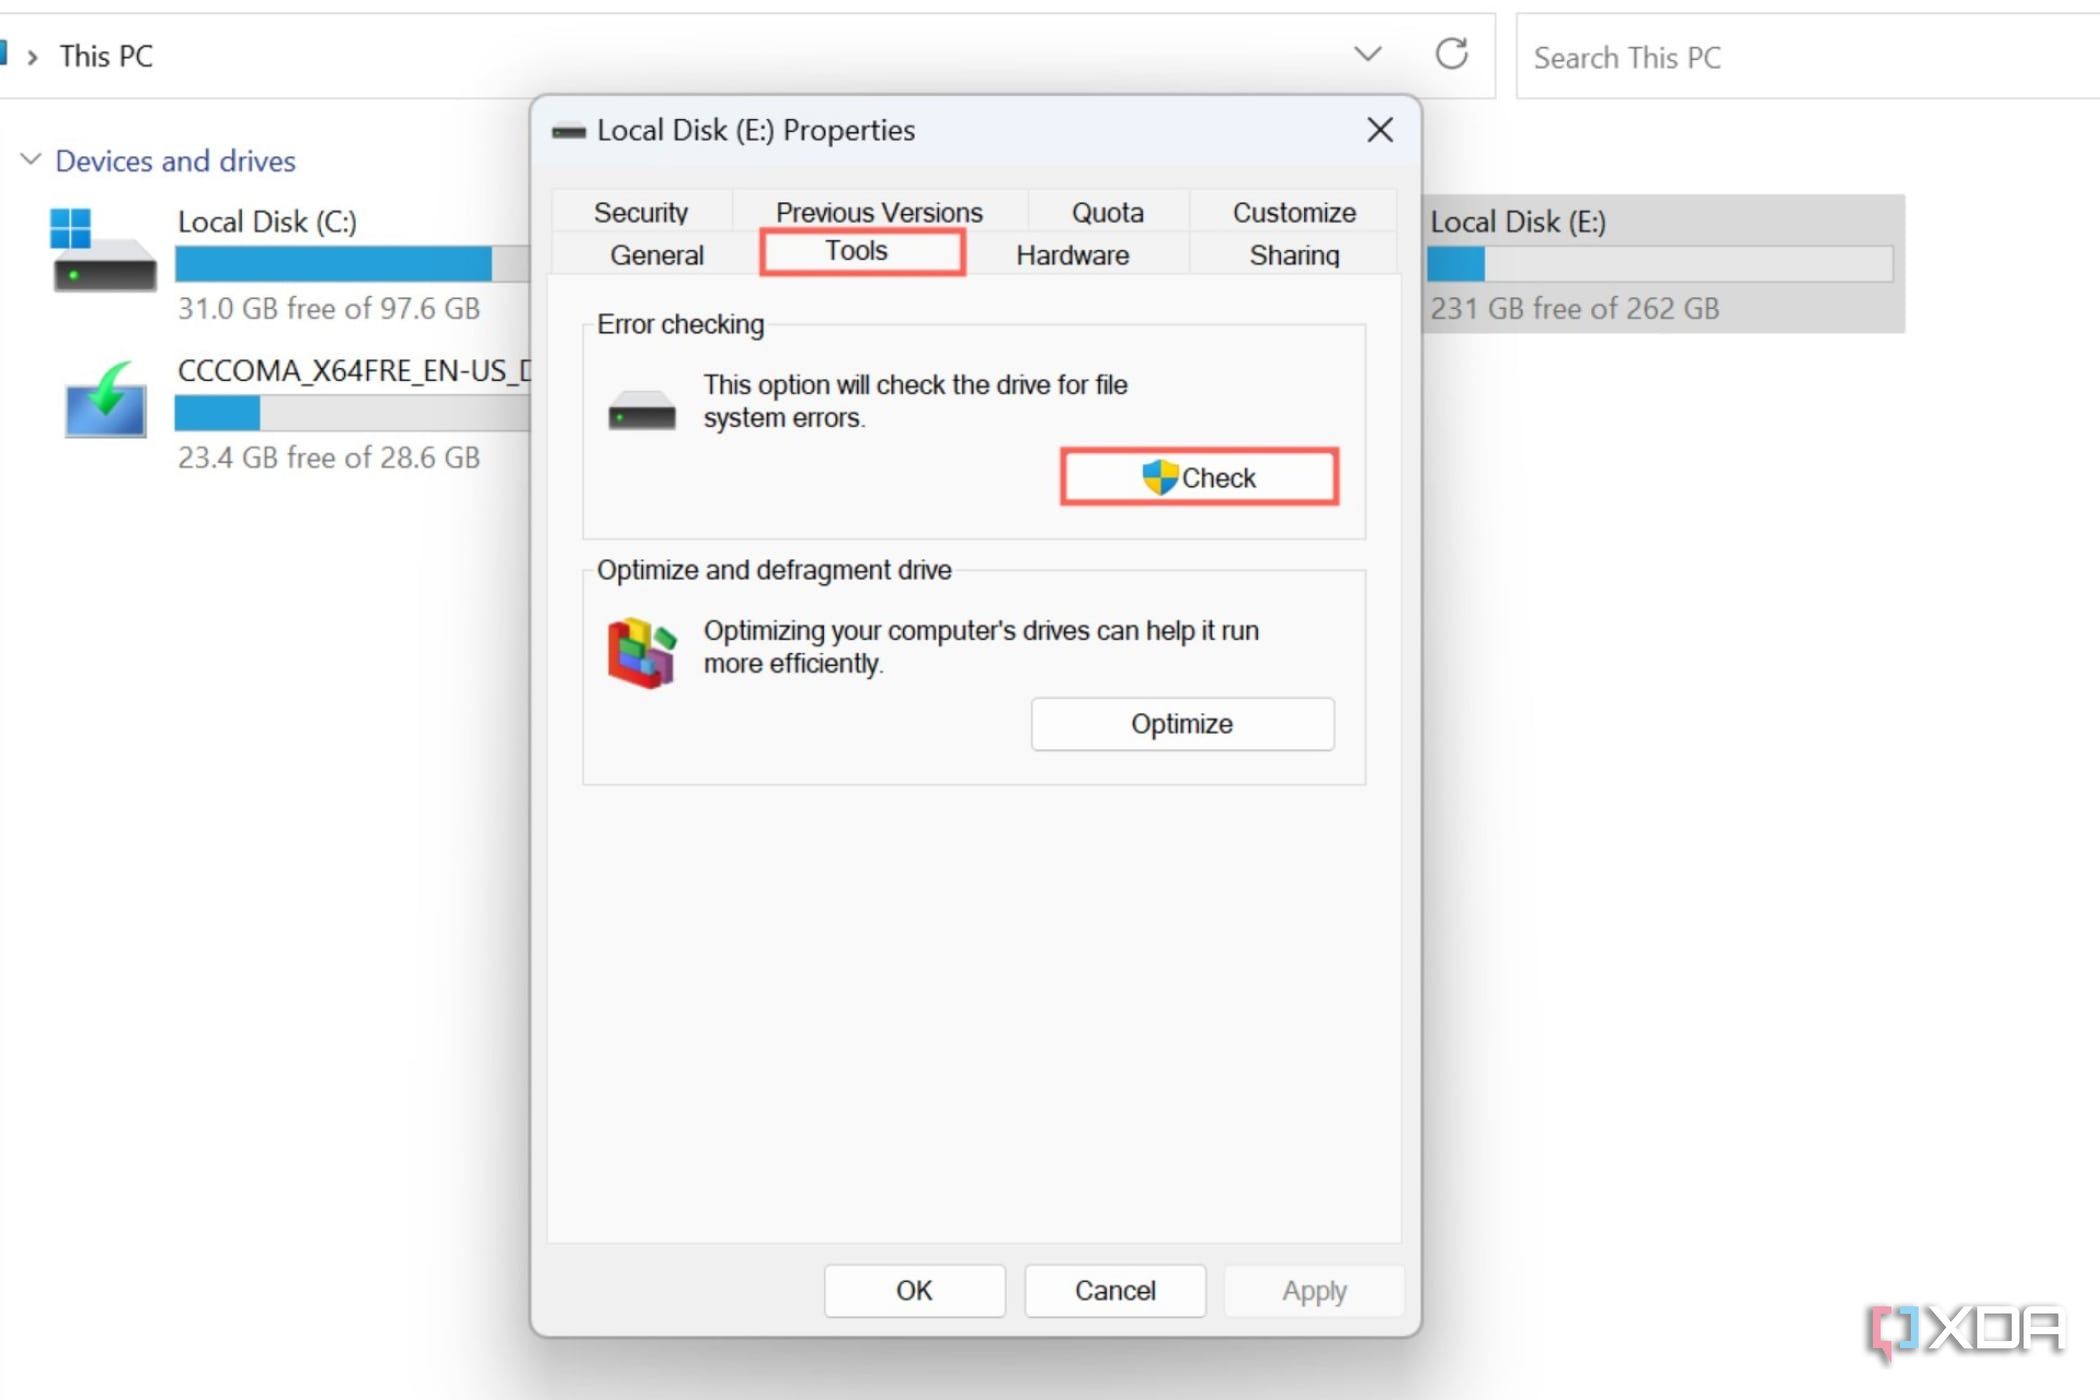
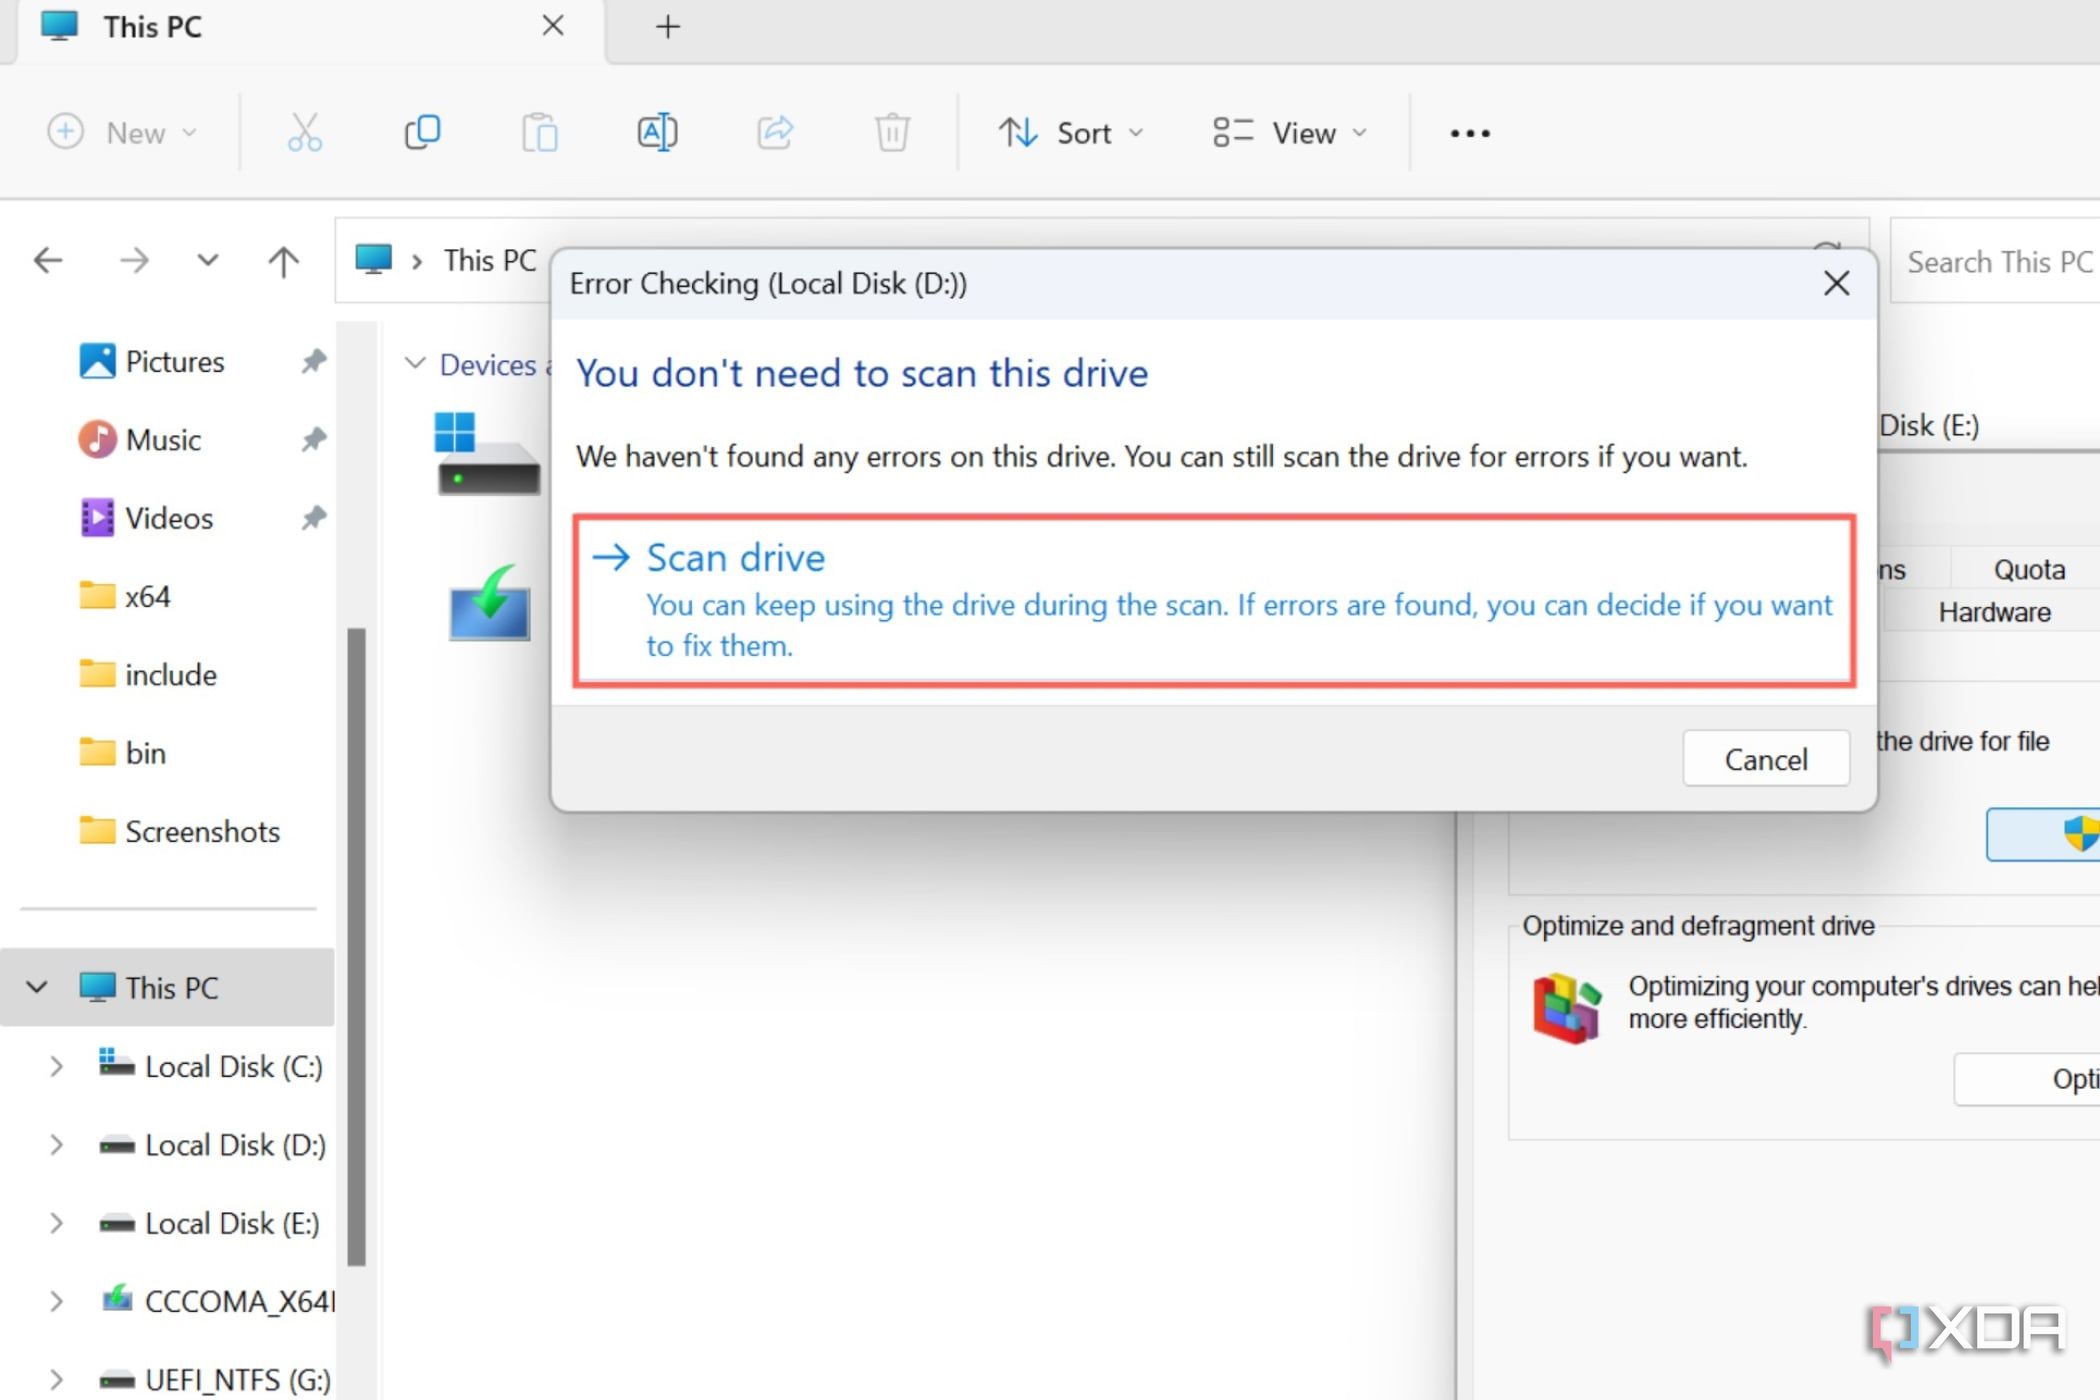
- Select the Scan Drive possibility from the pop-up window.


How you can examine the SSD for errors utilizing CrystalDiskInfo
For the reason that aforementioned Home windows instrument would not give an in depth report of the errors, you need to use a third-party software like CrystalDiskInfo in your SSD’s well being.
- Obtain CrystalDiskInfo from the official web site and extract the .zip folder as soon as it has completed downloading.
- Run DiskInfo64.exe with admin privileges.
- You possibly can see the Well being Standing of the drive within the top-left nook of the app.
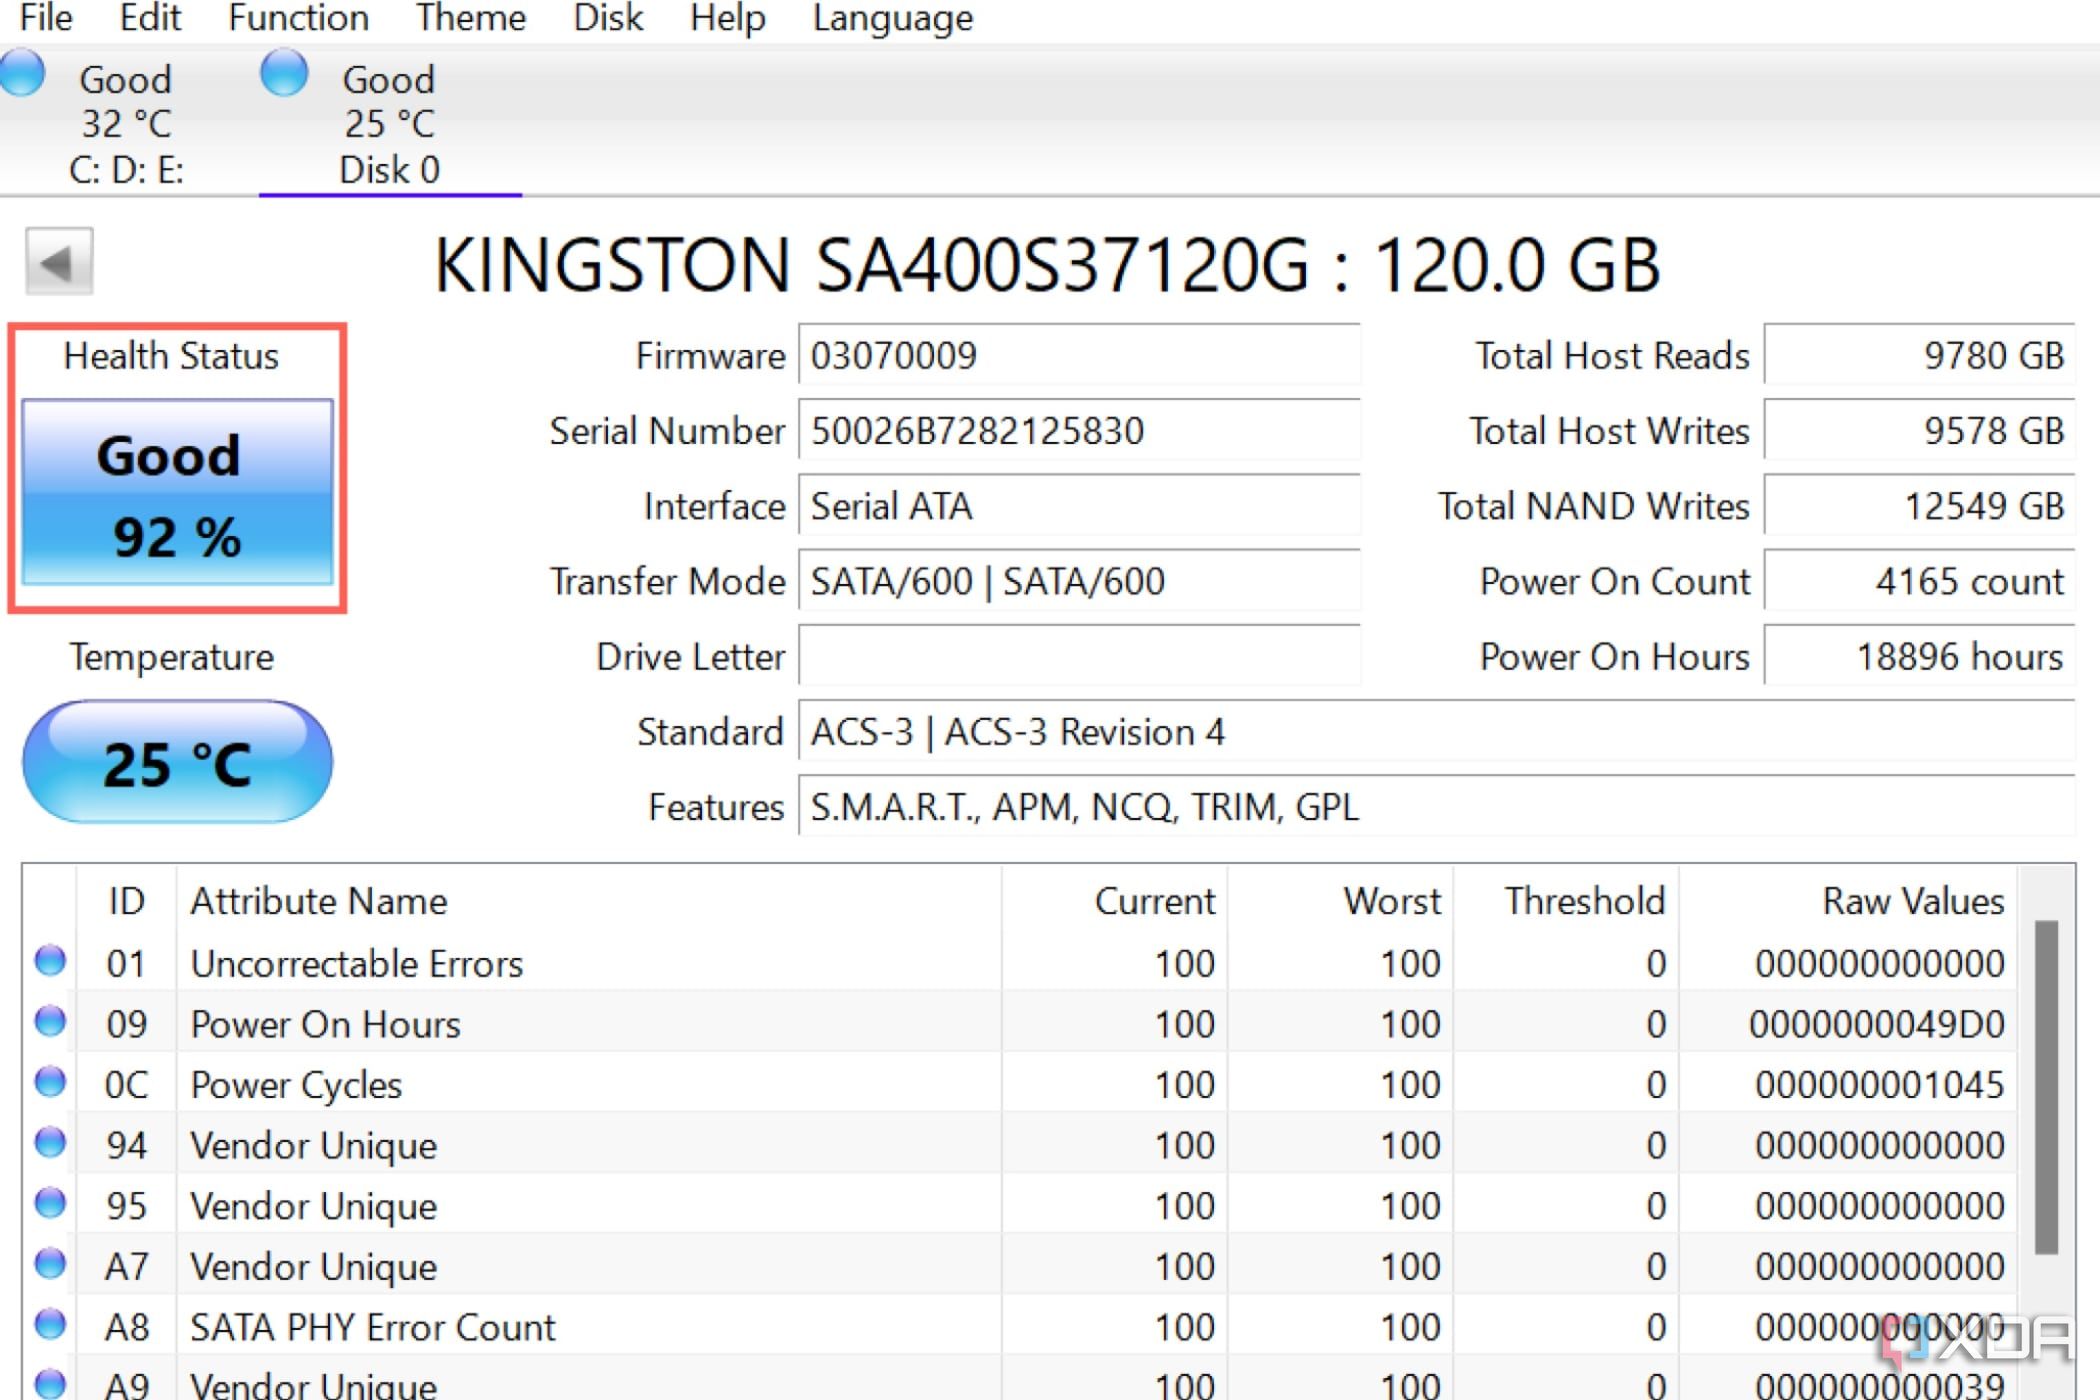

If the app exhibits your SSD well being as “Good,” then you definitely’re within the clear. But when the drive well being indicator reads “Warning” or “Dangerous,” you need to again up your PC after which transfer on to the precise fixes.
How you can repair your SSD by updating the drivers and firmware
Putting in the most recent drivers is the very first thing you need to do for any malfunctioning {hardware}, together with the SSD.
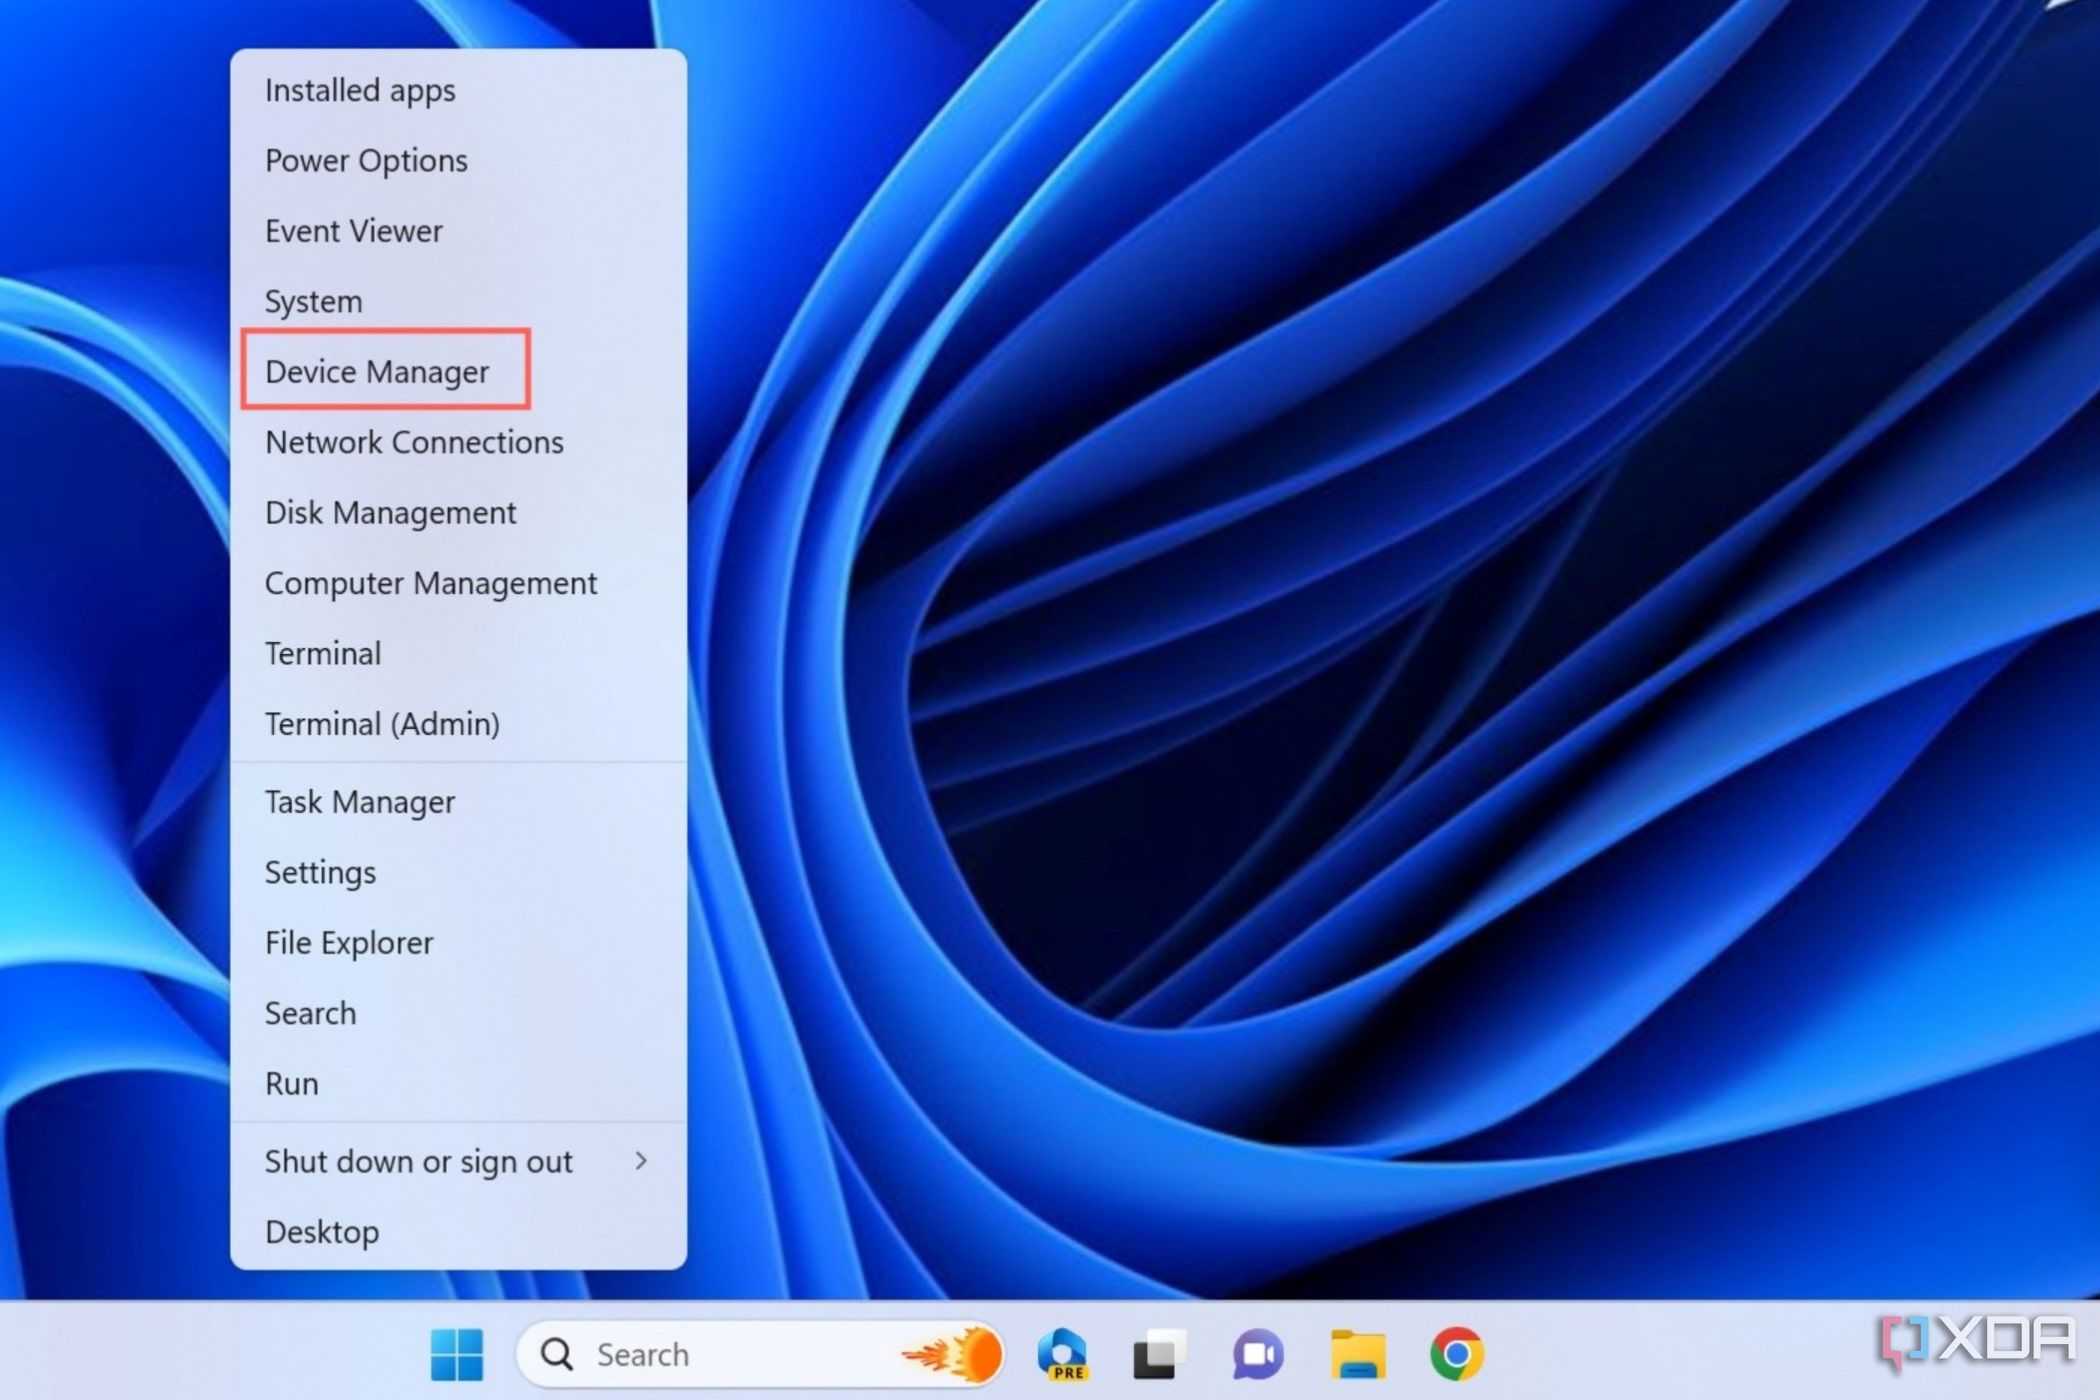
- Proper-click on the Begin button and choose System Supervisor.
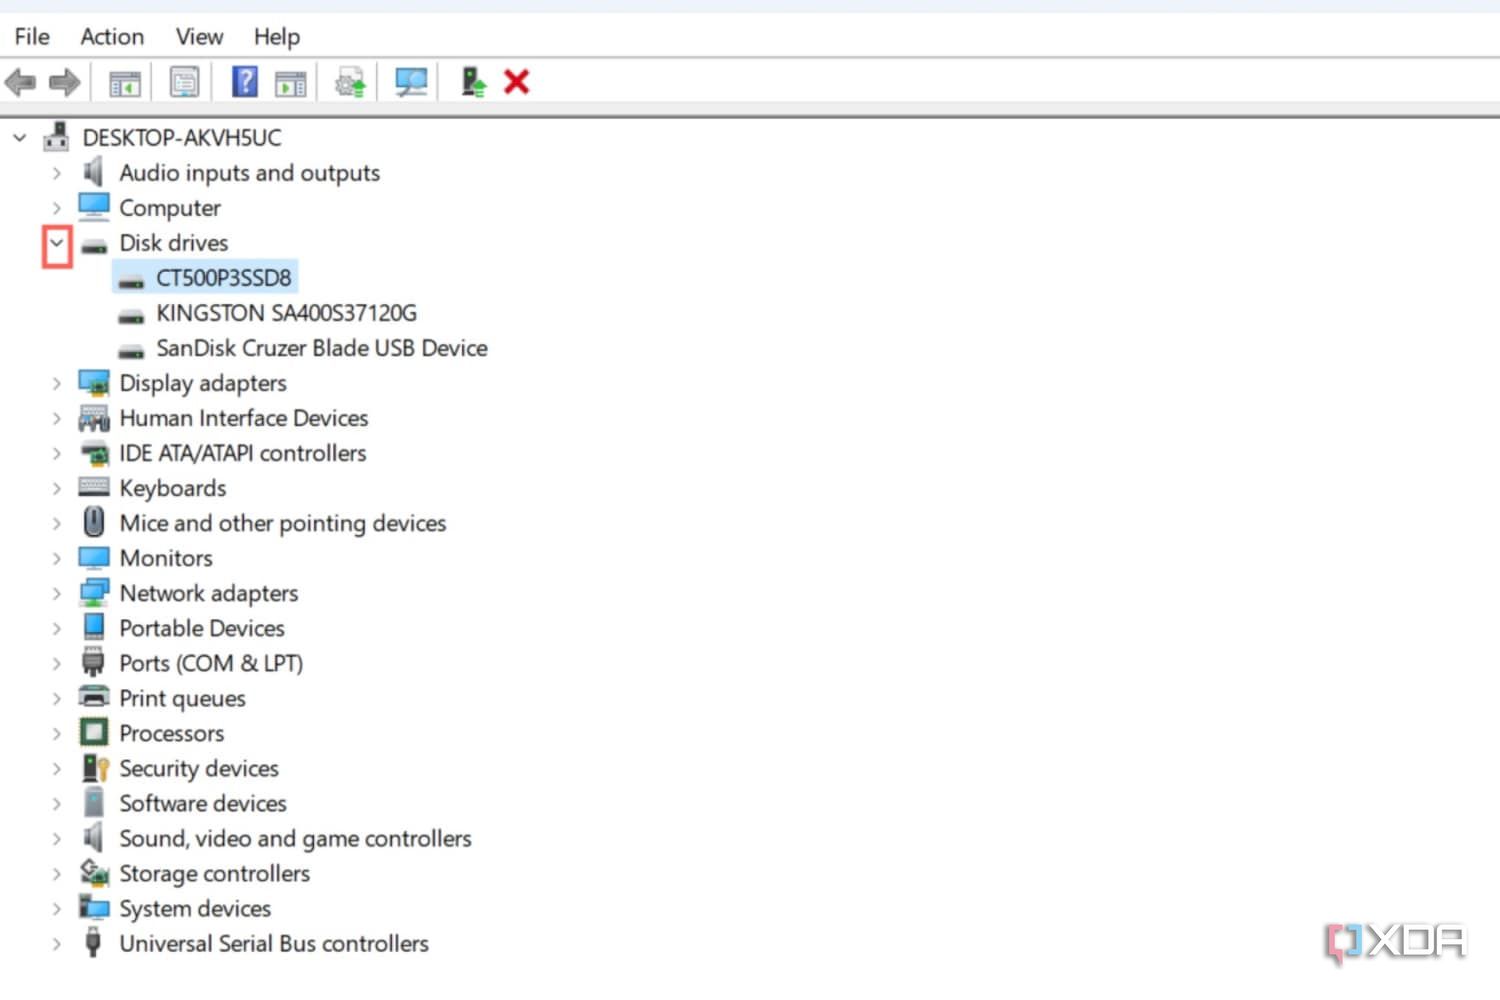
- Click on on the Arrow subsequent to Disk drives.
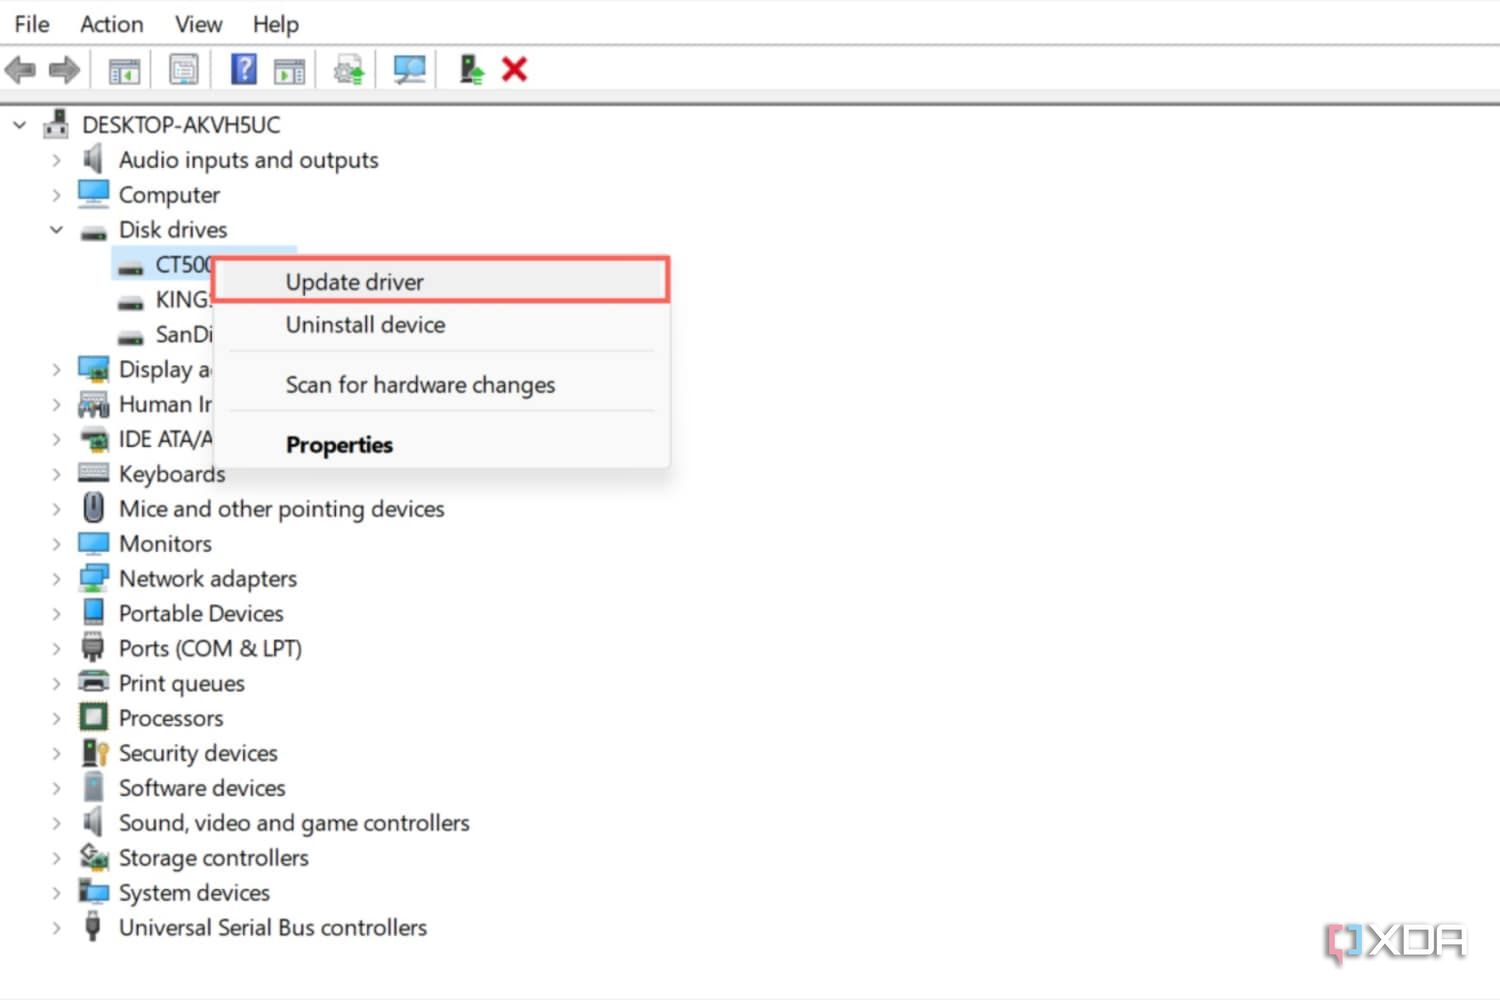
- Proper-click on the faulty SSD and choose Replace drivers.
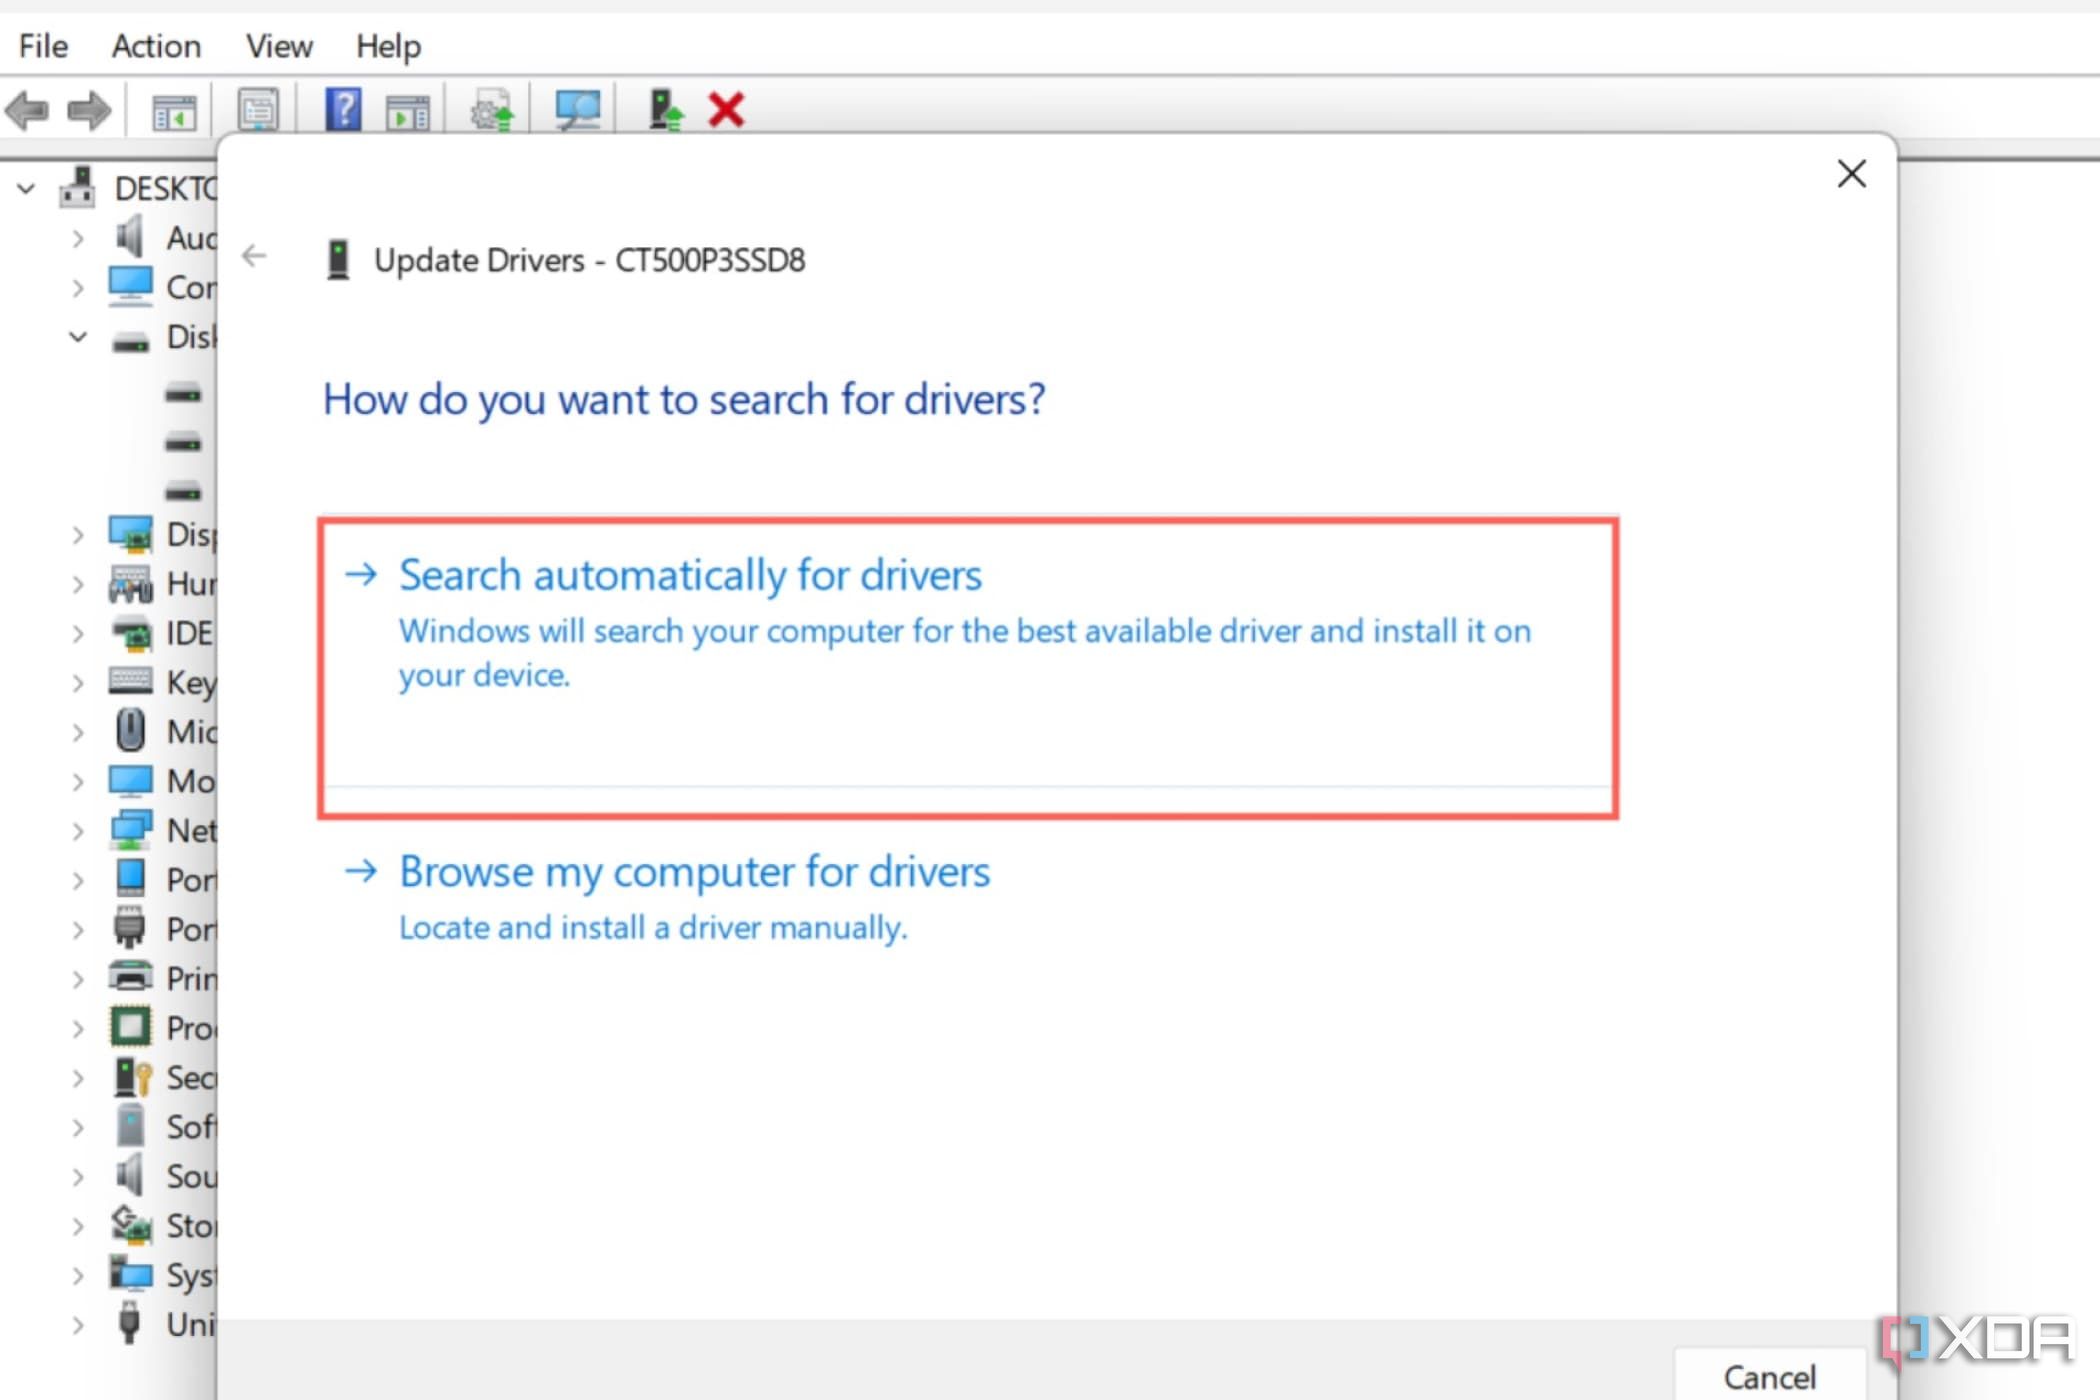
- Click on on Search mechanically for drivers and look forward to Home windows to put in the most recent drivers for the SSD.


Subsequent, you need to replace the firmware to its newest model. You possibly can copy the mannequin title of the SSD from the System Supervisor and browse the producer’s web site for the most recent firmware that’s suitable along with your drive.
How you can repair your SSD utilizing the facility cycle methodology
In case your SSD doesn’t even present up in your PC, or updating the drivers and firmware would not repair it, you’ll be able to strive utilizing the facility cycle methodology. It’s a easy but efficient resolution to tender reset the SSD with out deleting the consumer information saved inside.
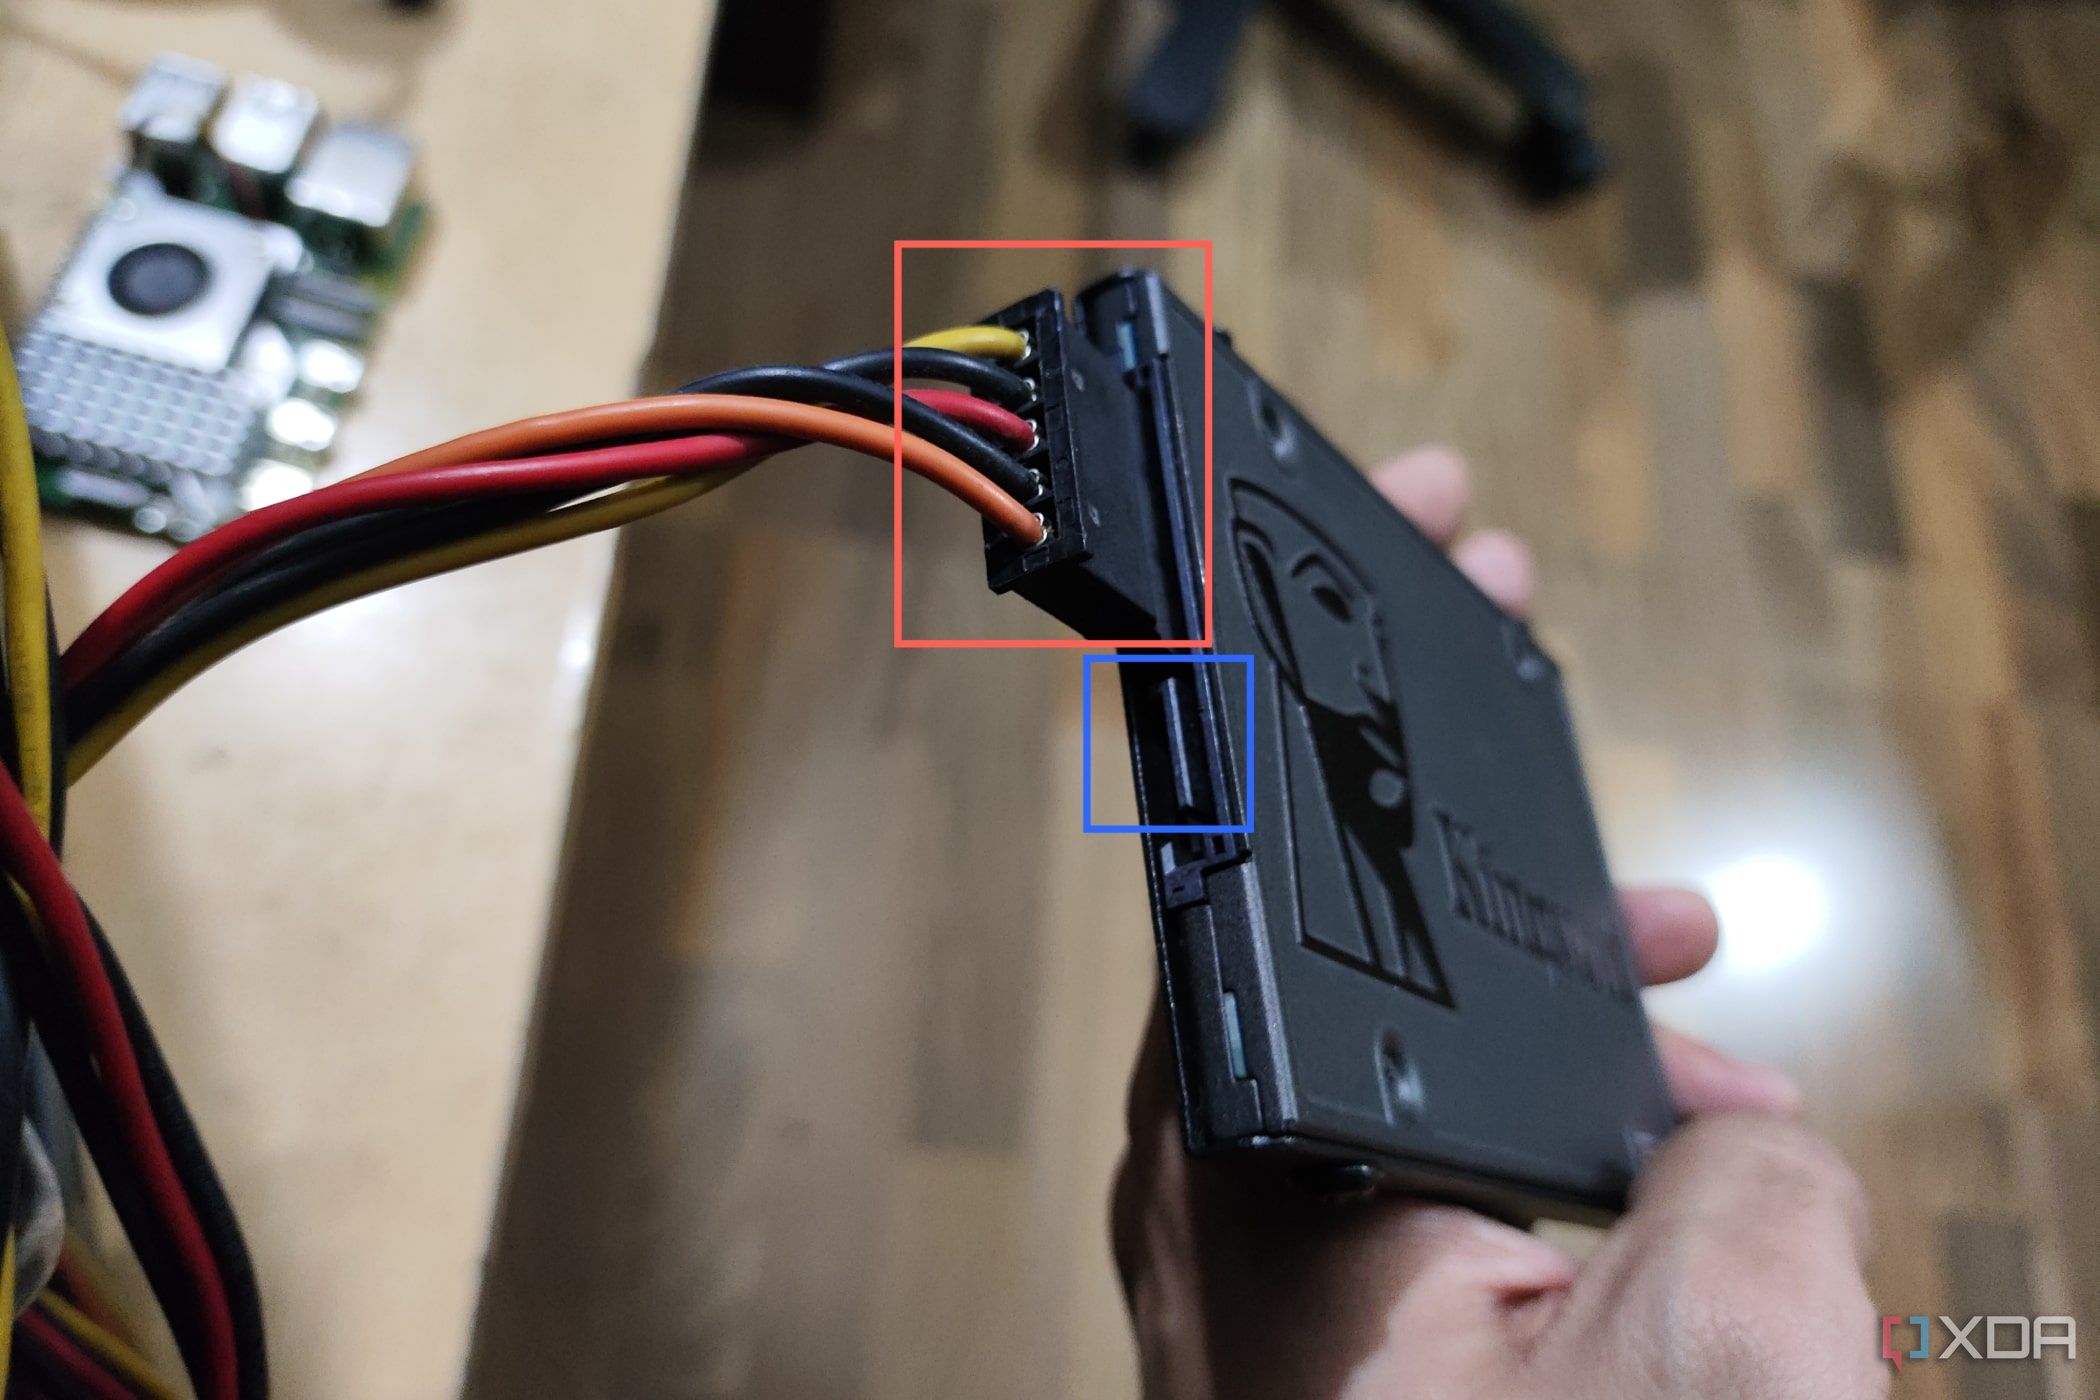
- Energy off your PC, unplug the AC adapter, and unmount the facet panels of its case to realize entry to the SSD.
- Pull out the SATA information cable however go away the facility cable plugged in.
- Restart your PC and maintain urgent the Delete key to enter the BIOS.
- Keep within the BIOS for an hour.
- Unplug the facility cable from the SSD for a minute or two.
- Insert each the SATA information and energy cables into the SSD and reboot your PC after mounting the facet panels you eliminated earlier.

In the event you’re utilizing an NVMe SSD, then you’ll be able to skip to step 3. When you’ve left your PC operating for an hour, shut it down, and take away all residual energy by holding the facility button for 30 seconds.
As soon as the PC reboots, you need to be capable to entry the drive. Even when it doesn’t totally restore your SSD, this DIY hack can revive it lengthy sufficient so that you can again up all of your necessary information to a different storage machine.
Alternatively, you’ll be able to repeat the method by altering the SATA cable and plugging it into a distinct port on the motherboard. When you have a couple of NVMe interface in your motherboard, you’ll be able to strive plugging your M.2 drive into the opposite slot.
How you can repair your SSD utilizing BIOS settings
In case your PC doesn’t acknowledge the SSD even after the facility cycle methodology, the drive could also be set to a distinct storage interface than the one it’s meant for use with. You should utilize the BIOS settings to change to a distinct storage mode on the motherboard.
- Restart your system, and maintain tapping the Delete key because it boots up.
- Change the SATA Mode from AHCI to RAID (or vice versa, if RAID was set because the default possibility).
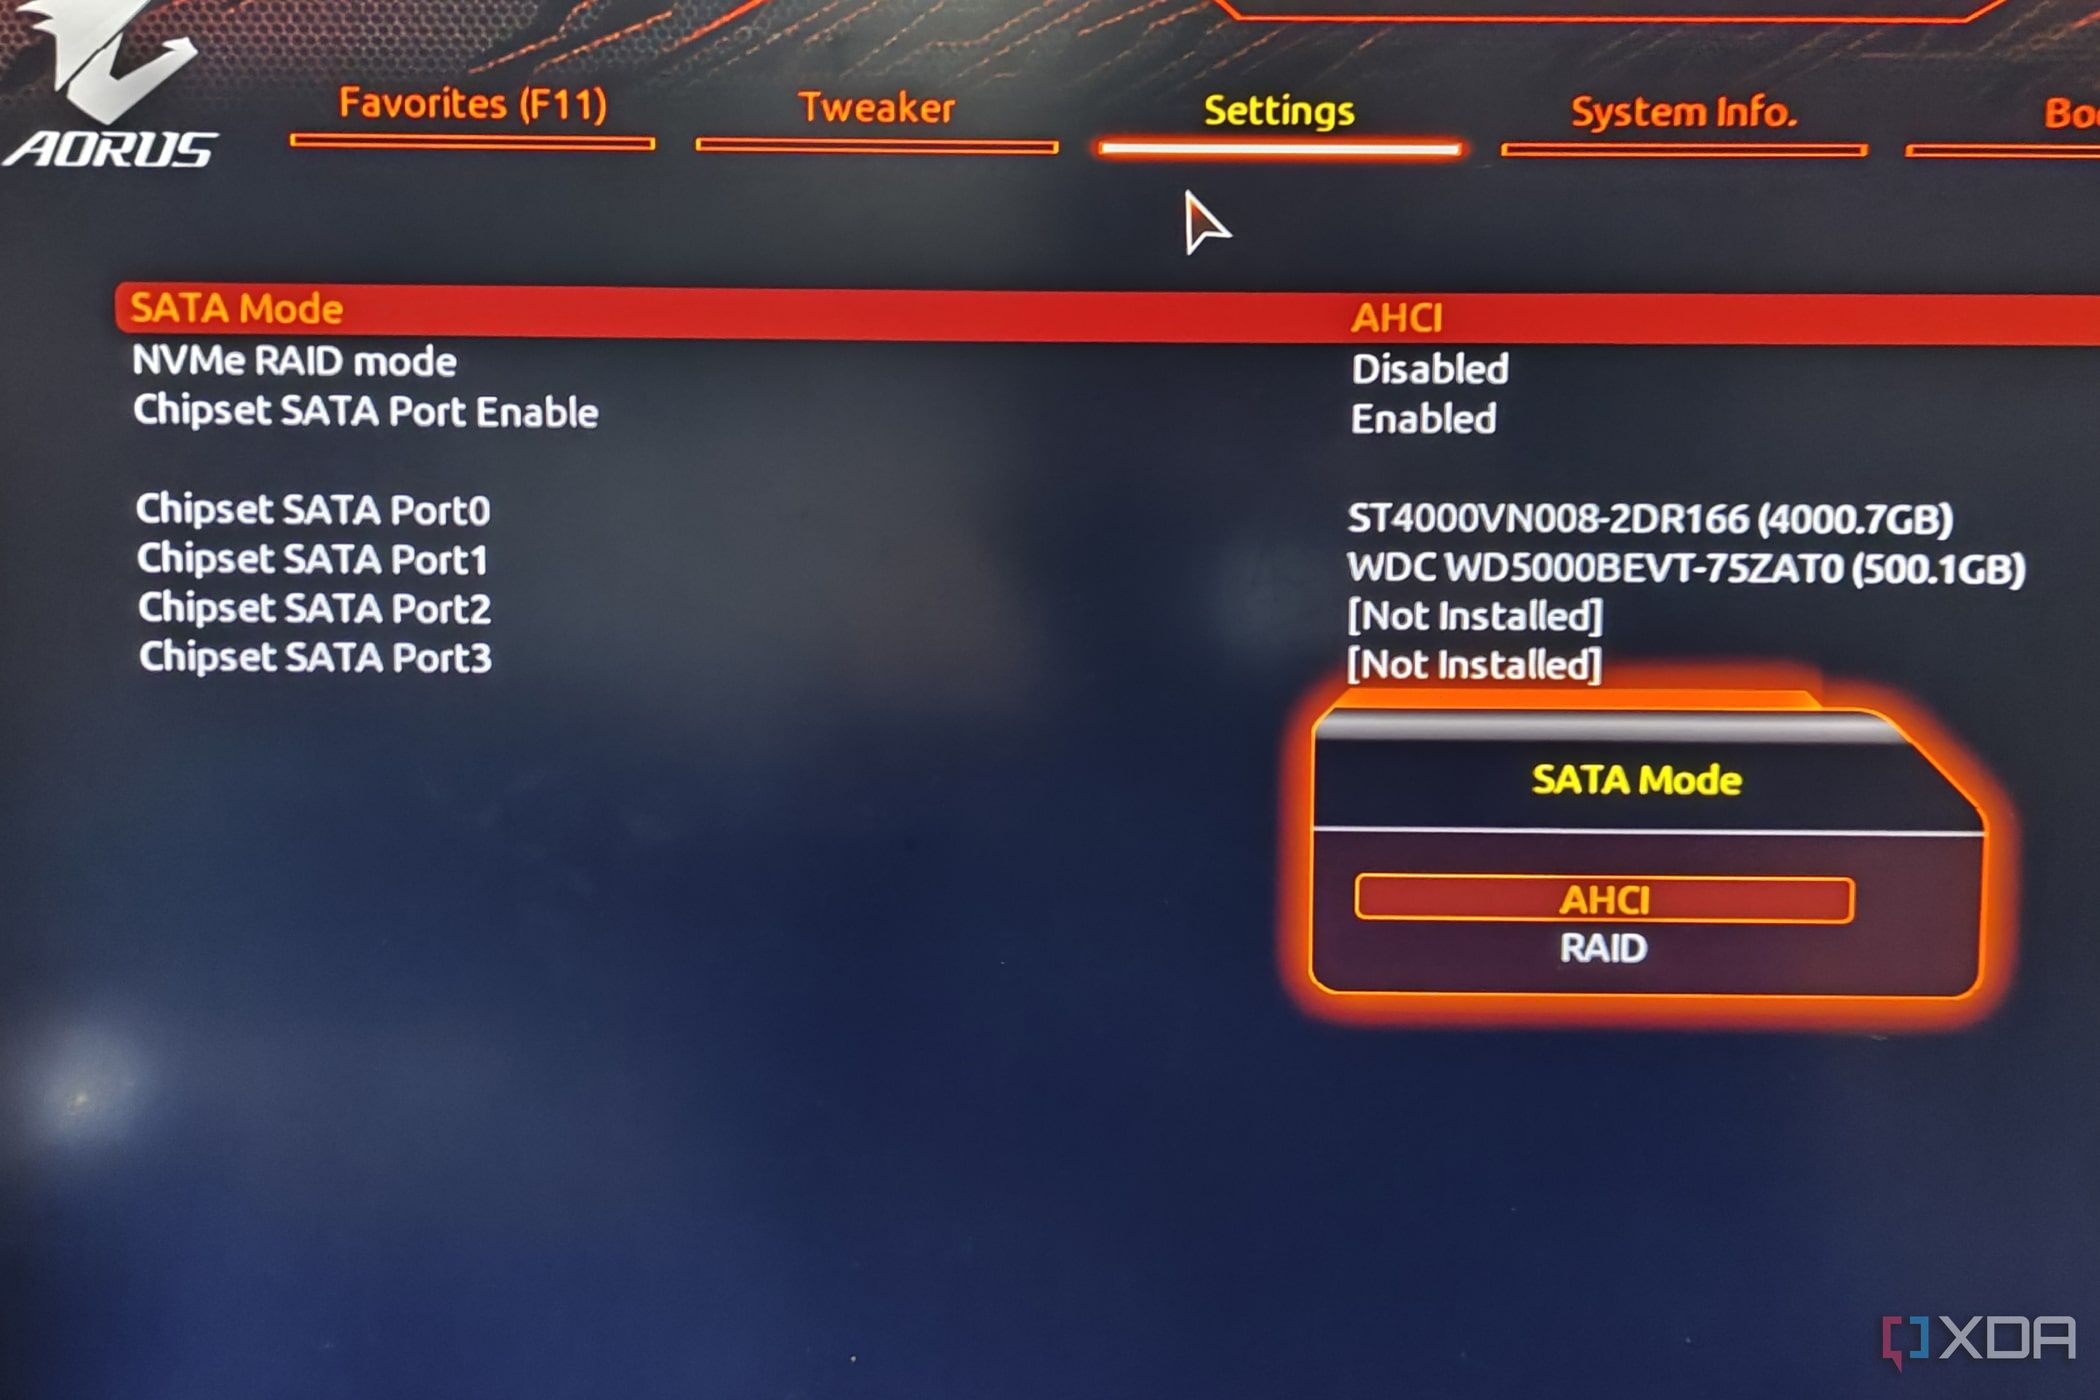
- Save the BIOS settings, and reboot your PC usually.

How you can repair your SSD utilizing the CHKSDK command
The Terminal in Home windows 11 helps sure helpful instructions to diagnose and restore your SSD. The CHKDSK methodology is right for troubleshooting the drive, and it even consists of sure parameters (/f, /r, and /x) to eliminate corrupted information.
- Proper-click on the Begin button and choose Terminal (Admin).

- Grant administrator privileges to the Terminal when prompted by Consumer Account Management.
- Sort the next command and press Enter.
chkdsk drive_name: /f /r /x
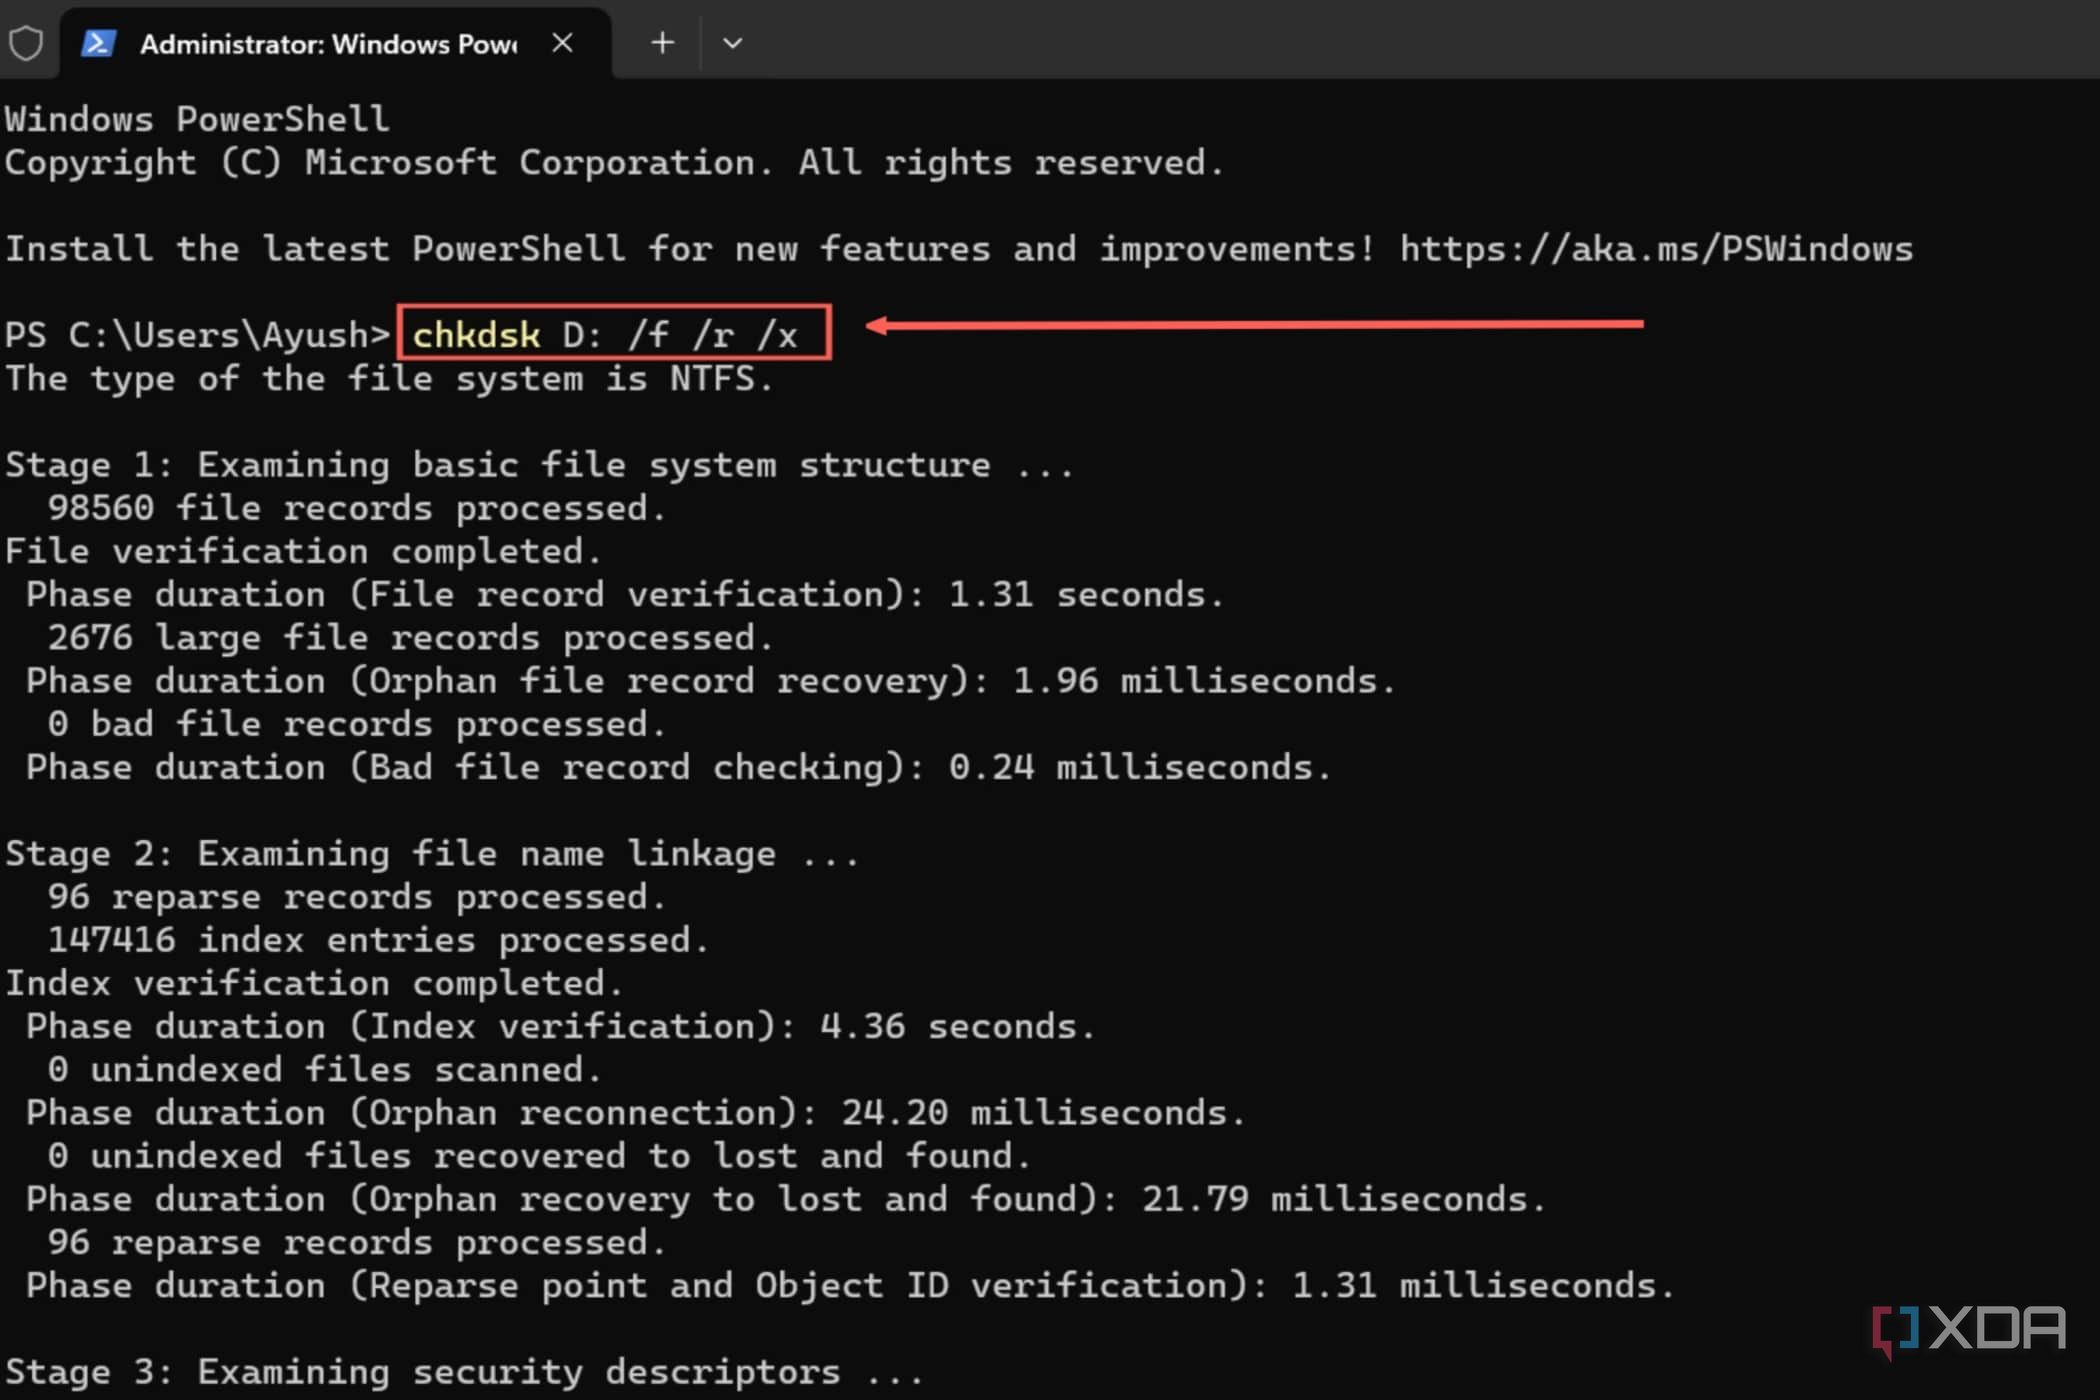
Remember to change drive_name with the driving force letter of the defective SSD.


How you can repair your SSD utilizing TestDisk
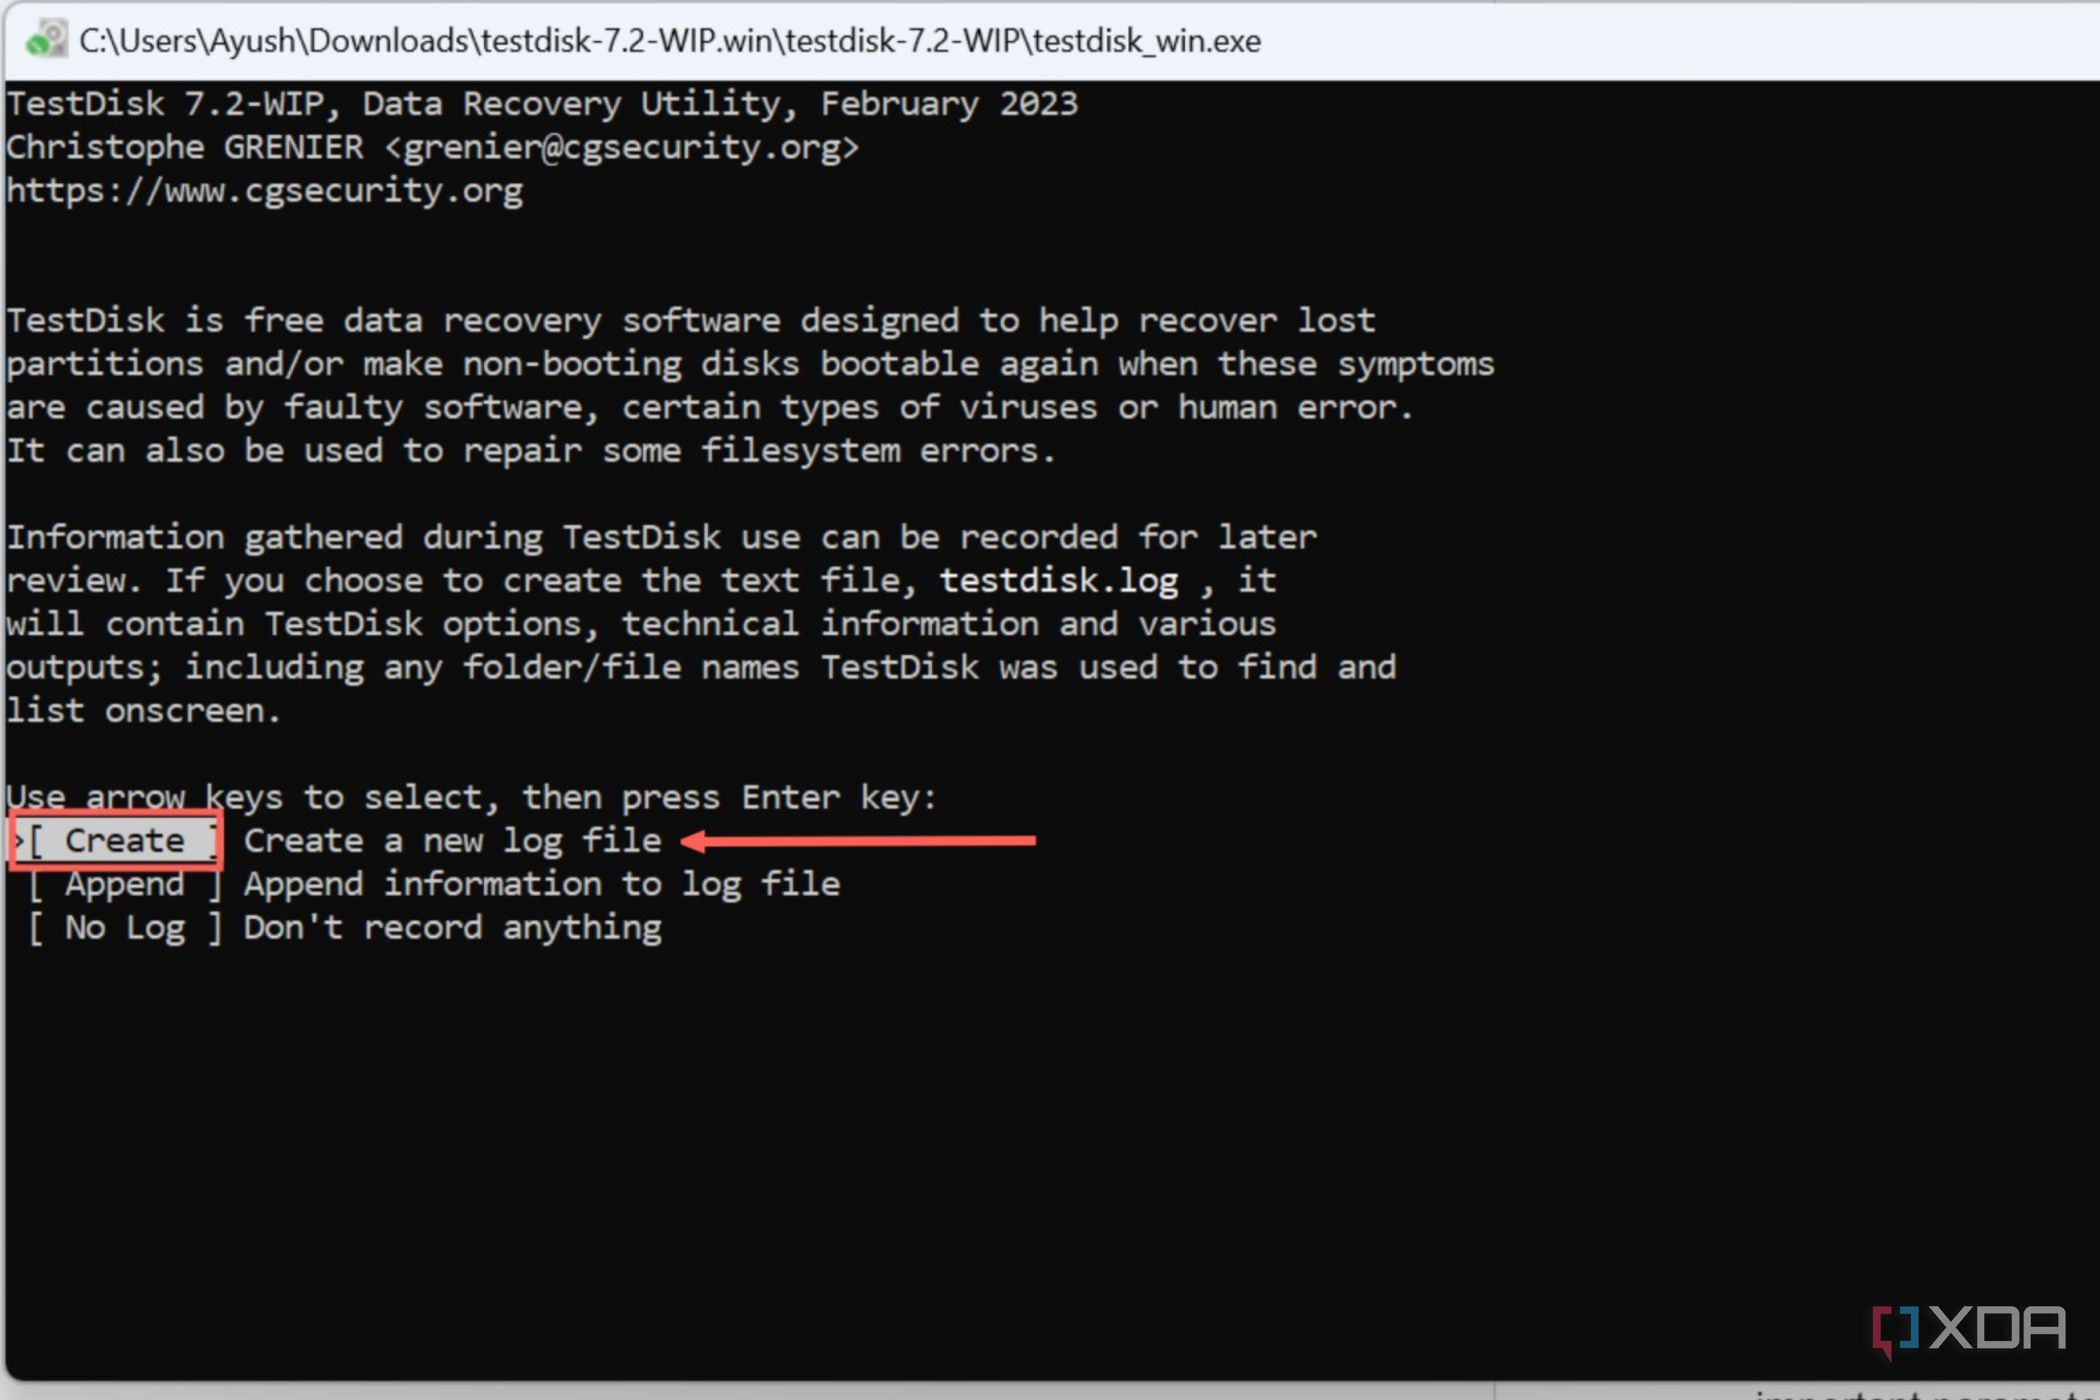
If there’s a problem with the MBR and restoration partitions of your boot drive, you’ll be able to get well them utilizing the TestDisk utility. Because it’s not included within the Terminal by default, you’ll should manually obtain TestDisk and launch the Terminal from its folder.
- Obtain TestDisk from the official web site and extract the contents of the .zip folder.
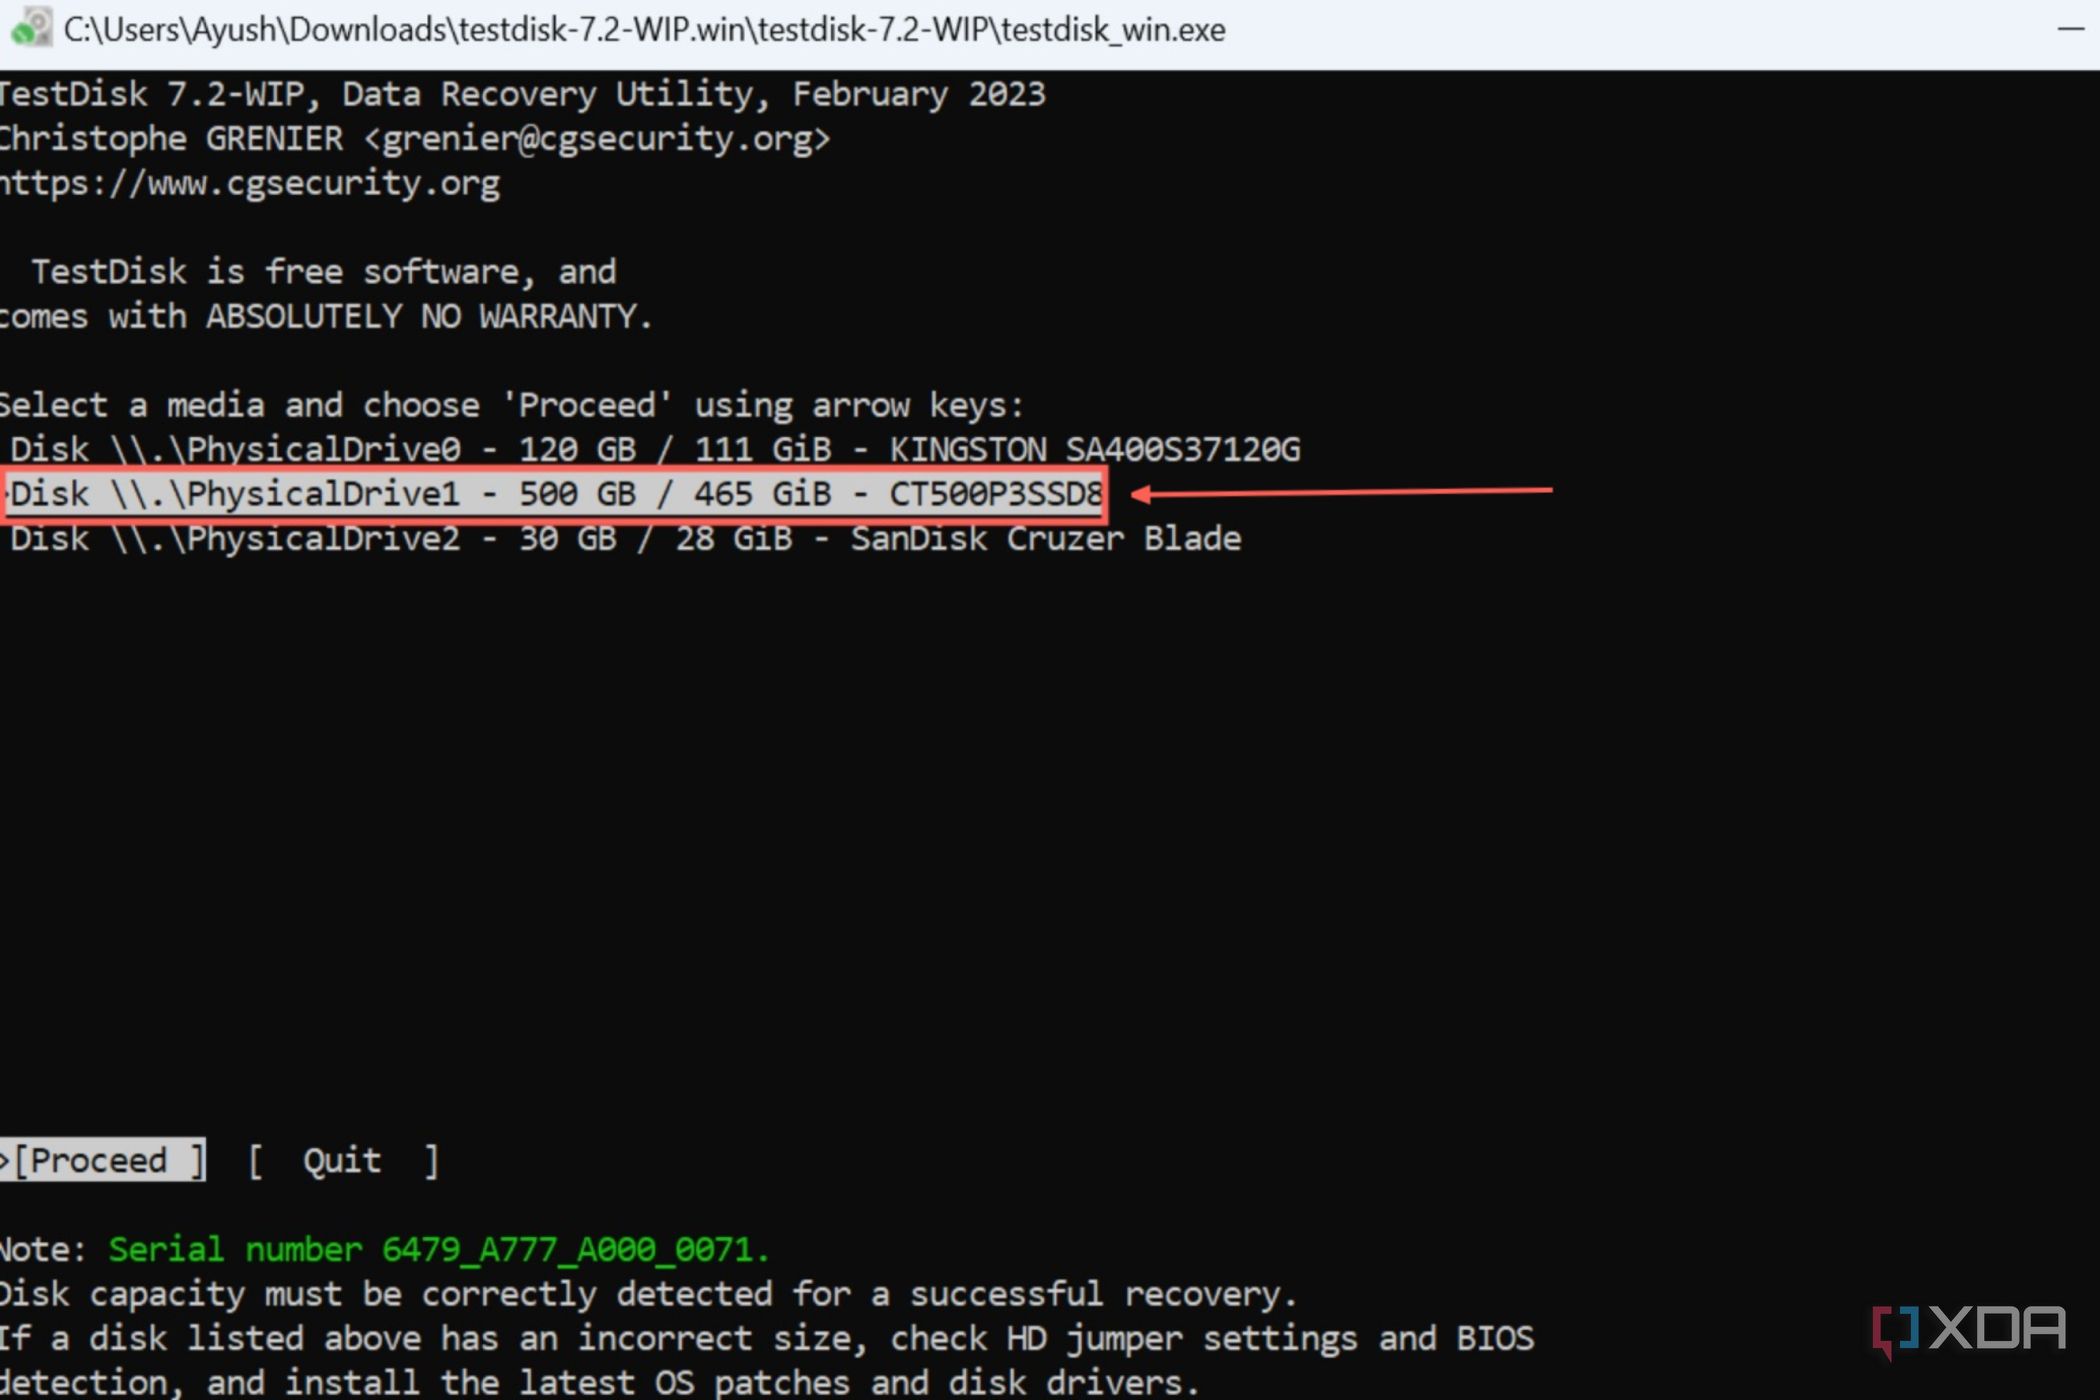
- Run testdisk_win.exe as an administrator.
- With the Create possibility highlighted, press Enter to create a log file.
- Select the malfunctioning SSD from the listing of drives and hit Enter to proceed to the subsequent step.
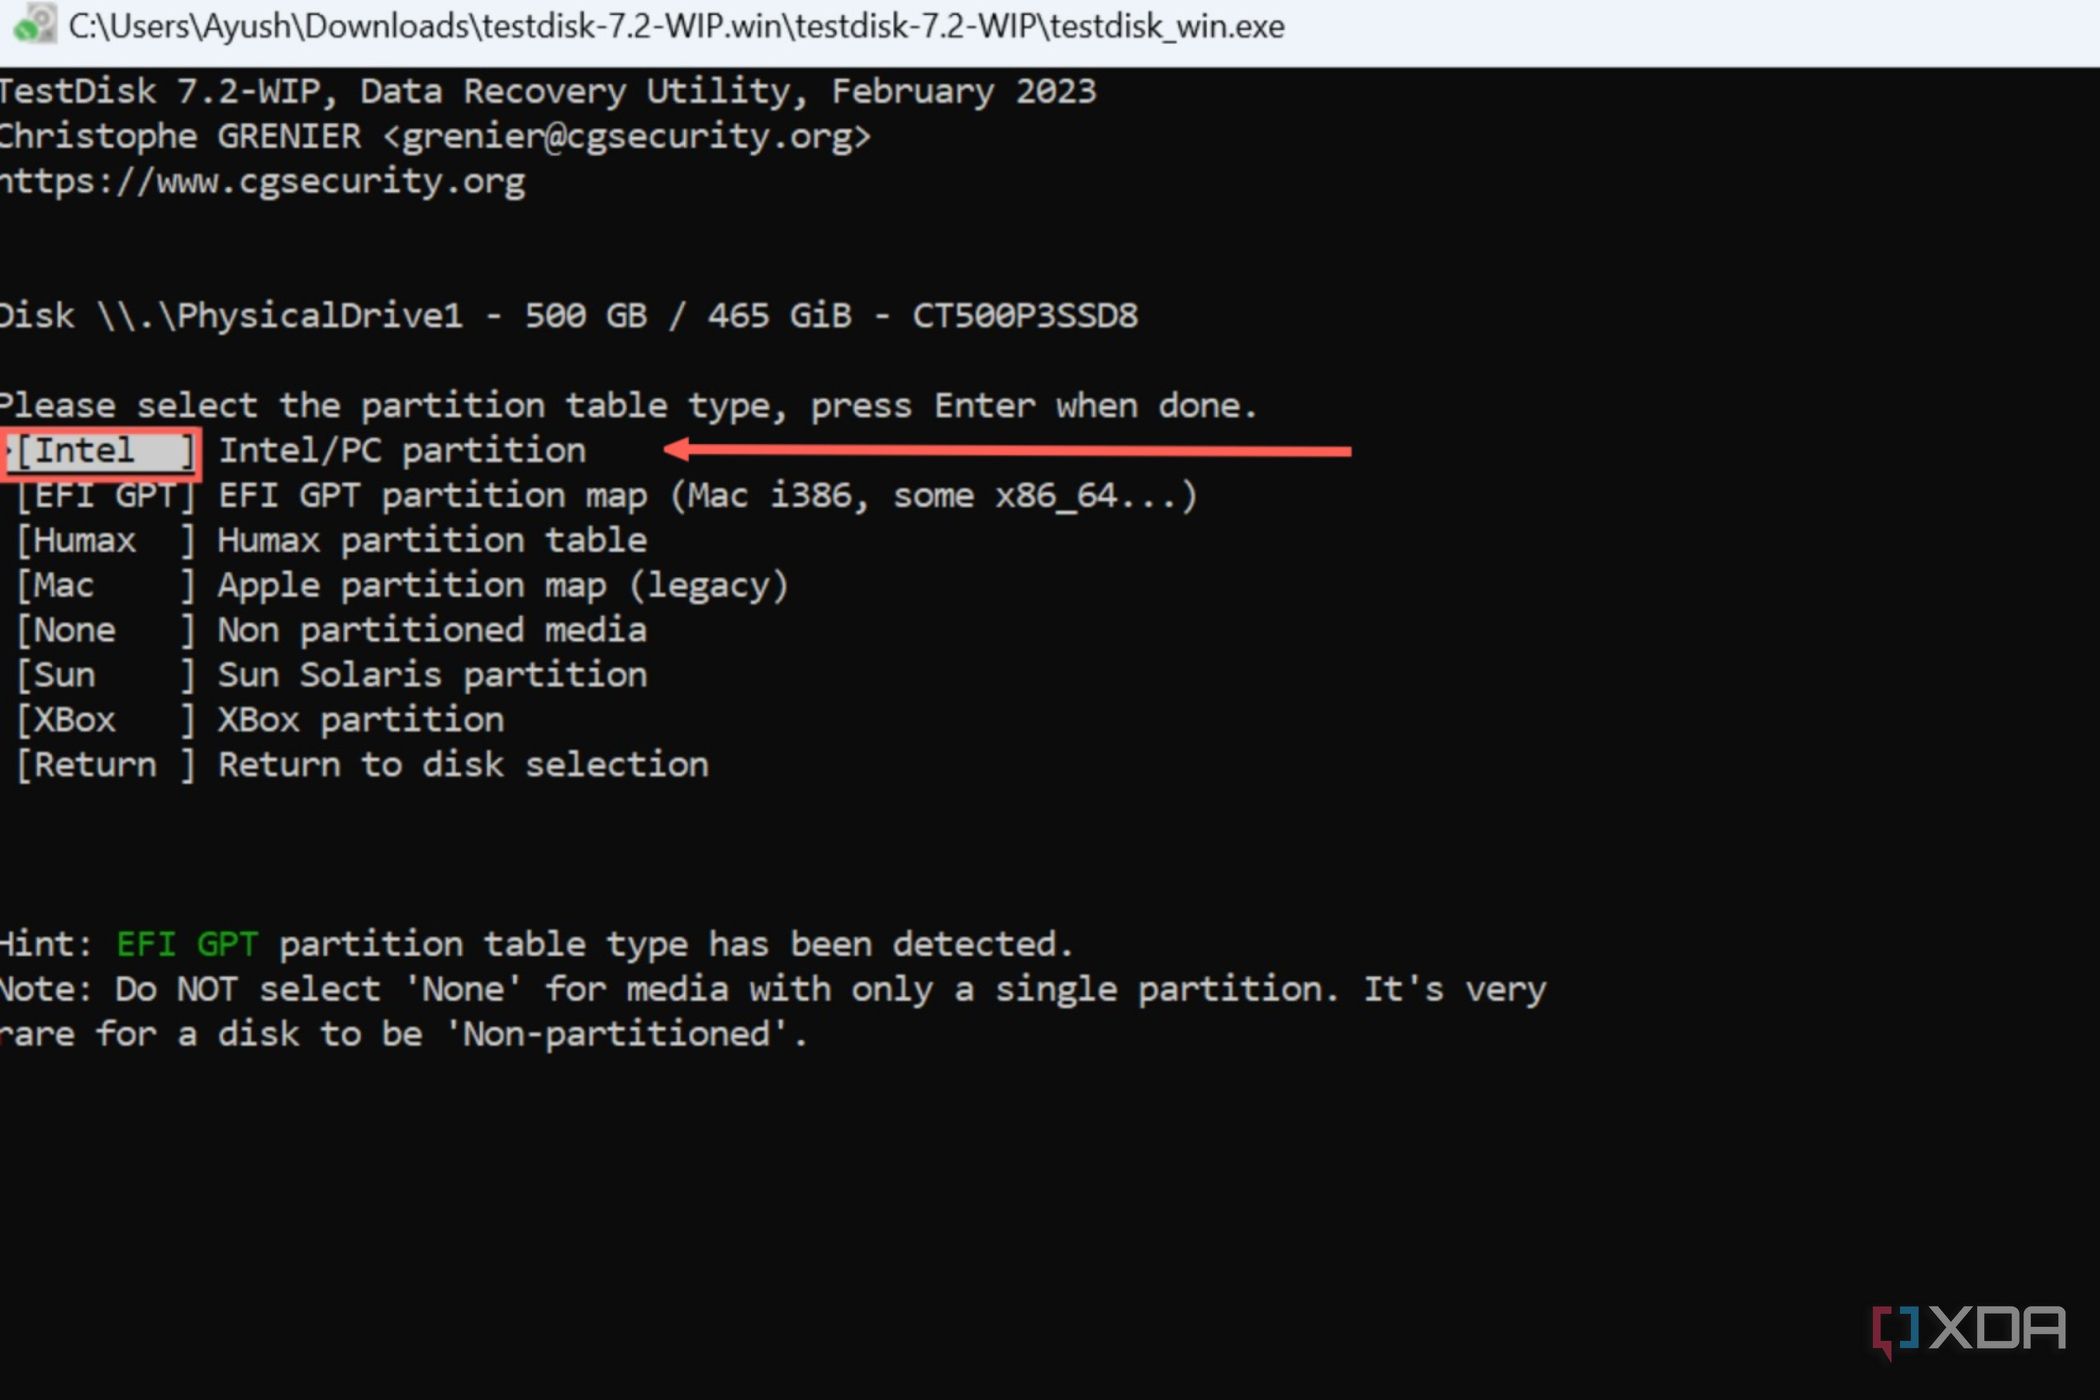
- Choose Intel because the partition desk kind and press Enter.
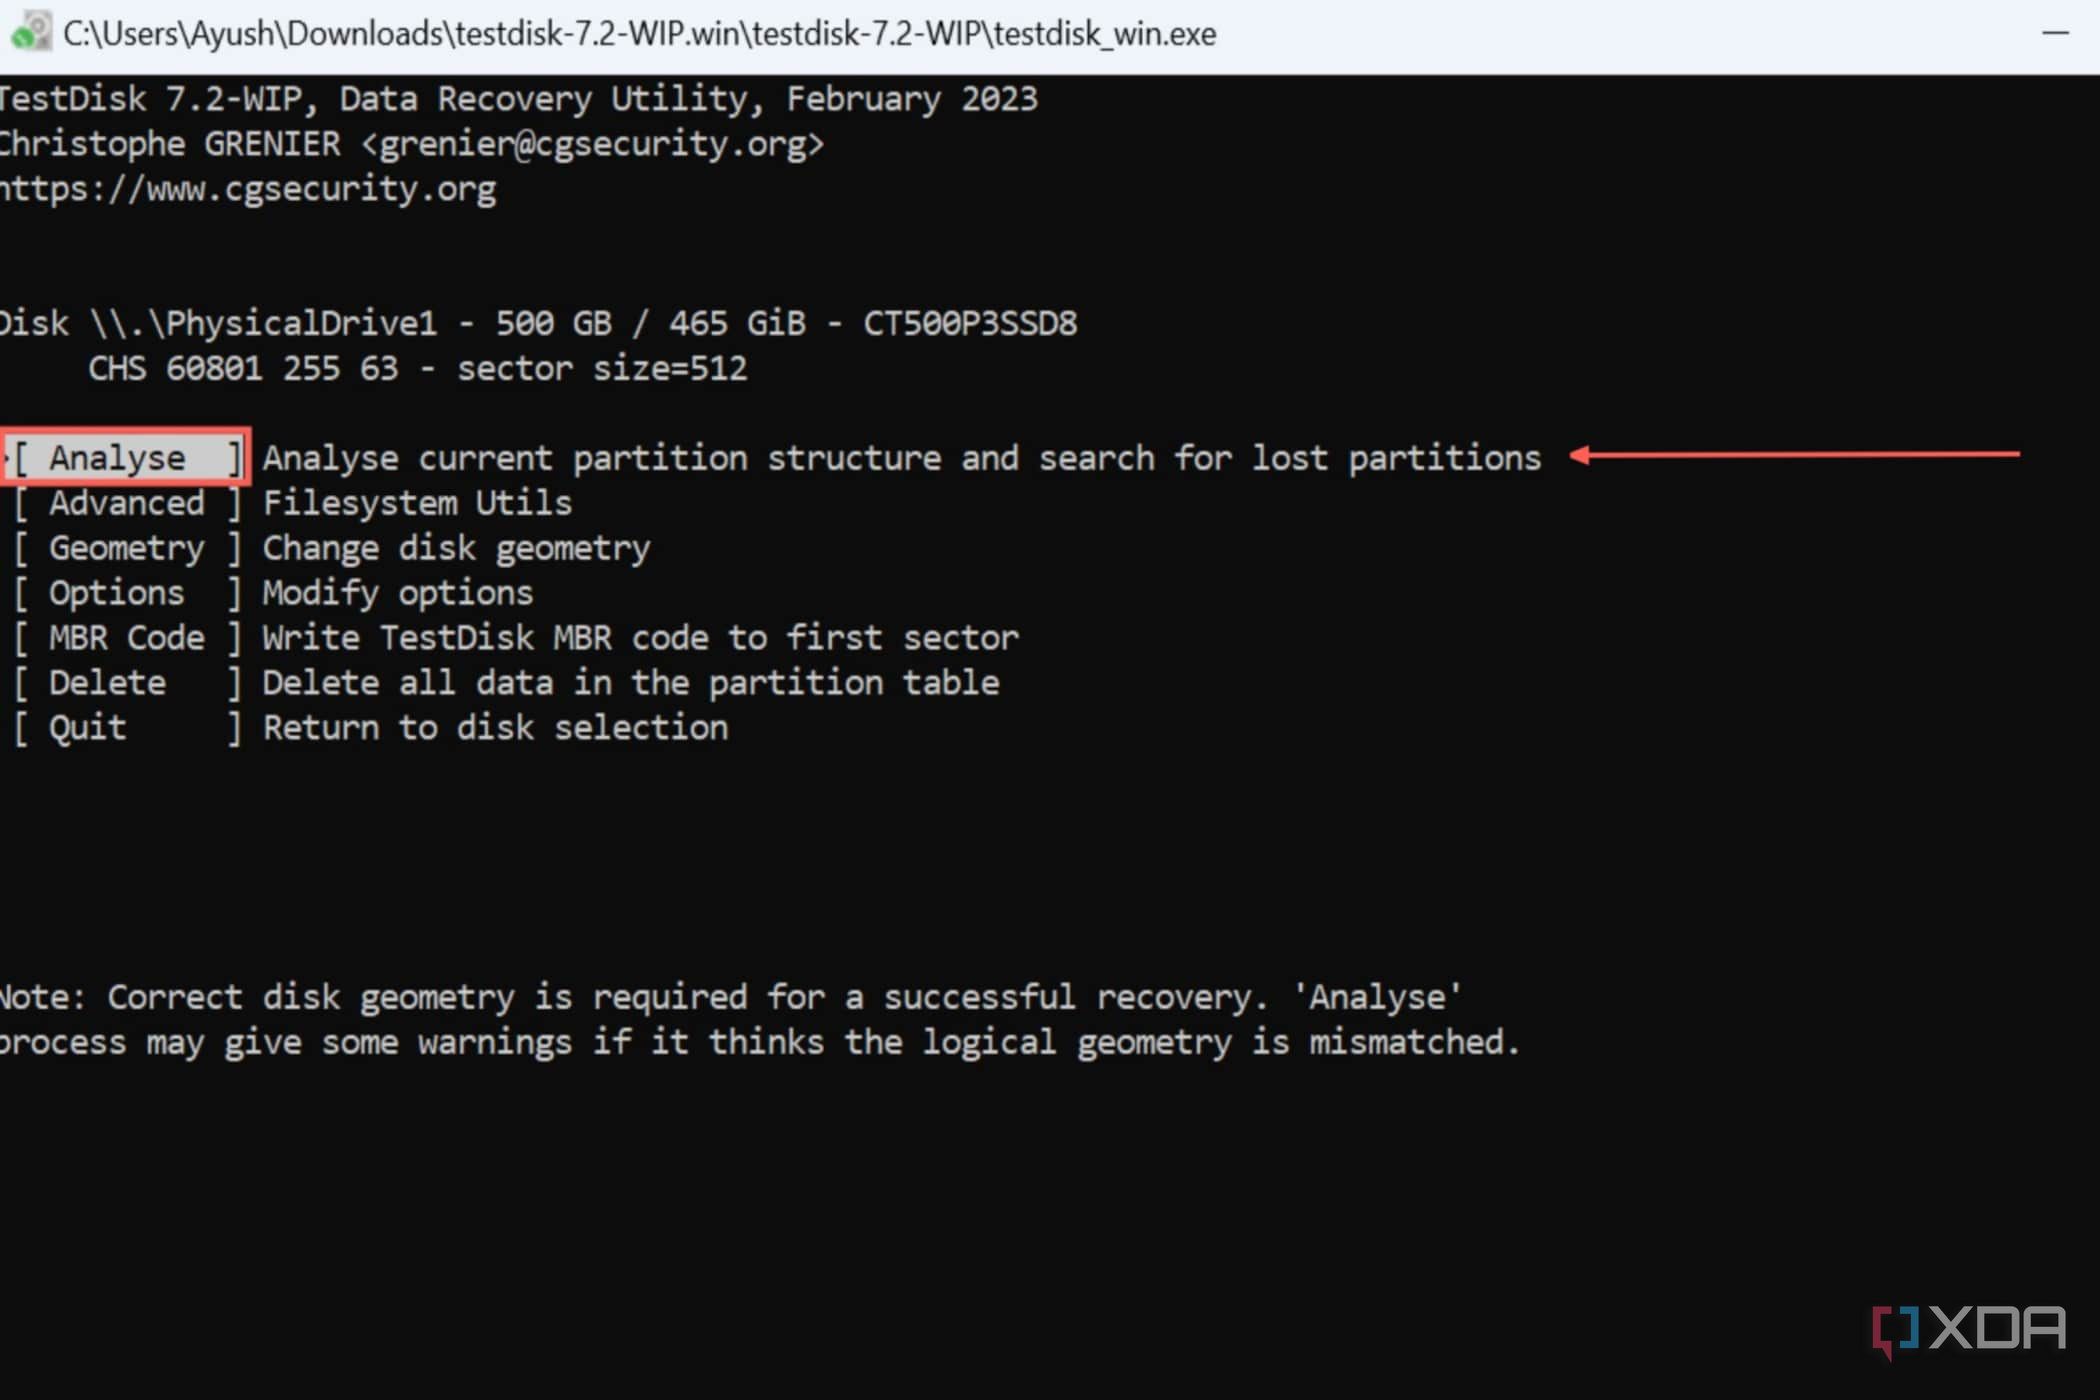
- Change to Analyse and faucet Enter.
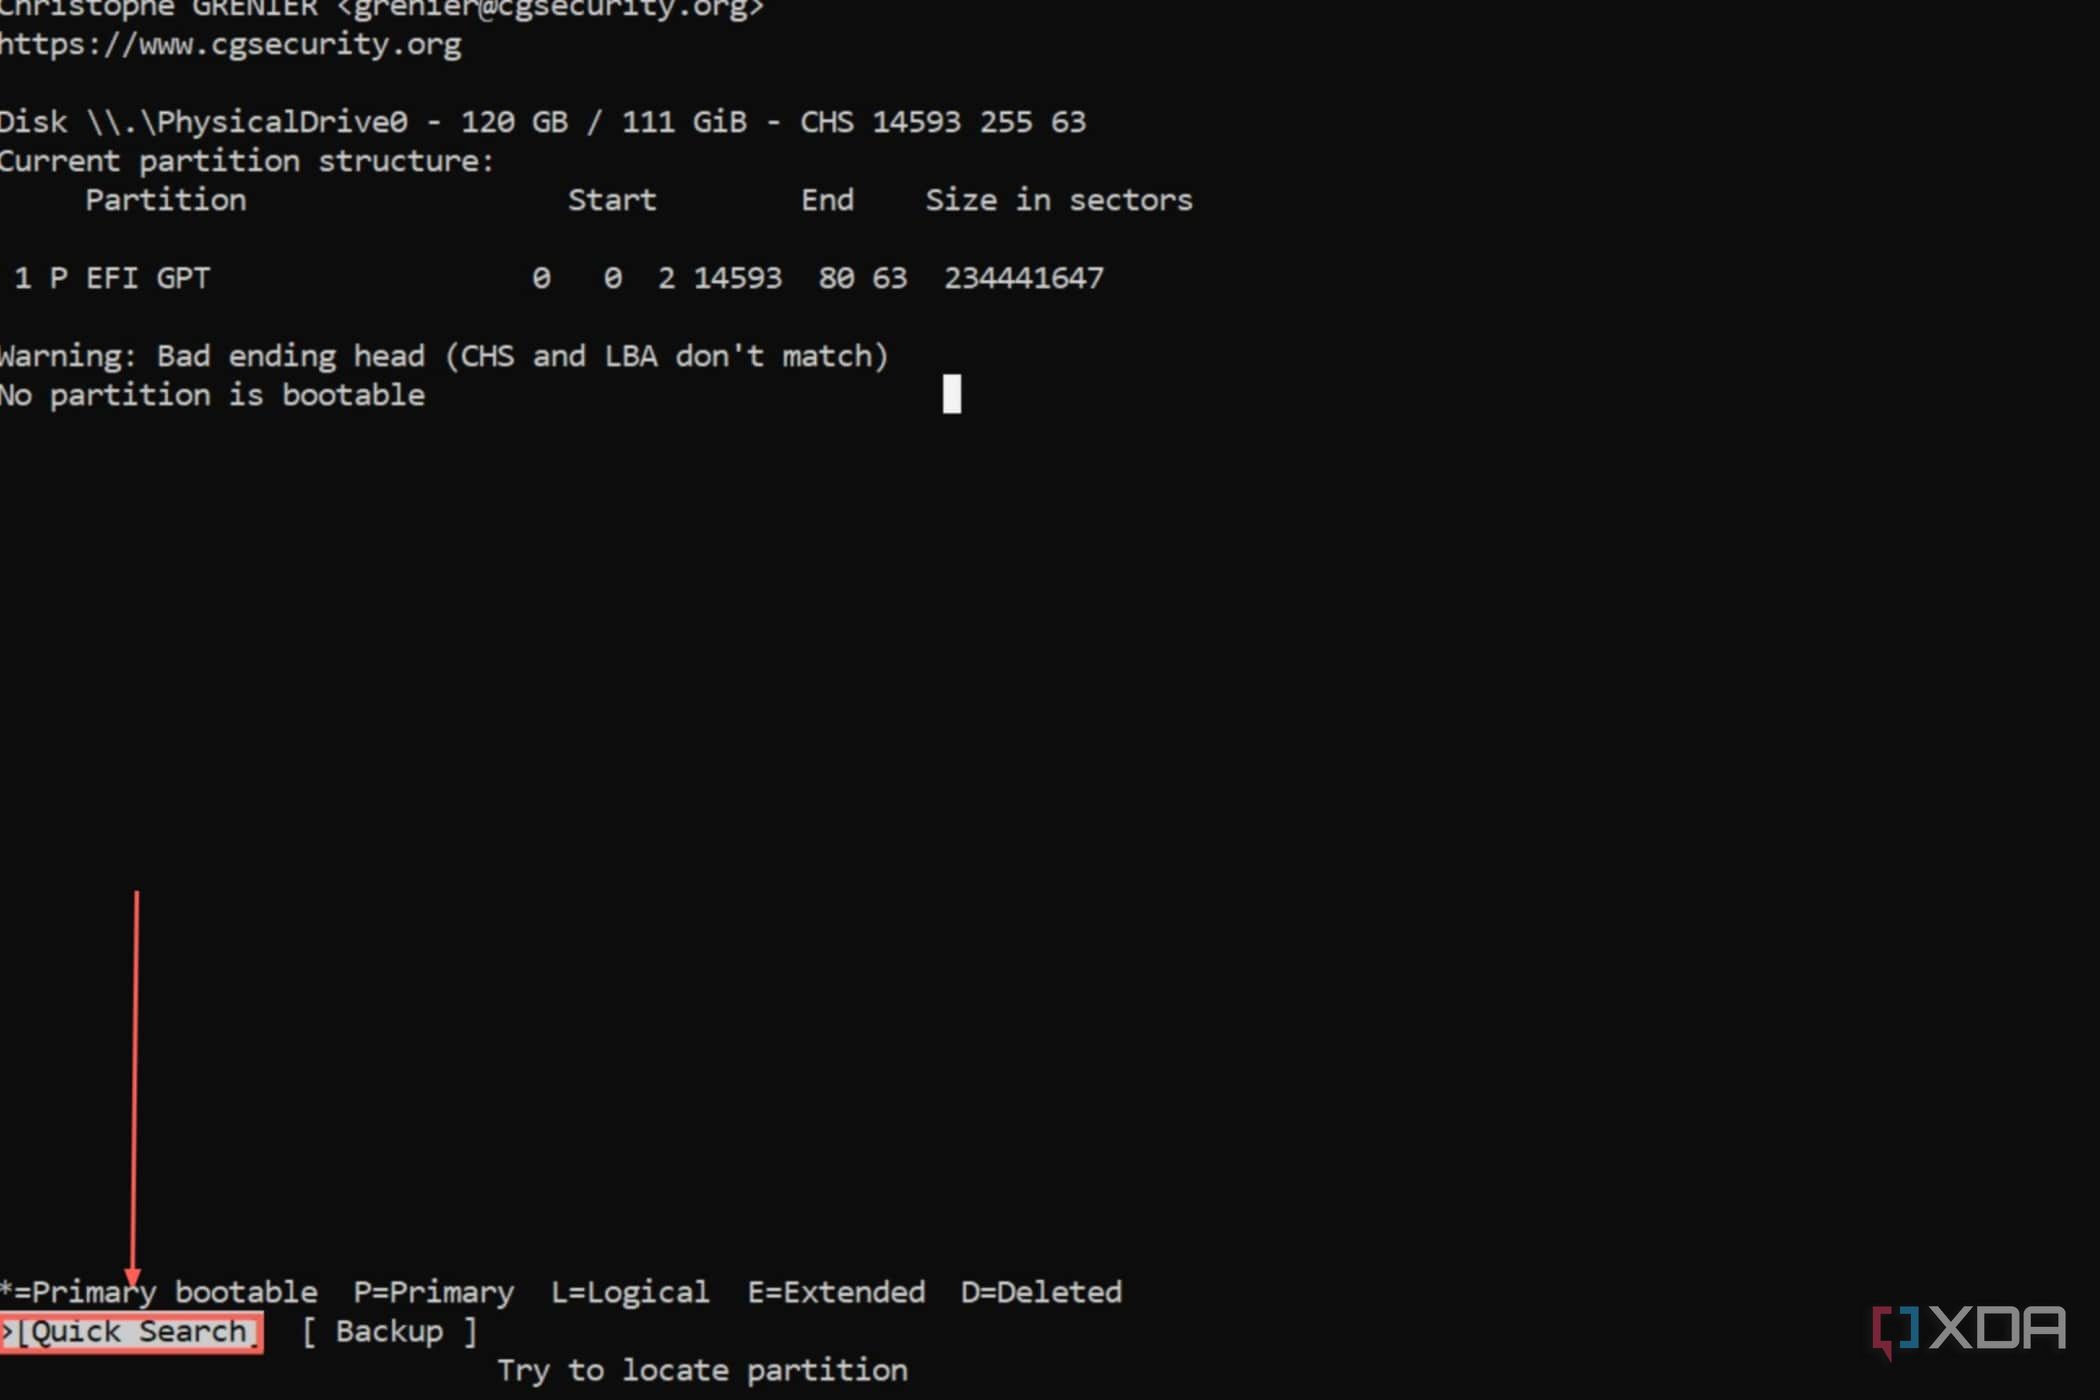
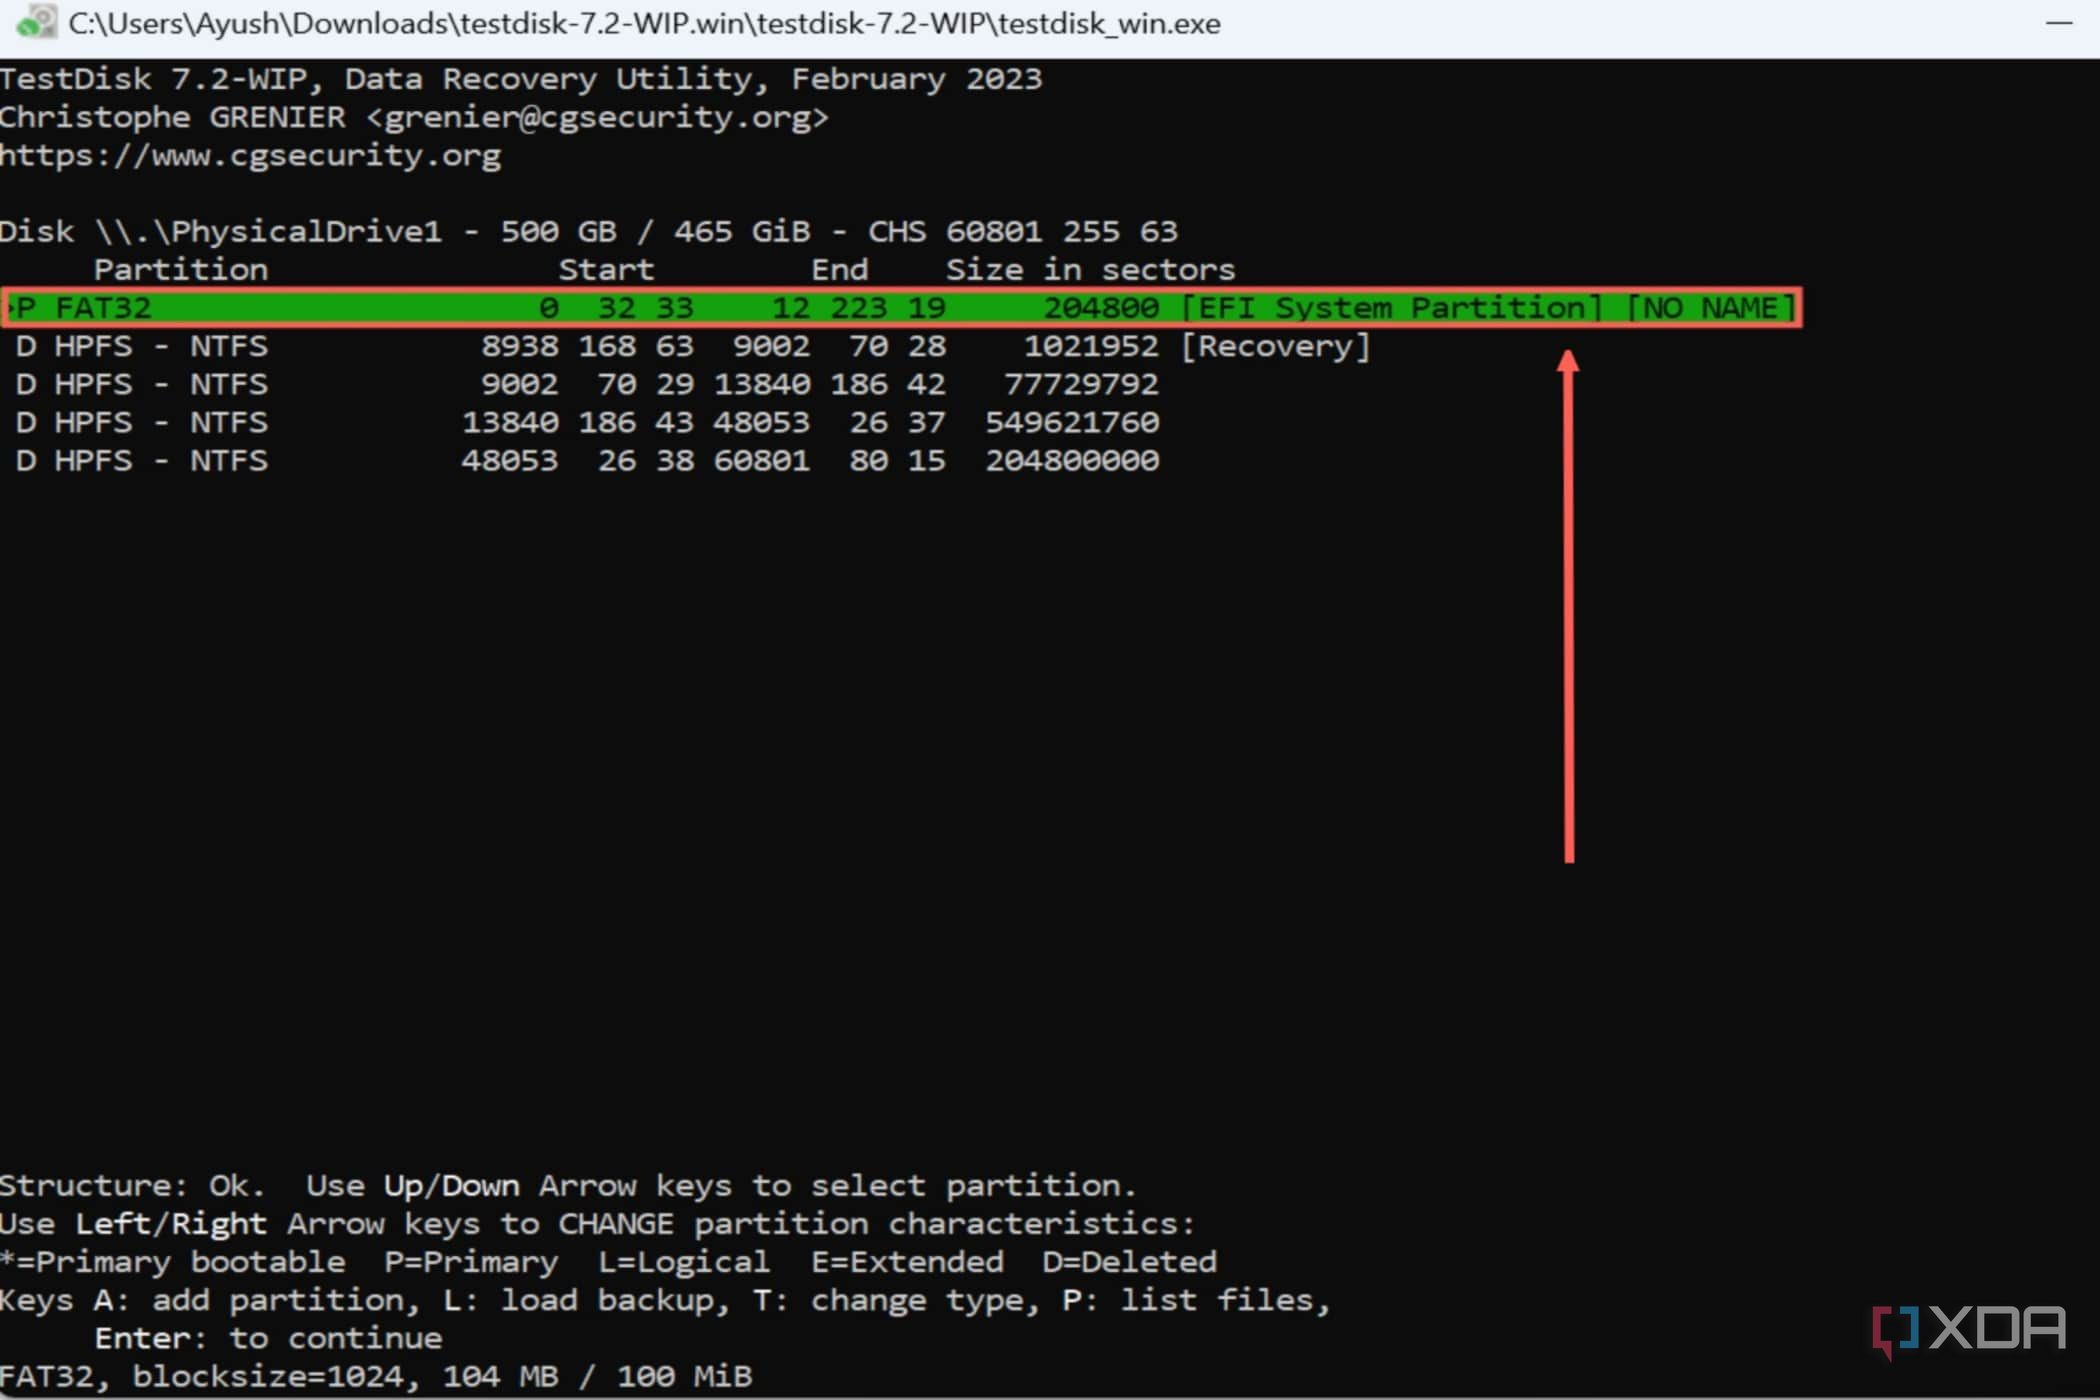
- Choose Fast Search and, after urgent Enterlook forward to the app to scan the partitions.
- As soon as TestDisk masses the partitions, you’ll discover the deleted partitions have a D prefix. Use the arrow keys to alter the prefix from D to P, and press Enter.
- Change to the Write possibility and hit Enter.
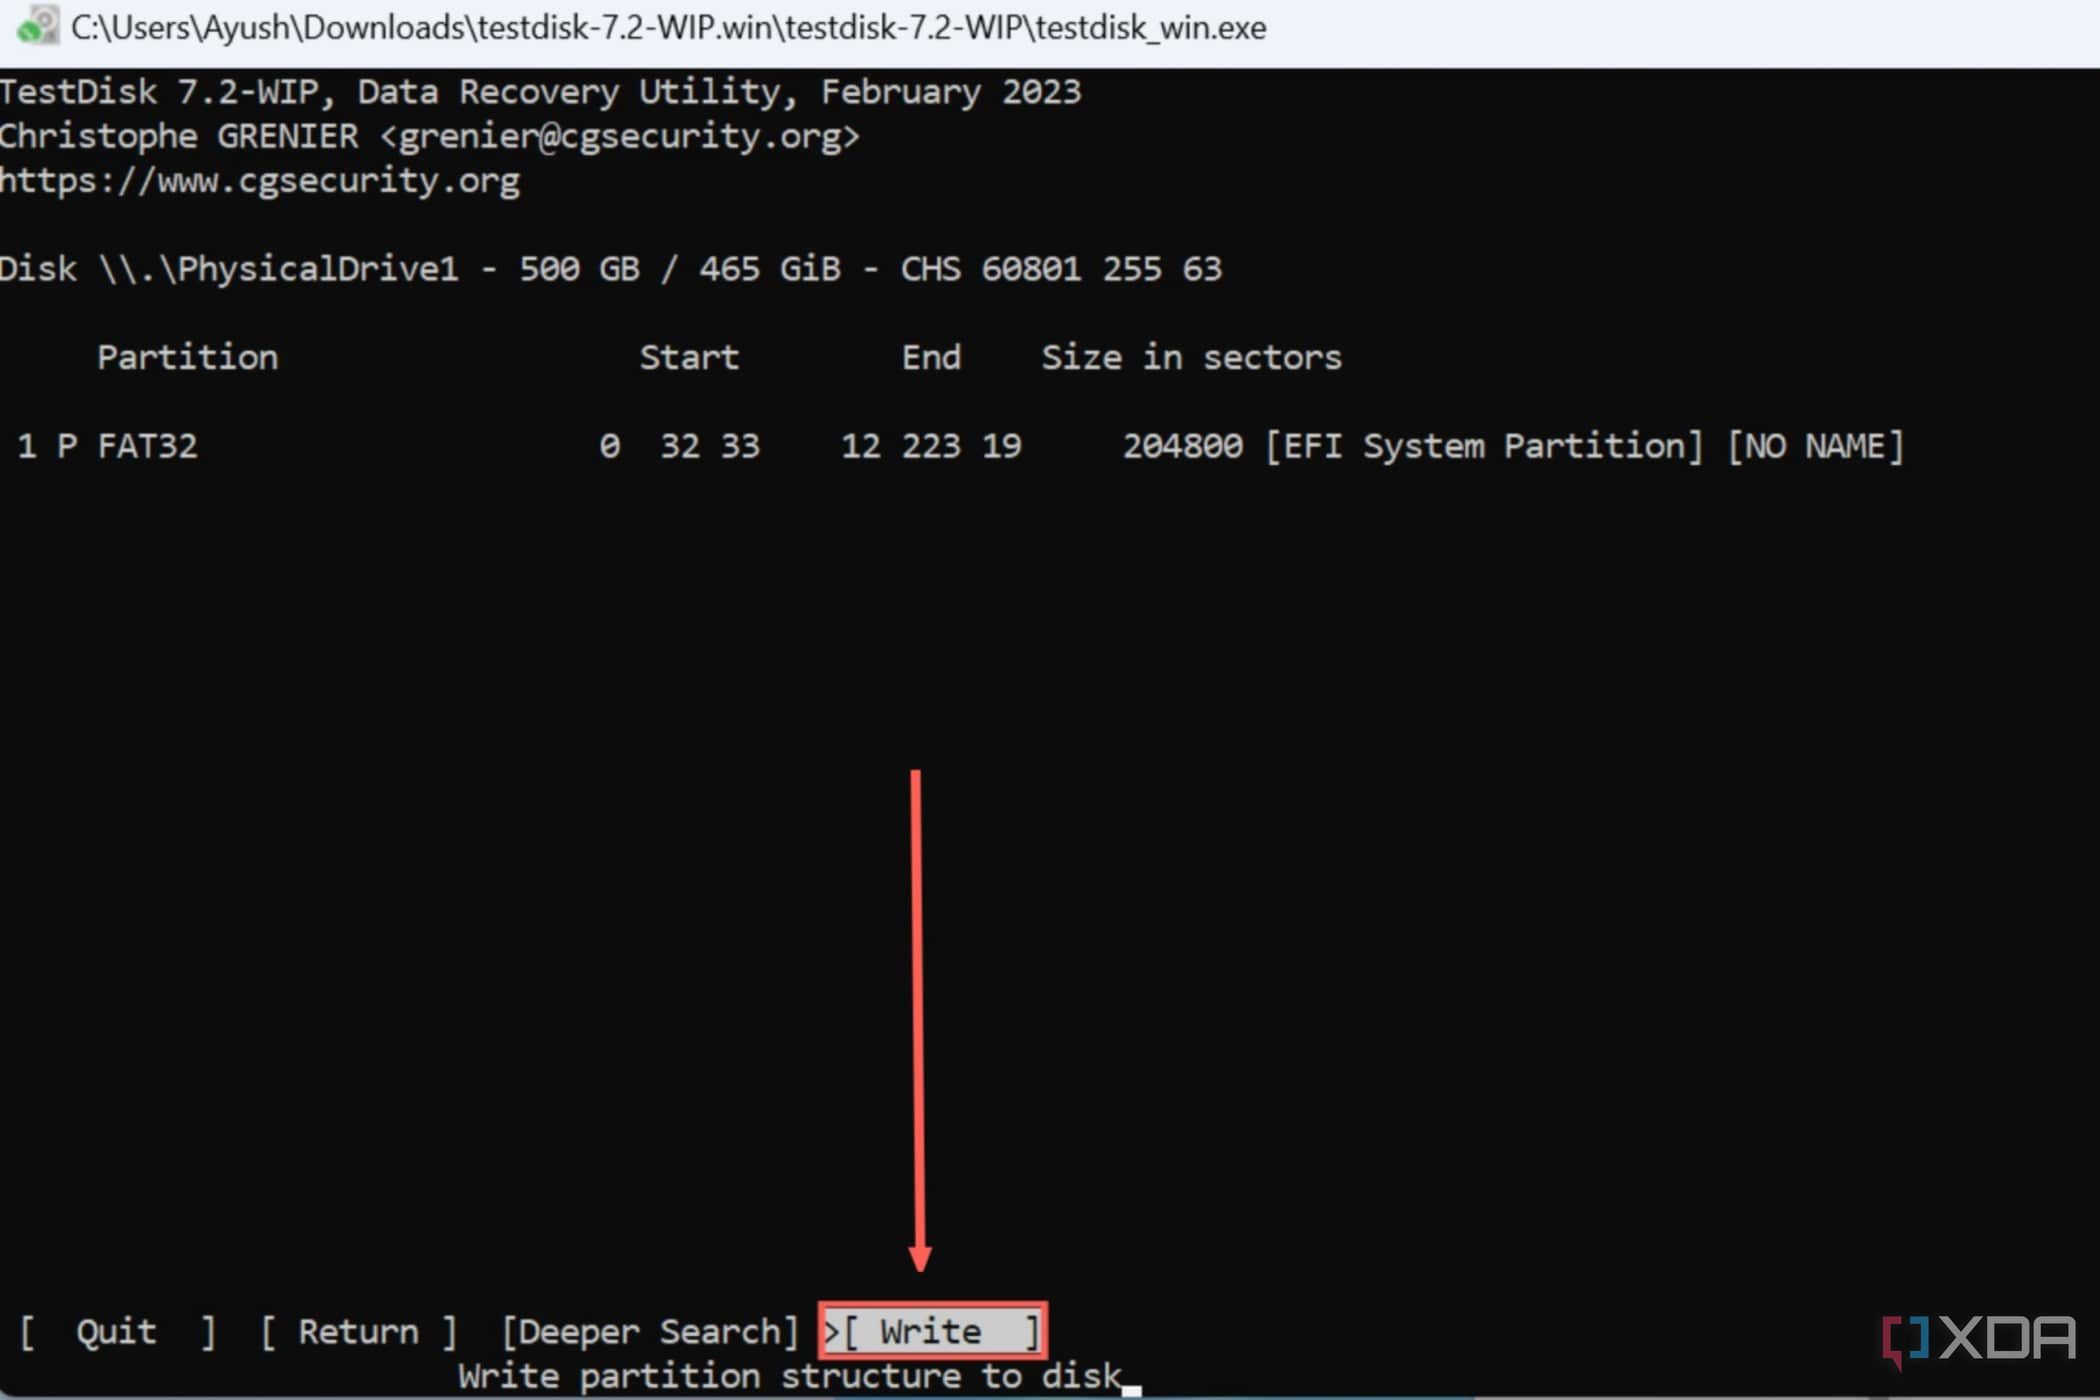
- Faucet Y when prompted for affirmation and press Enter one final time.


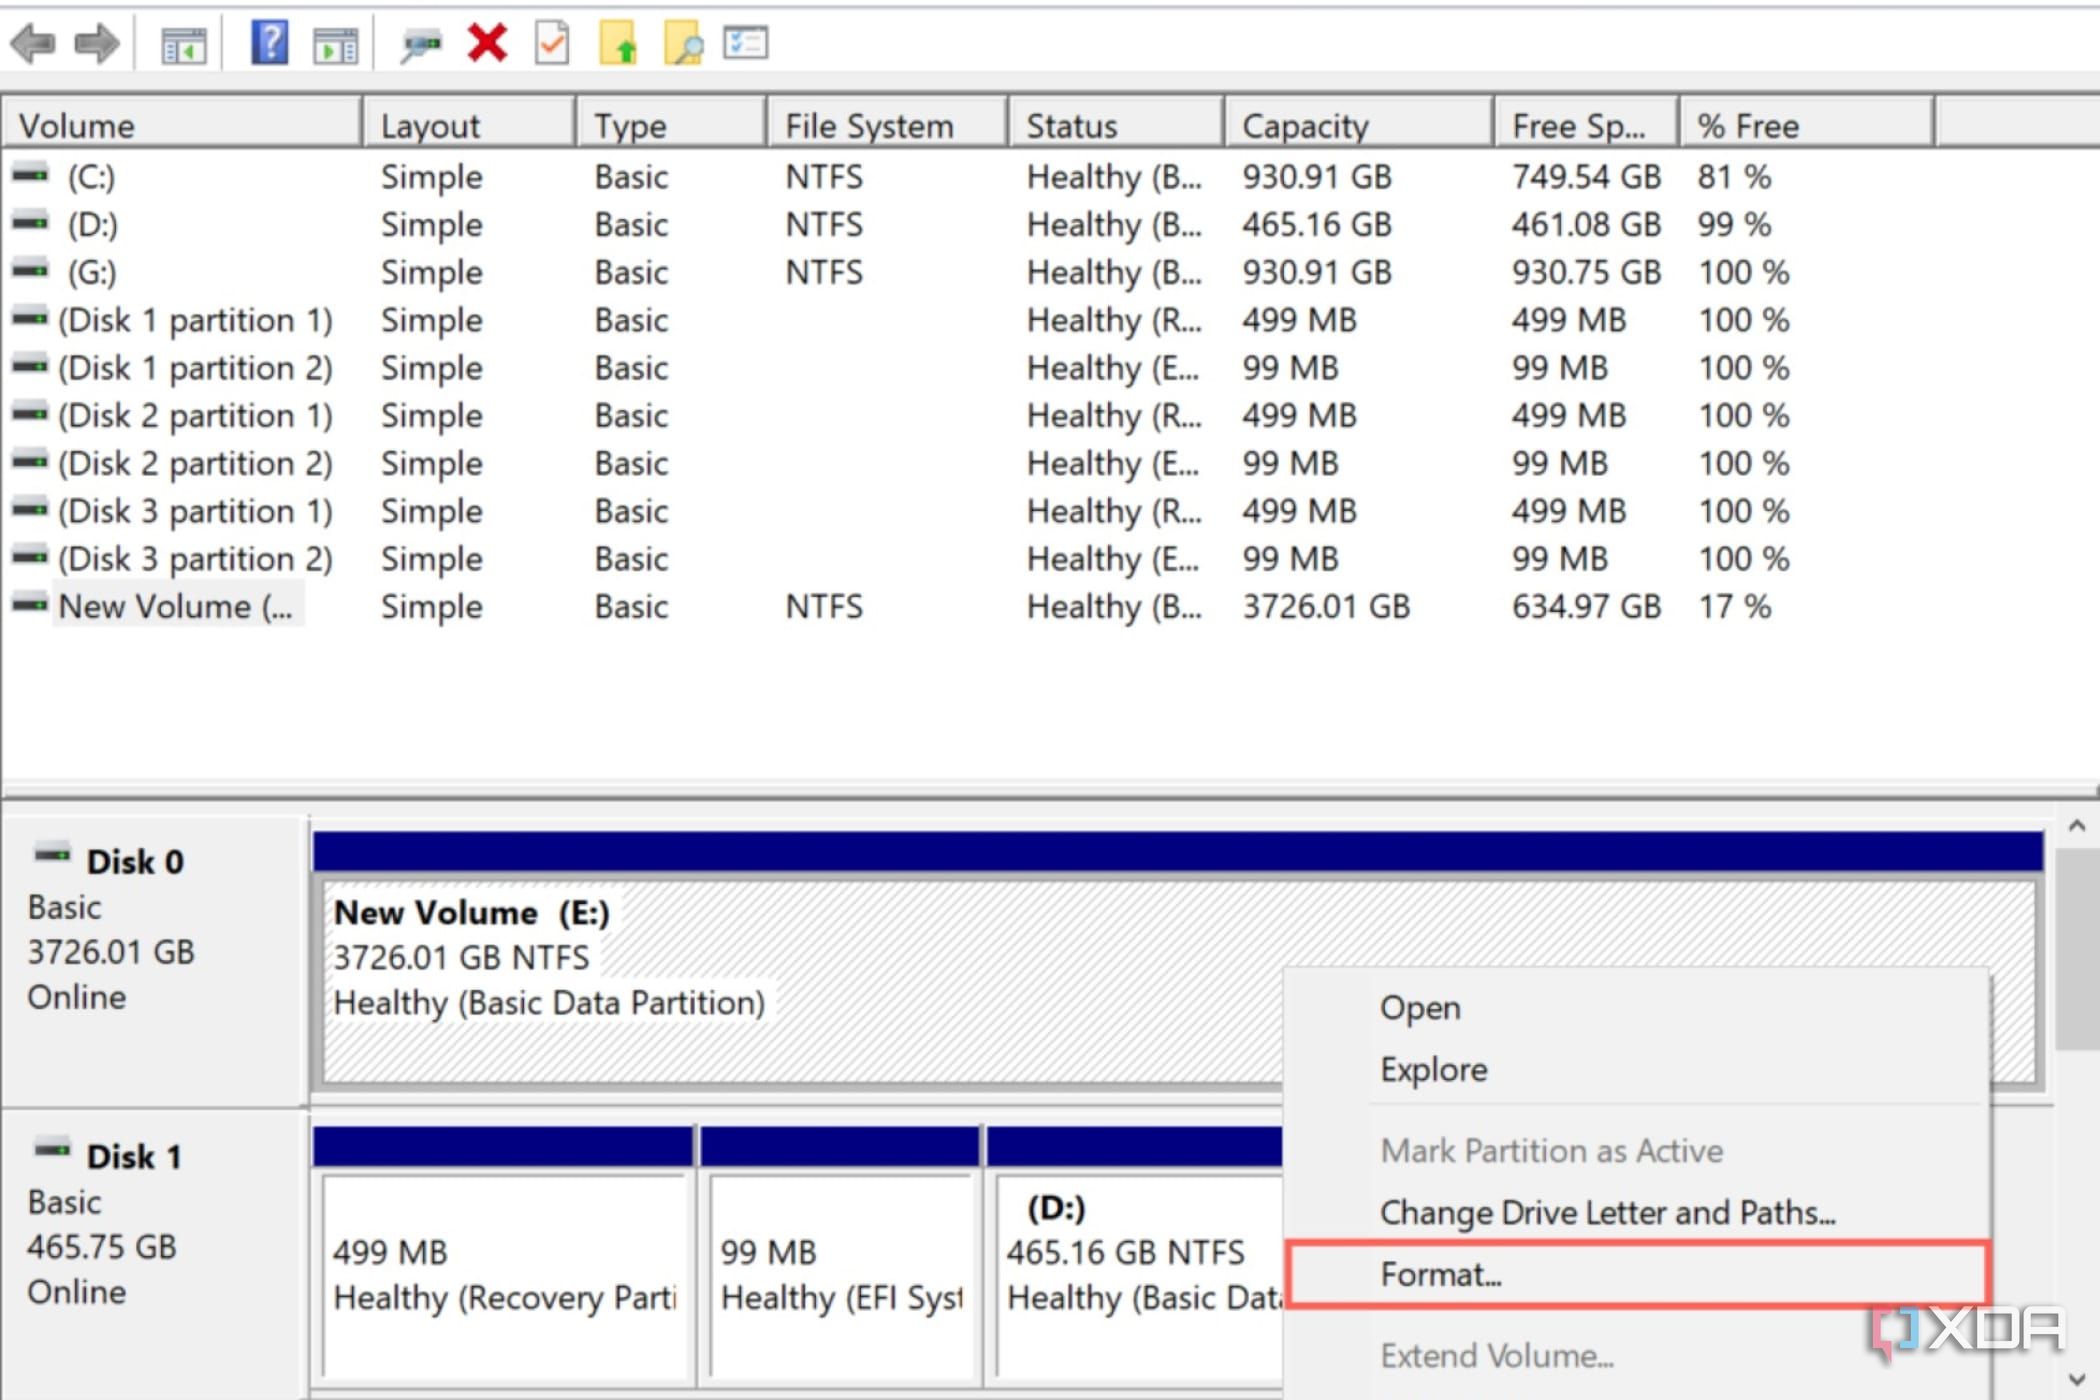
How you can repair your SSD utilizing Disk Administration
If none of those strategies fastened your SSD, the drive might have unhealthy sectors. Whereas it is simple to resolve these points in onerous drives, unhealthy sectors are particularly dangerous to SSDs as they’re troublesome to repair and virtually all the time result in drive failures. However if you wish to proceed utilizing the drive, you’ll be able to format its contents as a final resort.
- Proper-click on the Begin button and choose Disk Administration.

- Proper-click in your faulty SSD and select Format.
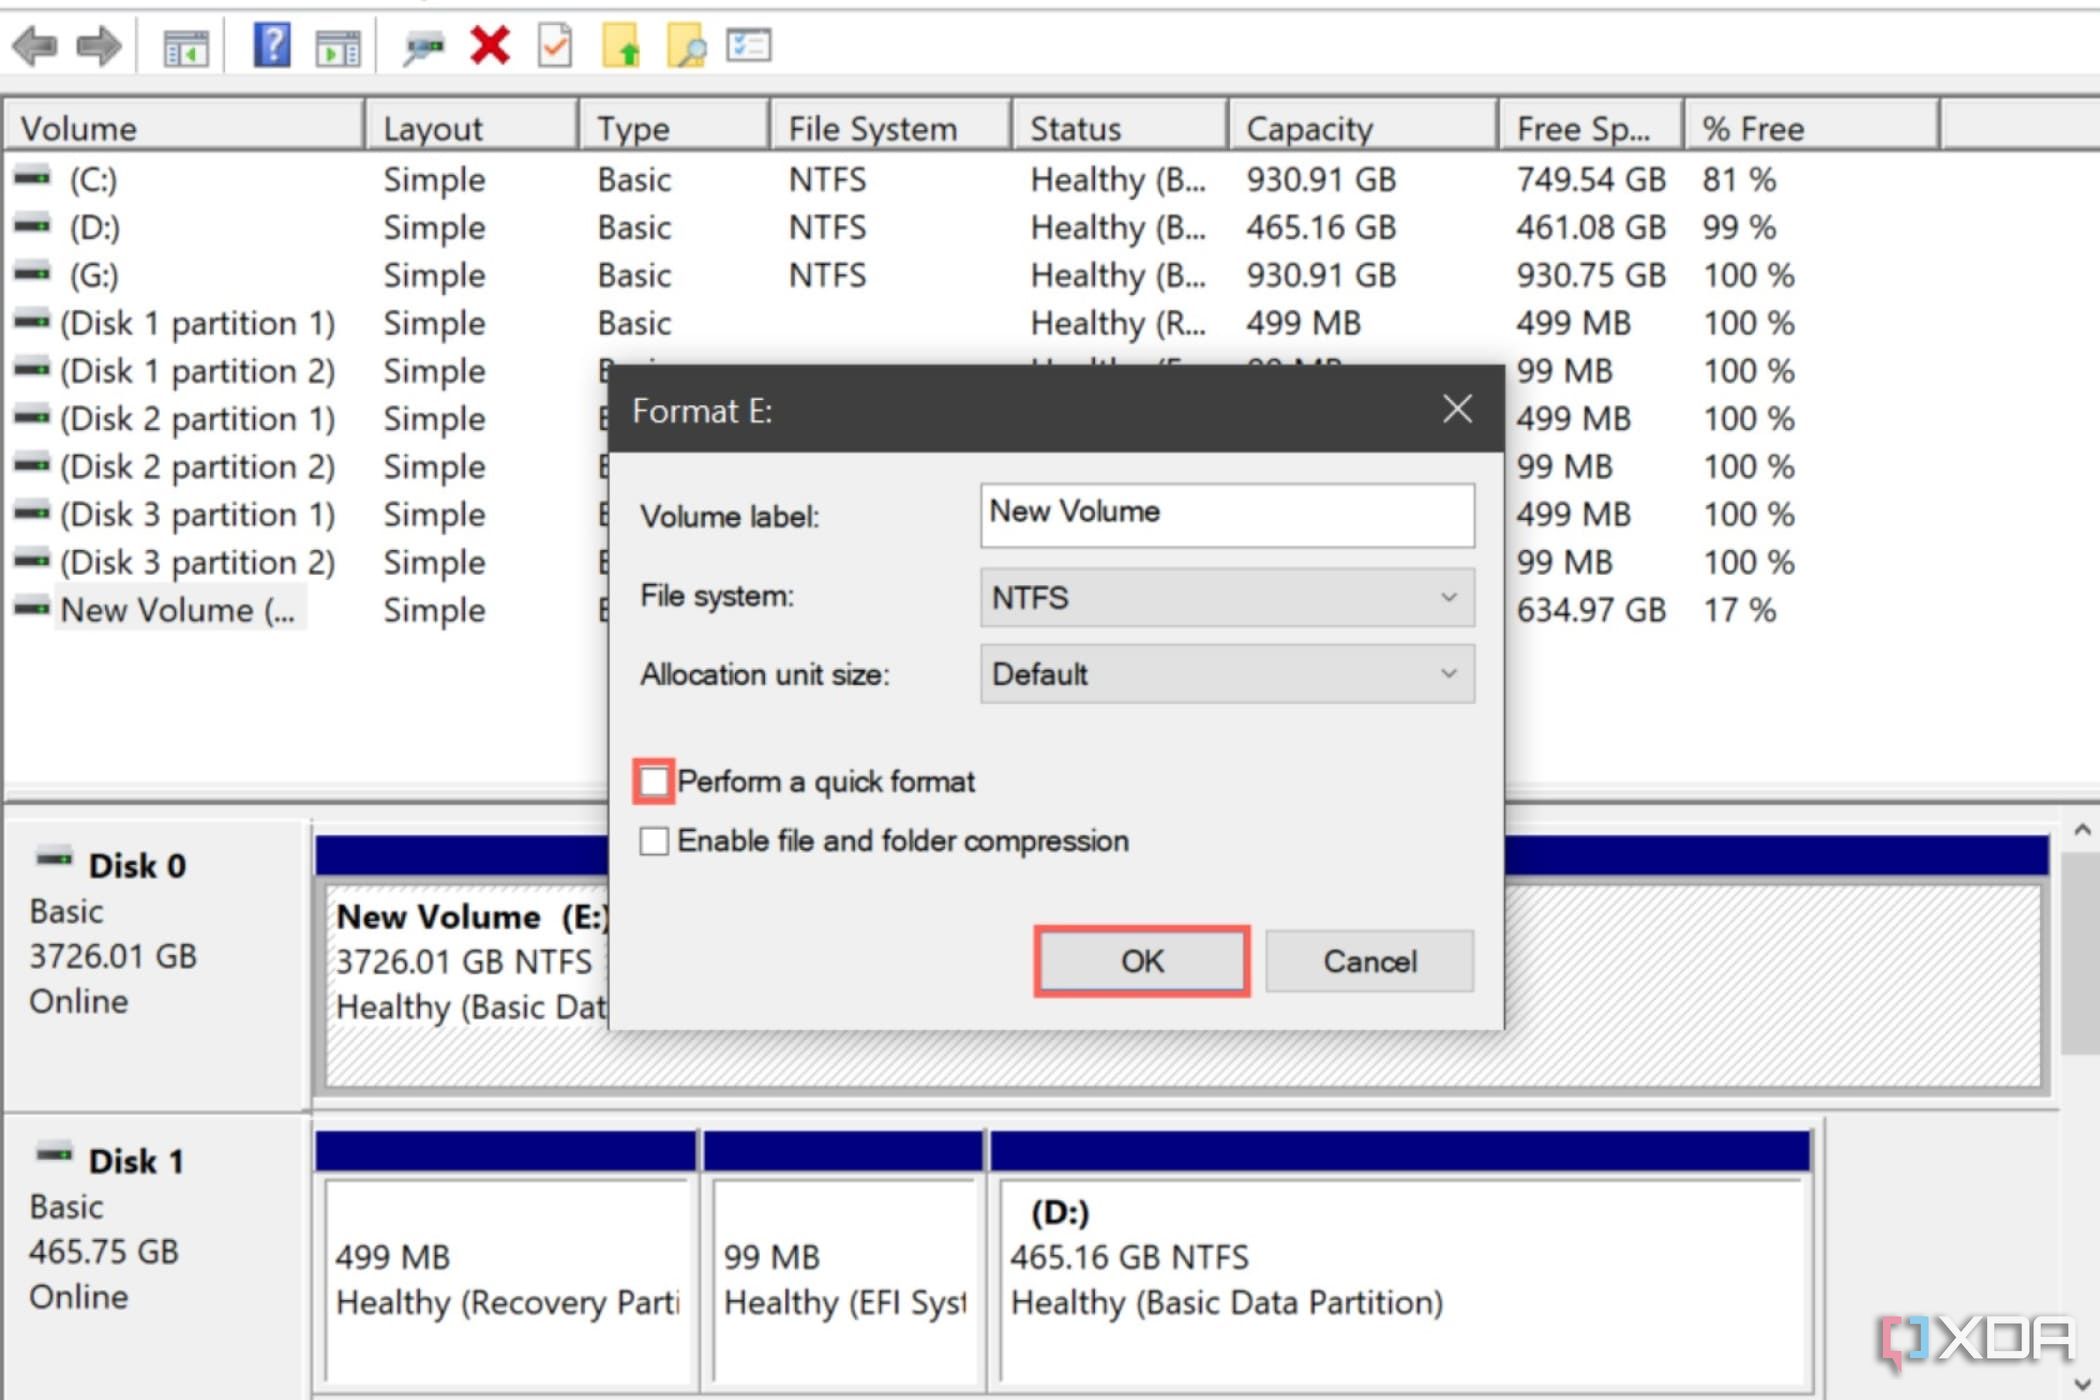
- Since we would like the drive to examine for unhealthy sectors, deselect the Carry out a fast format possibility and press OK.


Is your SSD working correctly?
In the event you’ve adopted the steps fastidiously, your SSD ought to grow to be practical once more. Nevertheless, there is no certainty when the errors might crop up once more, and the very best “repair” for a malfunctioning SSD is to interchange it with a brand new one as quickly as doable.
Thankfully, SSDs are now not as costly as they was once, and in the event you maintain an eye fixed out for offers, you’ll be able to nab an honest 1TB drive for beneath $100. It’s also possible to browse the very best SSDs of 2023 in the event you need assistance selecting out new drives on your system.