
When constructing a PC, putting in the motherboard is the step that brings all of it collectively – the place it lastly begins to appear to be a functioning gaming rig. It’s additionally the place putting in parts just like the CPU, RAM and CPU cooler exterior of the case pays off, as you gained’t must fumble with them any additional whereas your fingers are enveloped by the darkness of the case. They’re already in place, and may be carried together with the motherboard into your PC like a tray of scrumptious celebration nibbles.
Handle cookie settings
Watch on YouTube
That stated, there are a number of bits left to connect with the mobo as soon as it’s nestled within the chassis. These embody the braided tendrils of the PSU and my private PC constructing nemeses: the tiny entrance panel headers that hyperlink the board to the case’s energy button and USB ports. All you’ll want is a gentle hand and a crosshead screwdriver, thoughts, so comply with these steps and also you’ll be accomplished in a matter of minutes.
The best way to set up a motherboard
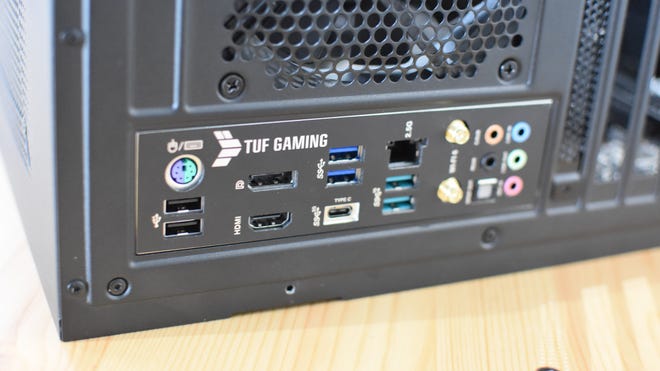
Step 1: Examine whether or not your motherboard’s I/O protect – that’s a steel plate that surrounds its onboard USB, audio, and community ports – is built-in, or separate. The TUF Gaming board you may see in these pictures has a useful built-in one, so we don’t have to do something, but when there’s a separate protect in your field you’ll have to pop this into the case earlier than the motherboard itself . Merely press it down firmly into the large rectangular void on the rear of the case, from the within going through out, till it clicks into place.
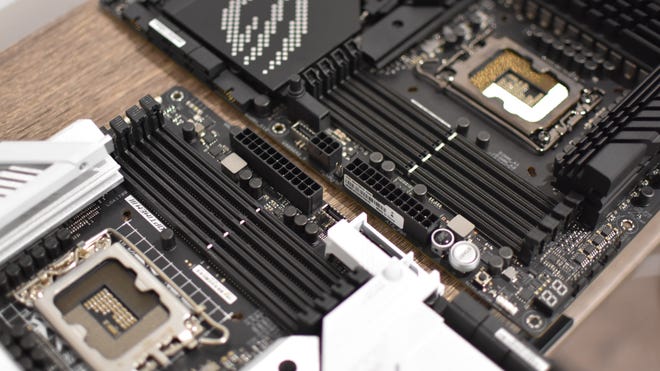
Step 2: Lay the case down on its aspect, with no cables laying round within the motherboard tray. Then, take your motherboard and gently lay it down inside this principal chamber. The screw standoffs contained in the case ought to line up with the holes on the motherboard, but when they don’t, simply take the mobo again out, unscrew any misplaced standoffs, and reposition them. The tray will often have a number of empty holes into which you’ll be able to transfer these standoffs.
Assuming every thing traces up, double examine that the motherboard is laying flat, that the I/O ports line up with the protect (if it got here separate), and that there are not any trapped cables beneath. For those who’re good to proceed, take the small screws that got here along with your chassis and begin screwing them into the standoffs. In case your chassis got here with a number of sizes of small screw, its handbook will inform you which dimension you want for motherboard mounting.
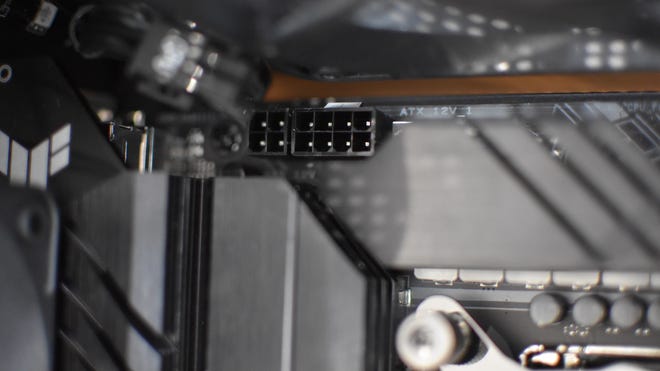
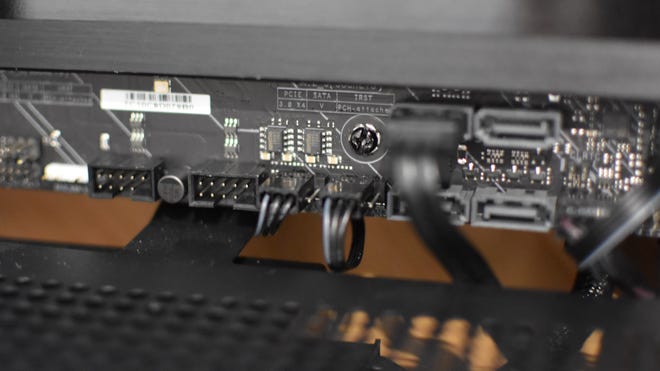
Step 3: With these screws fixed, the motherboard ought to now sit safe contained in the case, however go away it mendacity down for now as a result of it’s time to begin making connections. Let’s begin with the PSU cables. There’ll at all times be one eight-pin CPU energy connector on the top-left of the board and a hefty 24-pin connector over on the precise edge, so discover seize the matching energy cables and plug these in. Some mobos could have a secondary four-pin or eight-pin CPU energy connector subsequent to the primary eight-pin header, however you don’t truly have to fill this in until you propose to carry out some significantly bold overclocking. Then once more, in case your PSU occurs to provide the requisite additional cable, you might wish to plug it in anyway.
Some CPU coolers, particularly AIO liquid coolers, might also require a SATA energy cable (those with the header formed like a stretched-out capital L). Don’t neglect a type of in case your cooler wants it.
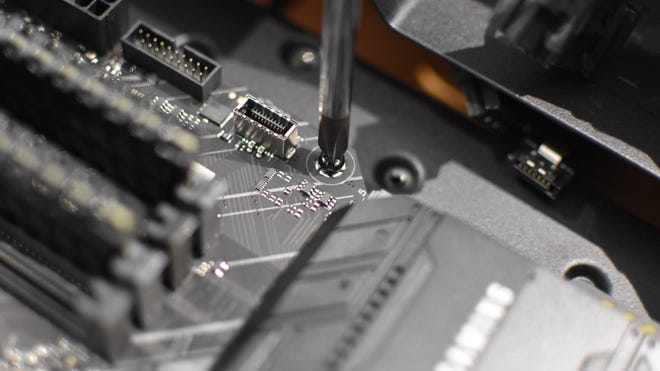
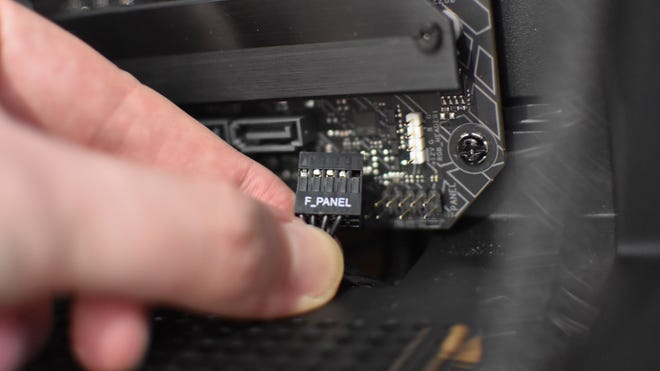
Step 4: The majority of the opposite cables you’ll want to attach come from the case’s entrance panel. These can embody cables for any USB and USB-C ports, and/or an HD-Audio cable for mic and headphone jacks, although there’ll at all times be a set of very small connectors for the facility swap and exercise LEDs. These needs to be rigorously connected to a labelled header that’s often across the bottom-right nook of the motherboard. For those who’re fortunate, as I used to be right here, they’ll all be merged into one header labelled “Entrance Panel” or “F_Panel”. If not, they’ll be in a little bit bouquet of particular person connectors, so make sure you place them on the proper pins as per the handbook or a diagram on the board itself. These teensy connectors may be fiddly, however your PC gained’t work with out them.
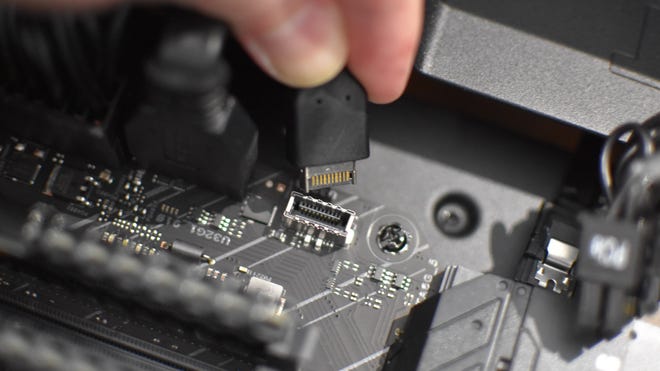
As for the USB connectors, these are usually up on the motherboard’s proper edge, whereas the audio connector needs to be within the bottom-left nook. Their respective headers will all have totally different shapes and needs to be labelled, so don’t fear an excessive amount of about probably getting them mistaken.
Step 5: Subsequent up, join the followers. A minority of circumstances embody fan hubs, that are separate modules that enable a number of case followers to plug in, with the hub itself linked to a single header on the motherboard. Extra possible, nevertheless, is that you just’ll want to attach the followers on to the motherboard itself. Case followers can plug into any four-pin SYS_FAN headers accessible, and don’t fear if the cable seems to have a three-pin connector – these will nonetheless work with 4-pin headers. Simply use the little plastic fins on the headers to information the cable onto the pins.
CPU cooler followers are coated in their very own set up part. These will clearly should be linked as effectively, however when you’ve got an AIO cooler with a radiator, it’s higher to get that fitted first. That manner, you may route the fan cables extra simply.
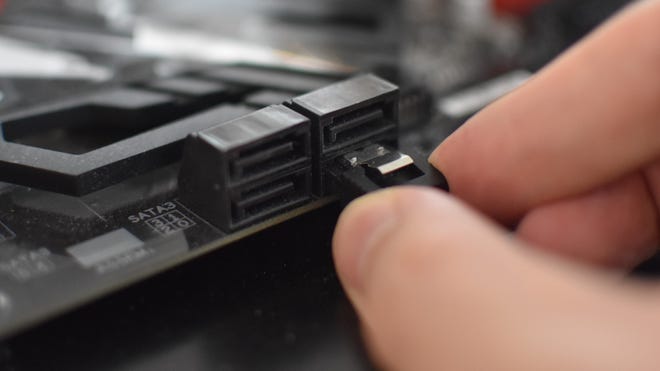
Step 6: For those who’re utilizing SATA-connected storage, like exhausting drives or a 2.5in SSD, it is likely to be useful to pre-emptively plug within the SATA cable(s) that they’ll want. These cables needs to be within the field that the motherboard got here in, and the ports are sometimes positioned to the lower-right of the motherboard. Simply get them linked on the motherboard’s finish for now.
With that, it’s best to have every thing it’s good to name your motherboard set up a hit. Even so, make sure you carry out one remaining examine across the within the case for any missed cables, together with lifting it as much as examine behind the motherboard tray. That is, in my very own admitted expertise, the primary reason for a newly constructed or rebuilt PC not working: I merely forgot a wire someplace. Be smarter than me by checking now, and connecting up any you will have missed, except the six/eight-pin graphics playing cards cables. We’ll take care of these shortly, in the middle of putting in the graphics card.